7 Portable Potting Setups for a Small Patio Without a Potting Bench
A temporary potting station keeps loose container mix, empty pots, and hand tools contained on a small patio without claiming permanent floor space. These seven setups use portable surfaces and catch trays that can be emptied, wiped down, and stored after a repotting session.
As an Amazon Associate I earn from qualifying purchases.
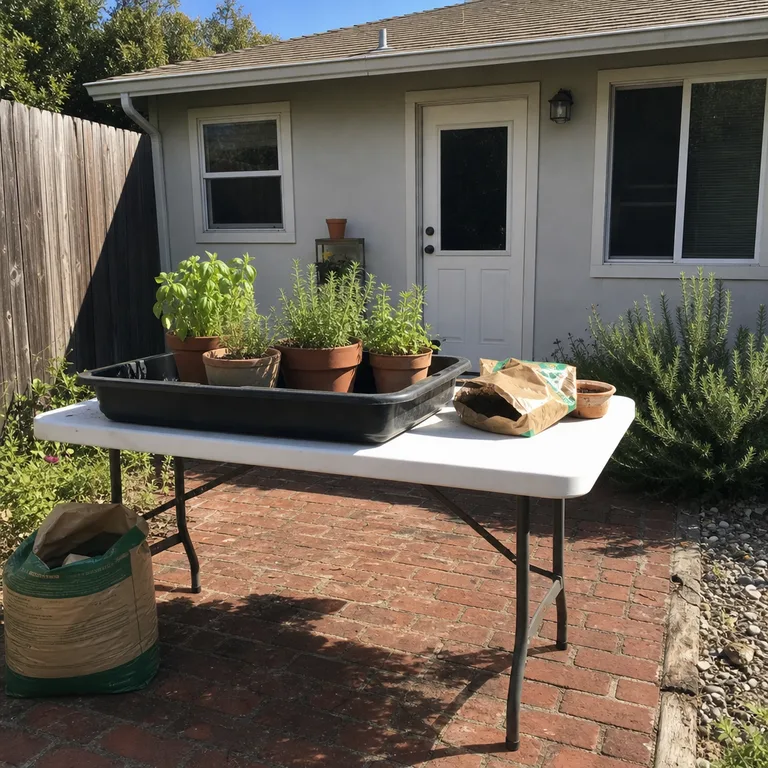
1.Put a soil-catching tray on an existing outdoor table
Turn a stable patio table into a short-term potting surface by placing a large waterproof tray on top. The raised rim keeps container mix, old roots, and loose soil in one defined area while bringing small pots up to a more comfortable height.
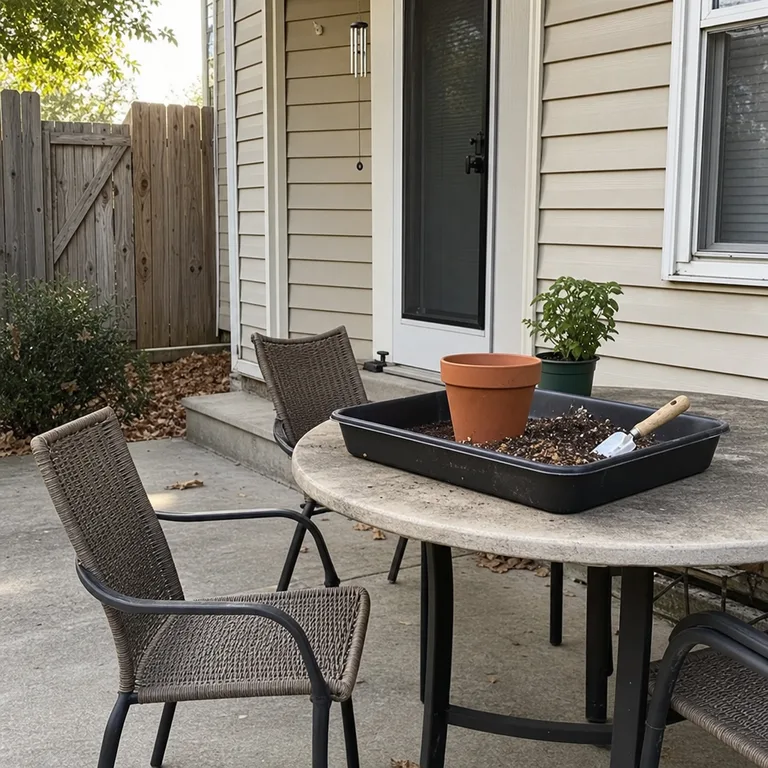
Use a tray wide enough to hold the pot and tools without crowding the edge. Repot directly inside it, then tip the remaining mix into a container or garden bed if appropriate, wipe down the tray, and wash the table surface afterward when it is also used for meals.
A boot tray, utility tray, or other durable plastic catch tray is usually easier to store than a dedicated potting bench. Keep heavy bags of mix on the ground and scoop up only what is needed so lightweight patio furniture is not overloaded.
Worth knowing: This works best for a few small or medium containers; a narrow, wobbly, or food-only table is not a suitable soil-work surface.
Related: 12 Container Garden Ideas for a Small Patio on a Budget
2.Pair a lidded soil tote with a small patio table
Set a lidded tote of container mix beside a small patio table, using the table only for the pot, hand tools, and a shallow mixing tub. This keeps most of the soil covered and limits how much dry mix can blow across a compact patio or balcony.
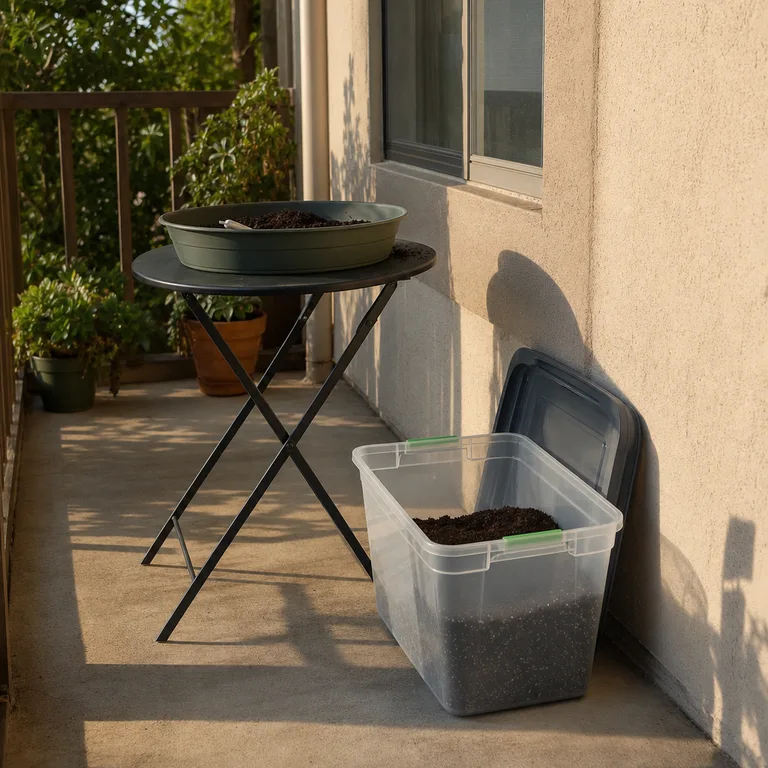
Scoop a manageable amount into the tub rather than opening a full bag beside the plant. Container mix is intended for pots and usually drains differently from garden soil, so use the material suited to the container rather than trying to reuse dense soil from the yard.
A basic storage tote can hold leftover mix between sessions when its lid fits securely and the contents stay dry. The arrangement also clears quickly: close the tote, empty the tub, and fold or store the table.
Worth knowing: Fine, dry mix can still scatter in windy weather, and a tote needs a dry storage spot so moisture does not turn its contents into clumps.
3.Spread a tarp for a ground-level potting station
Lay a washable tarp on the patio and place pots, tools, and container mix in its center. This creates a broad catch area for several plants at once, especially when a table is unavailable or the pots are awkward to lift.
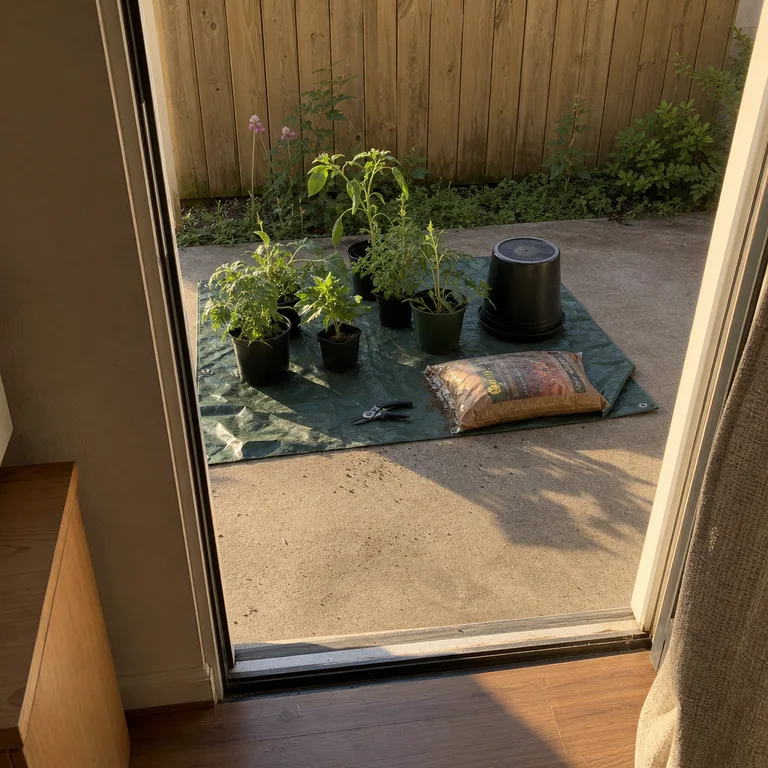
Work from a kneeler, a low stool, or an upturned bucket if that is comfortable. When finished, gather the tarp corners toward the middle to funnel loose mix into a tote, bag, or container, then shake out the remaining crumbs where it is appropriate to do so.
Choose a tarp that lies flat enough not to become a trip hazard, and leave a clear path to the patio door. It is an inexpensive reuse-friendly setup because the tarp folds away with the rest of the supplies.
Worth knowing: Ground-level work involves more bending and kneeling, and loose soil is difficult to control on gusty days.
Related: 15 Budget Landscaping Ideas That Make a Small Yard Feel Finished
4.Use a sturdy folding table as a temporary potting counter
A sturdy folding table gives several plants a temporary standing-height counter without taking up patio space every day. Add a deep utility tray on top so spills stay contained rather than collecting in table seams or on the paving below.
Check that the table is level and fully locked open before setting out pots. Keep the main bag of container mix on the ground unless the manufacturer’s load guidance specifically supports its weight, then transfer small scoops to the work tray as needed.
This arrangement is useful for a larger repotting session because tools, empty pots, and finished containers can be grouped across the surface. Fold the table and store the tray separately when the work is done.
Worth knowing: A folding table can become unstable on uneven brick, pavers, or sloped concrete, so it needs a firm, level position.
5.Set a wide tray on a low outdoor bench
Place a wide raised-edge tray on a low outdoor bench for a seated potting setup. The bench brings small and medium containers off the ground while the tray catches loose mix and makes cleanup more controlled.
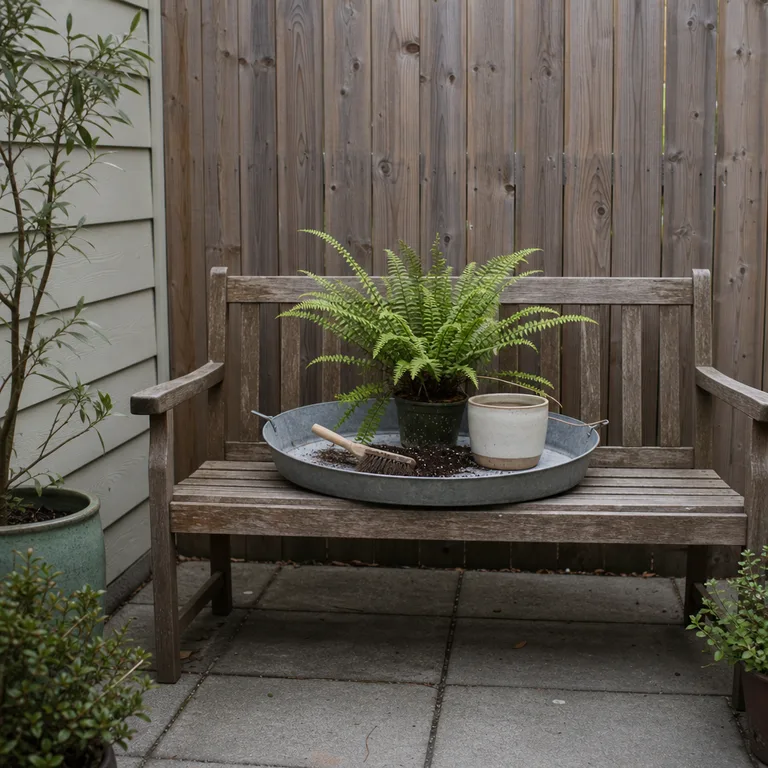
This is especially practical for light pots that can be turned and handled from a seated position. Use a root brush or hand tool inside the tray, and keep a separate container nearby for discarded roots or spent mix.
A serving tray, utility tray, or shallow metal tray can work if it is rigid and has a lip around the edge. Check the bench first for loose boards, weak joints, or a finish that could be damaged by moisture and soil.
Worth knowing: Low benches are not ideal for tall containers or anyone who finds seated bending uncomfortable, and an unsealed wooden bench may stain.
Related: 12 Small Patio Seating Ideas on a Budget
6.Separate soil work from clean-up with two trays
Use one tray as the dirty zone for loose container mix, empty pots, and root work, then place a second tray beside it for completed plants and wiped-down tools. The clear division prevents freshly potted containers from picking up loose soil again as the session continues.
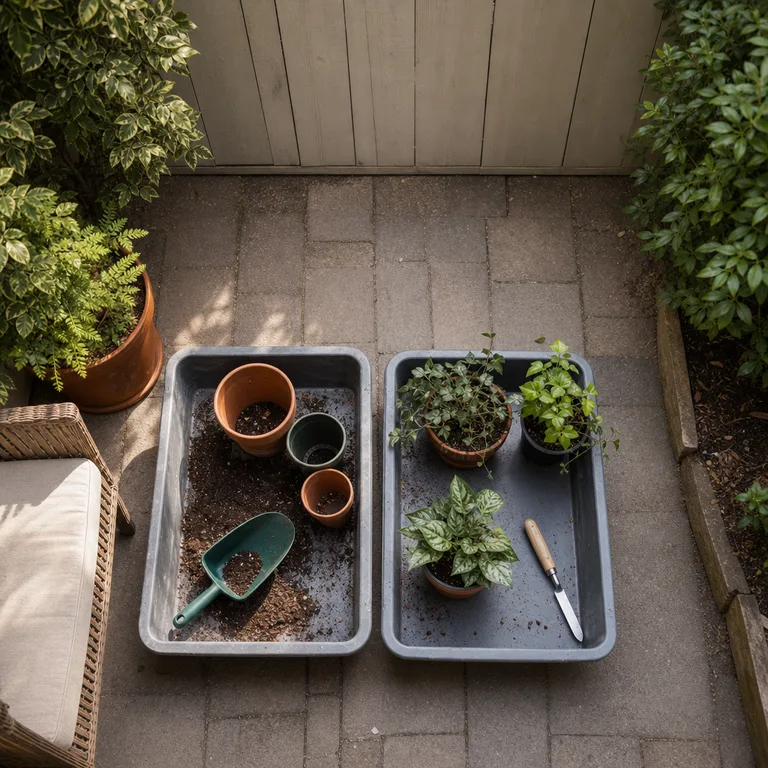
Arrange the trays so the soil tray is closest to the mix source and the clean tray sits nearer the place where finished plants will go. This small workflow change is useful on narrow patios, where a few crumbs tracked indoors or onto seating can make the whole space feel untidy.
Two matching trays are easy to stack after use, but they do not need to match. What matters is that the soil tray has enough depth for mixing and that the clean tray is wiped out before it holds finished pots.
Worth knowing: This setup takes more horizontal space than a single tray, so it may be too wide for a very narrow balcony or side passage.
7.Roll a potting tray on a load-rated utility cart
A load-rated utility cart can carry a raised-edge tray, small pots, and hand tools from a storage corner to the patio work area. It reduces repeated carrying and gives supplies a temporary home without leaving a permanent bench outdoors.
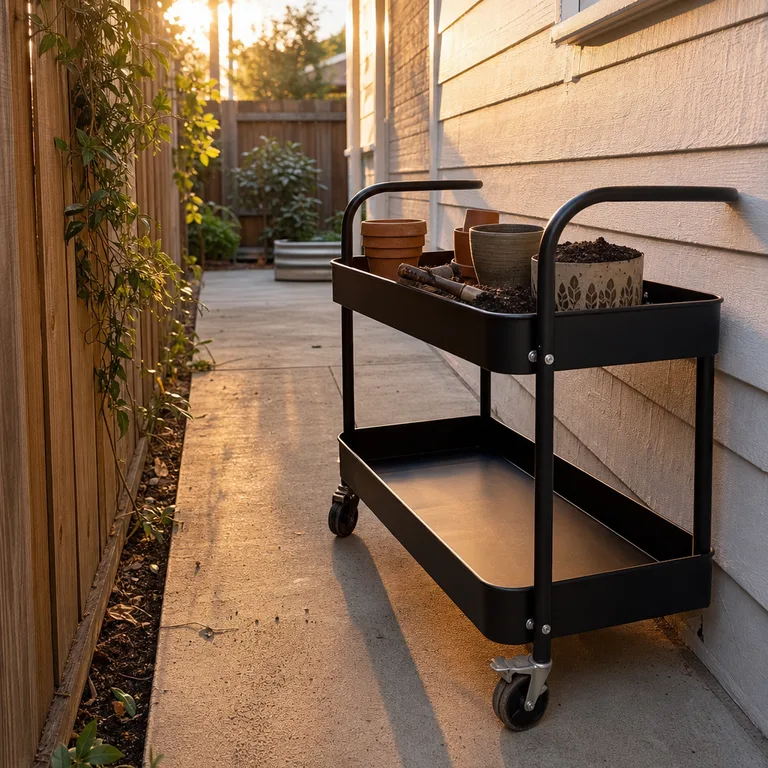
Lock the wheels before beginning, then keep the heavier items on the lower shelf when the cart design allows it. Use the top tray for the active task and move repotted plants off the cart once they are finished, rather than crowding the work surface.
A cart is most useful when supplies must travel along a smooth, level route. Store it indoors or under cover when possible, since prolonged exposure can affect metal parts, casters, and any wood or fabric accessories.
Worth knowing: Do not roll a loaded cart over thresholds, loose pavers, or slopes, where it can shift or tip even with locking wheels.
About the author
Dana Ruiz, Senior editor
Dana writes about small-space living, storage and low-cost decorating.
Keep reading
7 Planning Steps for a Rain Barrel in a Small Yard
October 18, 2026
8 Small Lettuce Container Garden Plans for a Patio or Balcony
October 18, 2026
6 Container Pond Setups for a Small Garden Without Digging a Large Pond
October 18, 2026
12 Refrigerator Organization Habits That Do Not Require Matching Bins
October 20, 2026