12 Family Photo Display Ideas Beyond a Matching Frame Set
A family photo display can look collected and personal without relying on a costly matching frame set or a rigid gallery-wall formula. These flexible layouts use everyday surfaces, inexpensive printing options, and easy-to-update holders while accounting for sunlight, rentals, and the visual weight of a busy living room.
As an Amazon Associate I earn from qualifying purchases.
1.Clip a Changing Photo Line Above a Console
Stretch a thin wire or sturdy cord across the wall above a console table, then add simple clips for family snapshots, postcards, and children’s drawings. The informal line breaks up a blank wall without making the room feel as fixed as a traditional gallery wall.
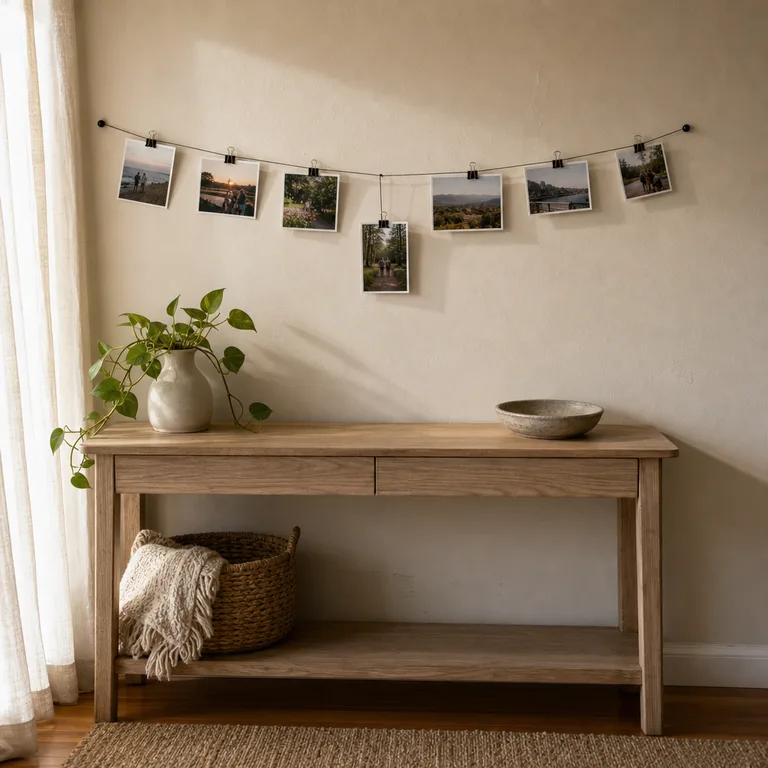
Use a mix of horizontal and vertical prints, leaving a little unevenness so the display feels relaxed rather than staged. Basic picture wire and small hooks keep the setup affordable, while a nearby console gives the arrangement a visual base.
Keep the line out of strong direct sun, since daylight can fade prints over time. In a rental, removable hooks may work for lightweight displays, but check their weight limits carefully.
Worth knowing: A photo line can look cluttered quickly if too many items are clipped on at once.
2.Build a Stair-Step Arrangement With Mixed Frames
Follow the rise of a staircase with framed family photos arranged in a loose diagonal. The upward movement suits the architecture and turns a pass-through wall into a display with a clear sense of direction.
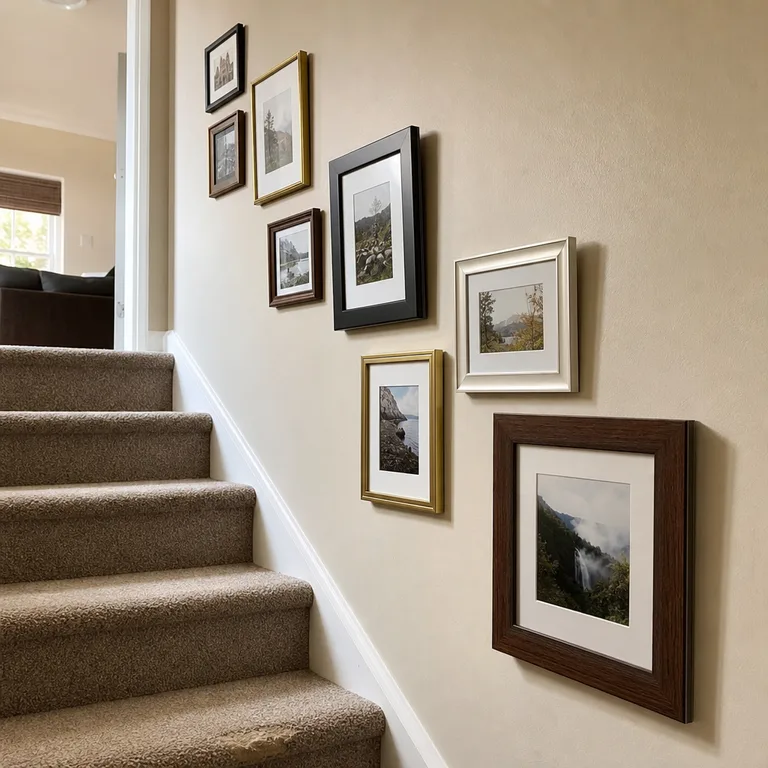
Gather leftover, thrifted, and simple new frames in a few related finishes, such as black, wood, and white. Trace each frame on paper first and tape the templates to the wall, adjusting the spacing before making holes.
Choose frames with secure hanging hardware, especially on a busy stair wall where a loose frame could be bumped. Keep the arrangement clear of handrails and tight corners.
Worth knowing: This layout takes more planning than a straight row, and the wall can be awkward to reach safely.
3.Lean Oversized Prints on a Picture Ledge
Install a shallow picture ledge above a sofa, console, or sideboard and lean one or two enlarged photo prints against the wall. Add smaller frames in front to create depth without committing every piece to a permanent position.
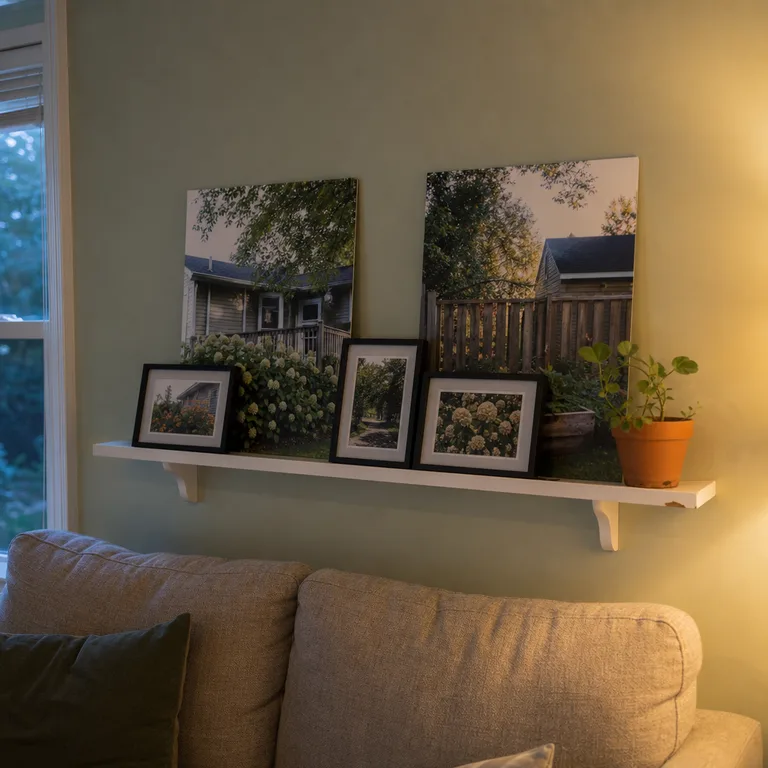
A ledge makes it easy to trade school portraits for vacation photos or seasonal family pictures. Affordable poster-size prints can look more intentional when paired with a simple frame, a small plant, or a ceramic object already in the room.
Anchor the ledge into suitable wall framing or use the correct anchors for the wall type. A securely installed ledge matters especially in homes with young children or pets that may pull at it.
Worth knowing: A picture ledge needs secure installation and is not the best choice for a wall that must stay completely hole-free.
4.Make a Grid With Same-Size Snapshot Prints
Print casual family photos in one small, consistent format and arrange them in rows above a loveseat, desk, or hallway bench. A repeated size makes ordinary snapshots look organized even when the images span different years and occasions.
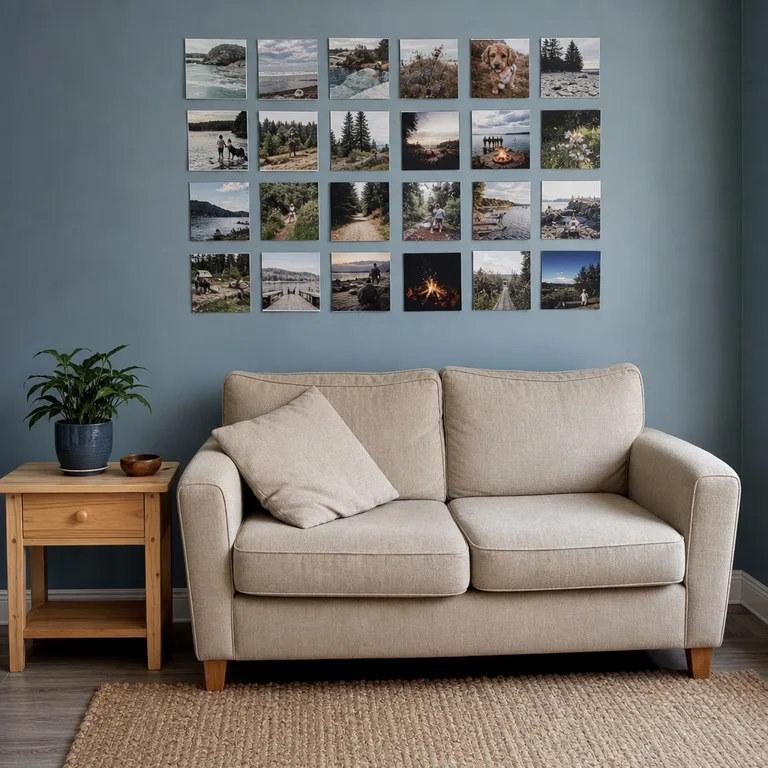
Leave narrow, even gaps between prints and build the grid gradually as new favorites appear. Lightweight prints can be mounted with renter-friendly adhesive designed for paper, making this a simple option for an expanding collection.
Choose photos with a shared thread, such as outdoor moments, birthdays, or everyday kitchen scenes, so the wall does not feel visually noisy. Keep prints away from humid rooms and windows with harsh afternoon exposure.
Worth knowing: Paper prints are more vulnerable to curling, fading, and accidental damage than framed photos.
5.Layer Photos on a Living Room Mantel
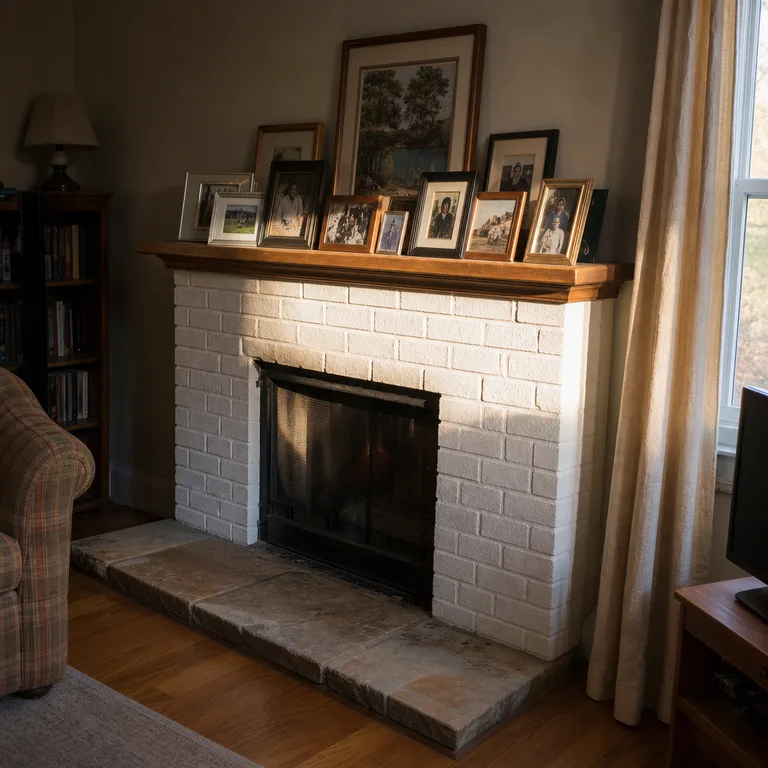
Use a mantel as a layered photo zone, placing the tallest frames at the back and smaller snapshots slightly in front. A few meaningful objects, such as a small bowl, vase, or book stack, help the photos feel like part of the room rather than a row of separate frames.
Mixing frame heights gives a collected look without needing a matched set. Shop the house for frames first, then unify the display by repeating one or two materials, such as light wood and black metal.
Keep all paper photos, frames, and decorative objects well back from an active fireplace opening. If the mantel gets soot, heat, or frequent vibration, use it for sturdier decor instead of irreplaceable originals.
Worth knowing: A mantel display needs occasional dusting and may not be practical around a frequently used fireplace.
6.Fill a Corkboard With Candid Family Moments
Hang a framed corkboard above a small desk or in a family room corner, then fill it with candid photos, ticket stubs, notes, and children’s artwork. Its casual overlap makes it a good home for images that do not need formal framing.
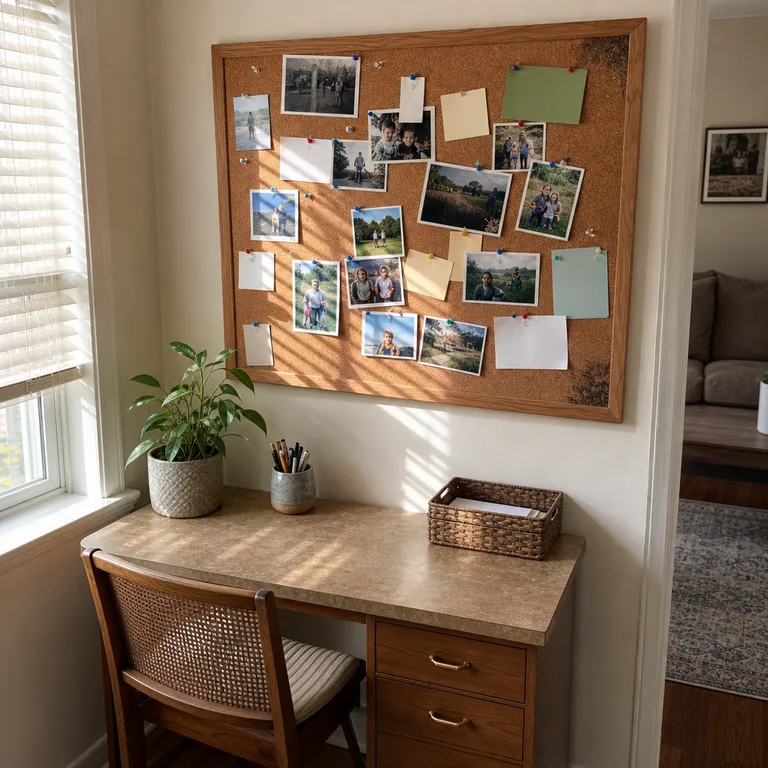
Use a limited palette of pins or clips to keep the board from becoming visually chaotic. Printing a mix of small snapshots makes updates inexpensive, and older items can move into a keepsake box when the board gets full.
Mount the board on an interior wall if possible, since damp exterior walls can affect cork and paper. Reserve the most important or private photos for a less exposed spot.
Worth knowing: A corkboard can become messy unless it is edited regularly.
7.Hang Black-and-White Photos With Wooden Hangers
Print a few favorite family images in black and white and clip them into wooden trouser hangers or photo hangers. Hung in a short row above a bench or console, the larger prints create a graphic display with little visual clutter.
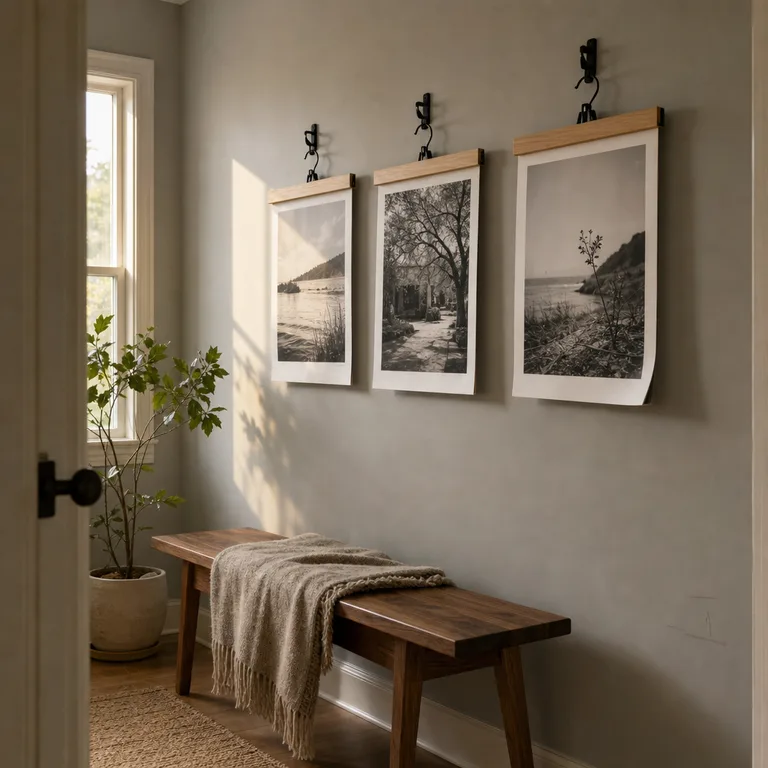
The monochrome treatment helps unrelated photos work together, whether they are old portraits or recent phone pictures. Clip hangers are useful for seasonal swaps because the print can be changed without taking down the wall hardware.
Use heavier paper so the photos hang flat, and avoid damp areas that may cause corners to curl. This works best with a small group of images rather than a crowded wall.
Worth knowing: Unframed prints offer less protection from fingerprints, sunlight, and humidity.
8.Create a Family Timeline Along a Hall Wall
Arrange small photos in chronological order along a hallway, starting with earlier family memories and moving toward recent ones. Guests can take in the story naturally as they walk toward the living area, and the layout gives a narrow hall a clear purpose.
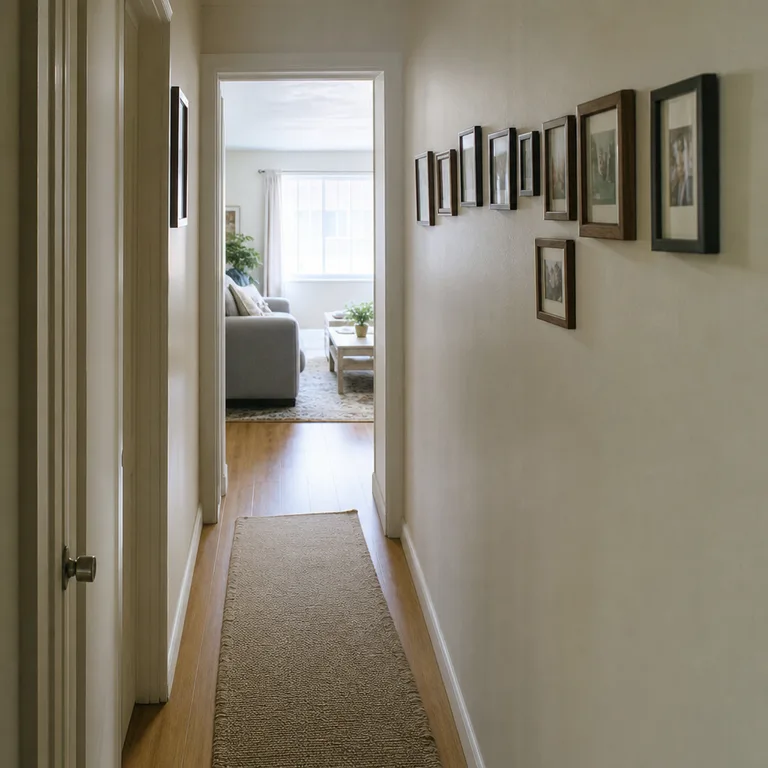
Keep the frames at a consistent viewing height, even if their finishes vary. Narrow frames reduce the chance of crowding a tight passage, while paper templates help confirm there is enough clearance around doors and corners.
Use images you are comfortable sharing with anyone who walks through the home. In a very narrow hallway, avoid frames that project far from the wall and could be bumped by bags or shoulders.
Worth knowing: A timeline can feel overly formal if the photos are too tightly spaced or the hallway is already busy.
9.Tuck Mini Photos Into a Coffee Table Tray
Place mini photo prints inside a shallow tray with a clear cover on the coffee table. The display invites close viewing and gives family pictures a place in the room without adding anything to the walls.
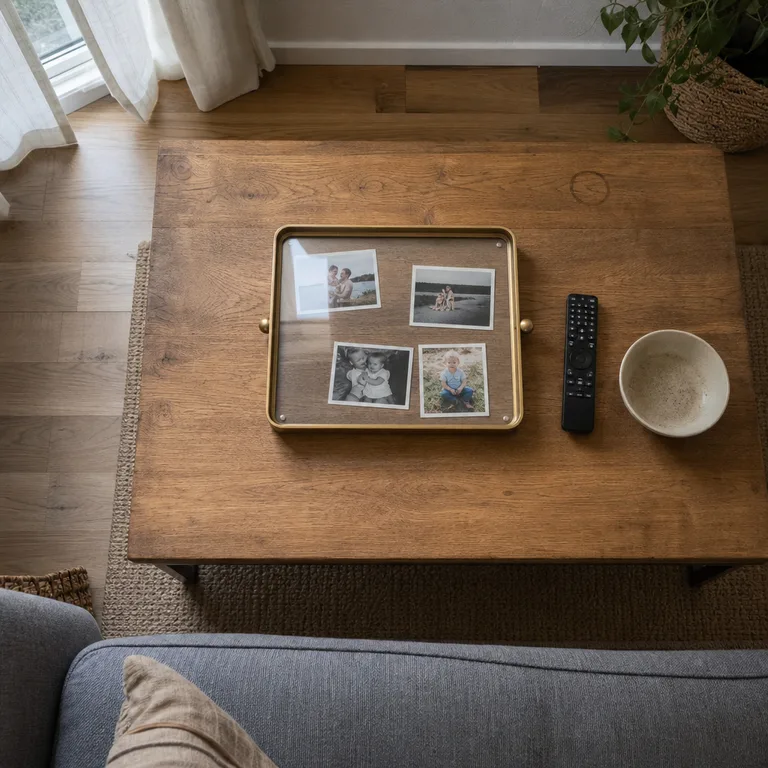
Choose a few images with similar colors, or make a loose theme around a holiday, trip, or shared hobby. Clear acrylic, sleeves, or a glass-topped tray help shield the prints from everyday dust and drink spills.
Keep the tray away from the edge of the table and use a cover that sits flat enough for regular use. This is especially useful for renters or anyone who prefers not to hang decor.
Worth knowing: Tabletop photos need protection from spills and can be harder to see from across the room.
10.Use a Magnetic Board for Easy Photo Swaps
Mount a slim magnetic board on an unused strip of wall beside a bookcase, desk, or window. Small magnets hold photos in place, so seasonal pictures and new family memories can be switched without repairing holes.
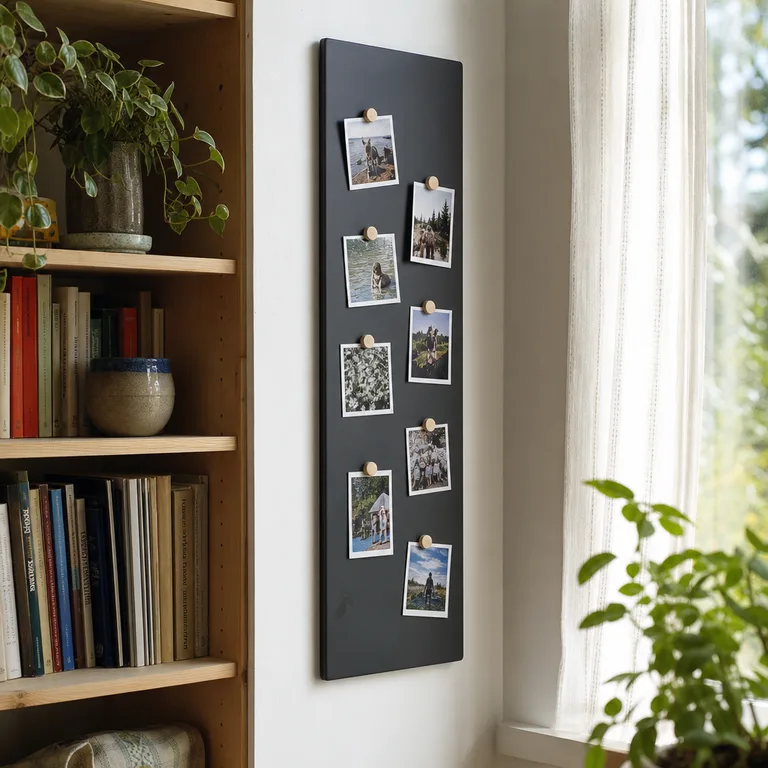
An irregular arrangement works well here because the board itself provides a clean boundary. Use wood, metal, or painted magnets that suit the room, and mix photos with a short handwritten note or a child’s small drawing if desired.
Install the board with hardware suited to its weight and the wall material. Keep strong magnets away from very young children, and avoid displaying sensitive family information in a public-facing room.
Worth knowing: A magnetic board can look utilitarian unless its size, color, and surrounding wall space suit the room.
Related: 12 Bookshelf Styling Ideas Using Things You Already Own
11.Frame Private Photos Inside a Cabinet Door
Mount lightweight photos inside a glass-front cabinet or on the inner face of a solid cabinet door for a family display that stays mostly private. Opening the cabinet becomes a small moment of discovery rather than a feature visible to every visitor.
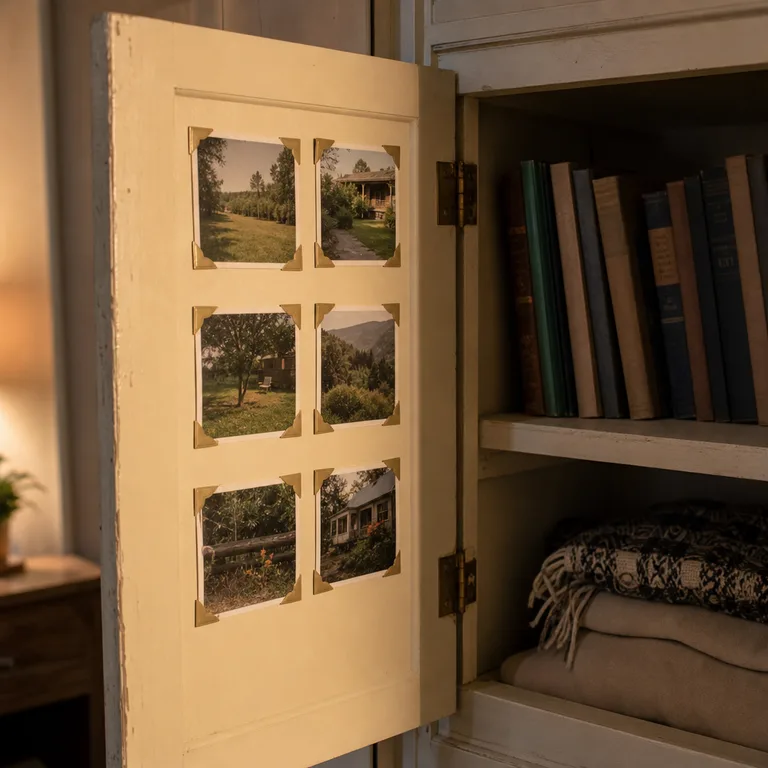
Use photo corners or archival mounting sheets instead of permanent glue, particularly for prints that may be meaningful or hard to replace. This setup works well for school pictures, candid snapshots, and photos that feel too personal for the main wall.
Make sure the door still closes smoothly and does not rub against shelves or stored objects. A cabinet near steam, moisture, or direct sun is a poor place for paper photos.
Worth knowing: The photos are less visible day to day, so this idea suits a private keepsake display more than a focal point.
12.Anchor a Sofa Wall With One Large Photo and Small Companions
Choose one enlarged family landscape, reunion photo, or meaningful place as the center of the wall above a sofa. Add a few smaller personal photos around it rather than filling every open inch, giving the room a calmer focal point.
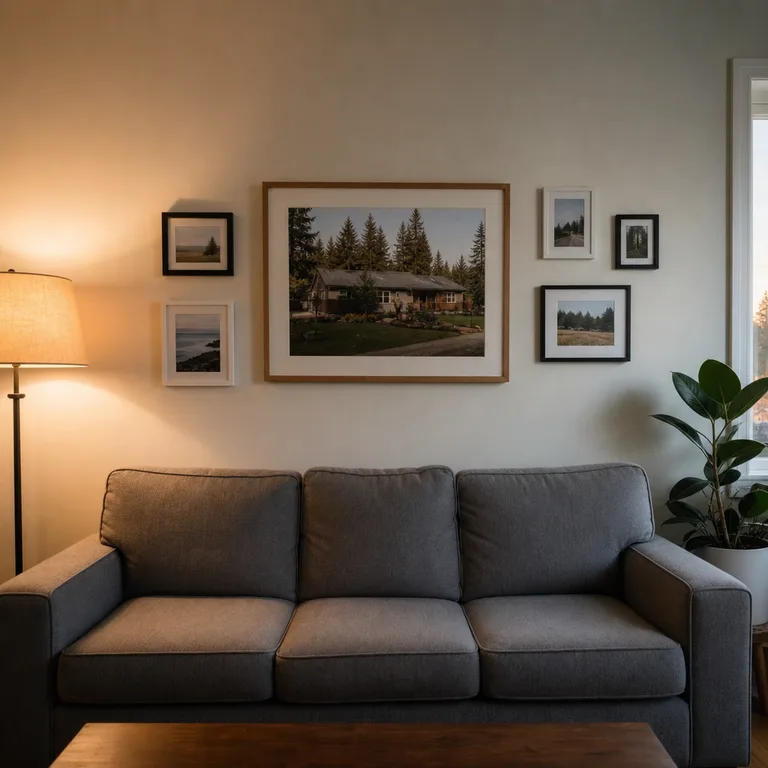
A simple large frame can be paired with smaller mismatched frames as long as the colors are restrained. This approach is often cheaper than building a full wall of matching frames, and it leaves room to add or remove companions later.
Hang the main frame securely and consider wall anchors if it is substantial. Avoid placing the group where direct sun hits for long periods, especially if the large photo is a favorite that cannot easily be reprinted.
Worth knowing: The large central image needs enough empty wall space to read clearly, so it may overpower a very small or crowded room.
About the author
Dana Ruiz, Senior editor
Dana writes about small-space living, storage and low-cost decorating.
Keep reading
10 Kitchen Color Accents That Work With Oak Cabinets
October 3, 2026
10 Thanksgiving Centerpiece Ideas Using Everyday Dishes
September 30, 2026
10 Pedestal Sink Ideas for Bathrooms With Almost No Counter Space
October 4, 2026
10 Small Raised-Bed Garden Ideas for Beginners on a Budget
October 4, 2026