10 Small Bedroom Layout Ideas for a Queen Bed
A queen bed can stay in a small bedroom when the layout gives priority to the door swing, a usable path, and the way the room is actually shared. These arrangements use different door and window positions to improve one-person or two-person access without pretending every room has space for bedside tables, drawers, and a desk at once.
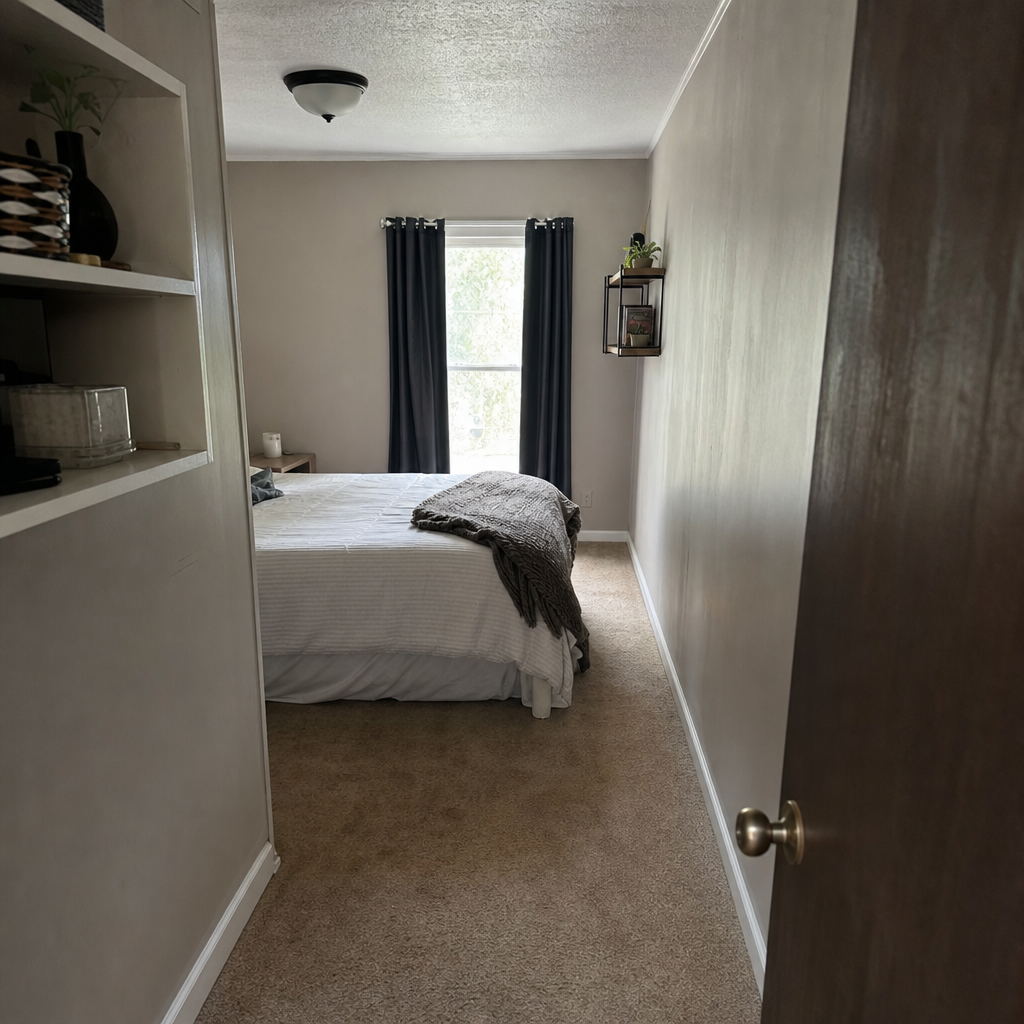
1.Center the Bed on a Solid Wall for Two-Sided Access
Put the headboard on the longest wall without a door, window, radiator, or built-in obstruction. Centering the queen bed there creates a route on each side, which is usually the most comfortable arrangement for two people sharing the room.
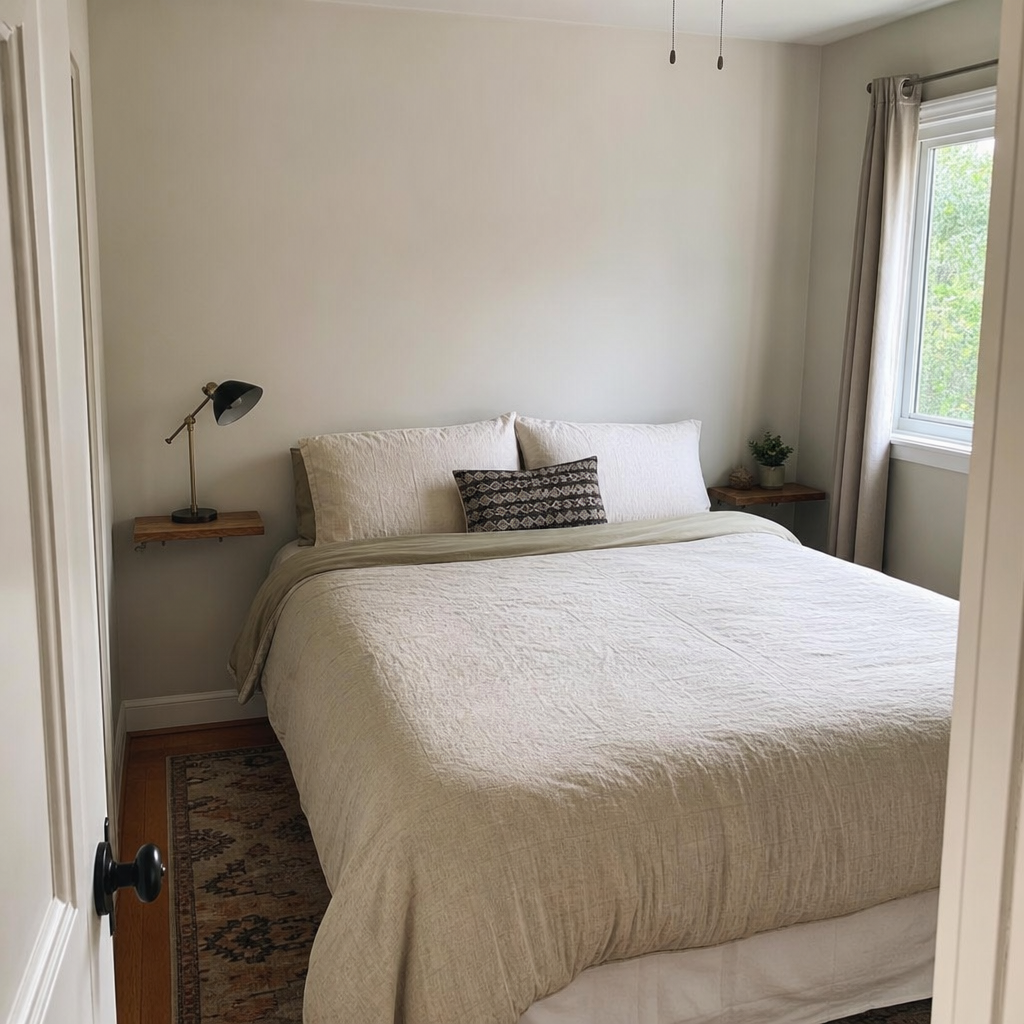
Use compact bedside surfaces rather than full tables if the side paths are tight. A small wall shelf, narrow ledge, or wall-mounted light can provide the essentials without taking up the floor beside the mattress.
Keep the route from the door to the bed clear, even if that means moving a dresser to another wall or reducing what is stored in the room. This layout works best when access matters more than fitting in matching furniture.
Worth knowing: Two usable side paths may leave little room for deep dressers or wide nightstands.
2.Shift the Bed Into a Corner for One-Person Living
Place one long side of the queen bed against a wall and tuck the headboard into the corner. This opens more central floor area and can create a broad, simple route from the door to a window, closet, or dresser.
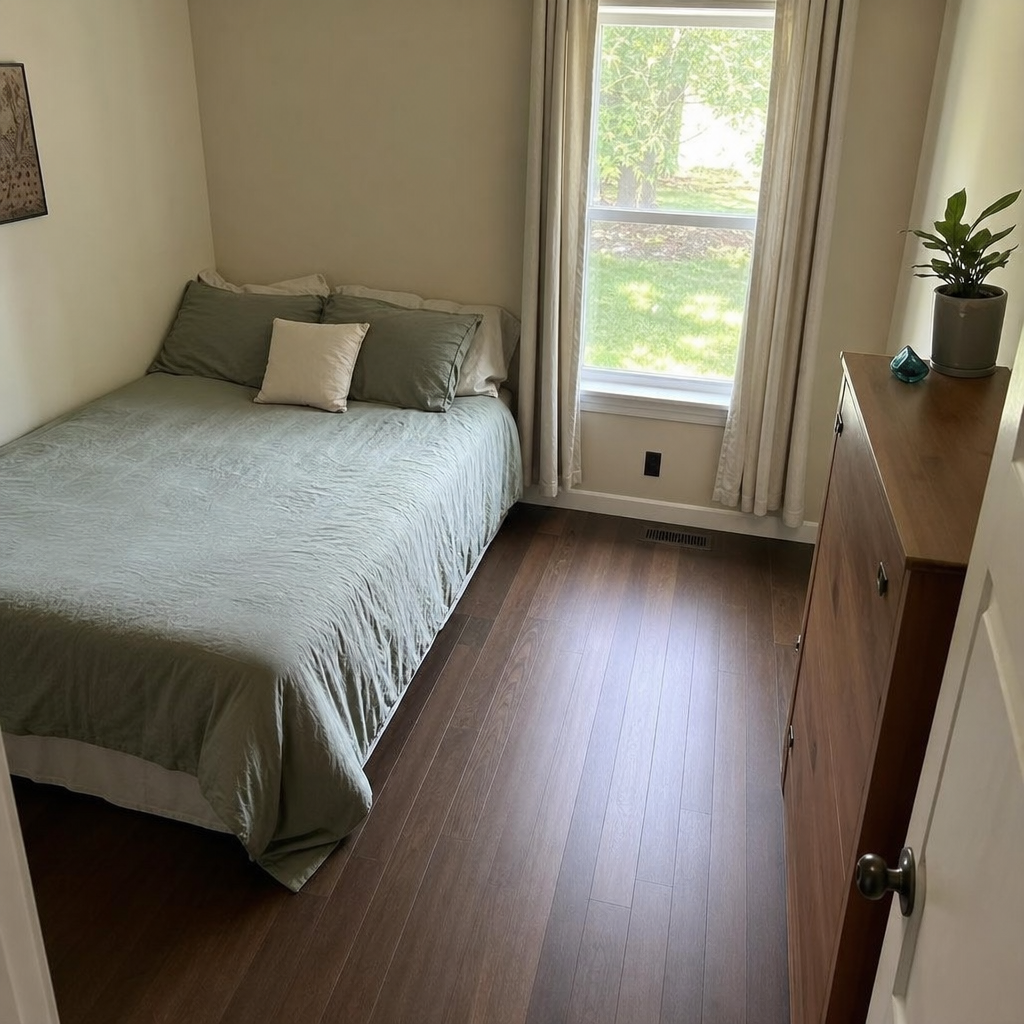
The open side can hold a compact bedside table, while the wall side needs only a reading light or a small ledge if needed. This is often a practical choice for someone who sleeps alone and values an easier path through the room.
Use the newly open wall for shallow storage or leave it bare to make dressing and laundry less awkward. Avoid filling that space with a chair or hamper that turns the main aisle into an obstacle course.
Worth knowing: The person sleeping on the wall side must climb across the bed or enter from the foot, so it is not ideal for regular two-person use.
3.Put the Headboard on the Wall Beside the Door
When an inward-swinging door takes up much of a long wall, position the headboard on the adjacent wall instead. This can keep the entry area open and prevent the first view into the room from being the side of a bed blocking the door.
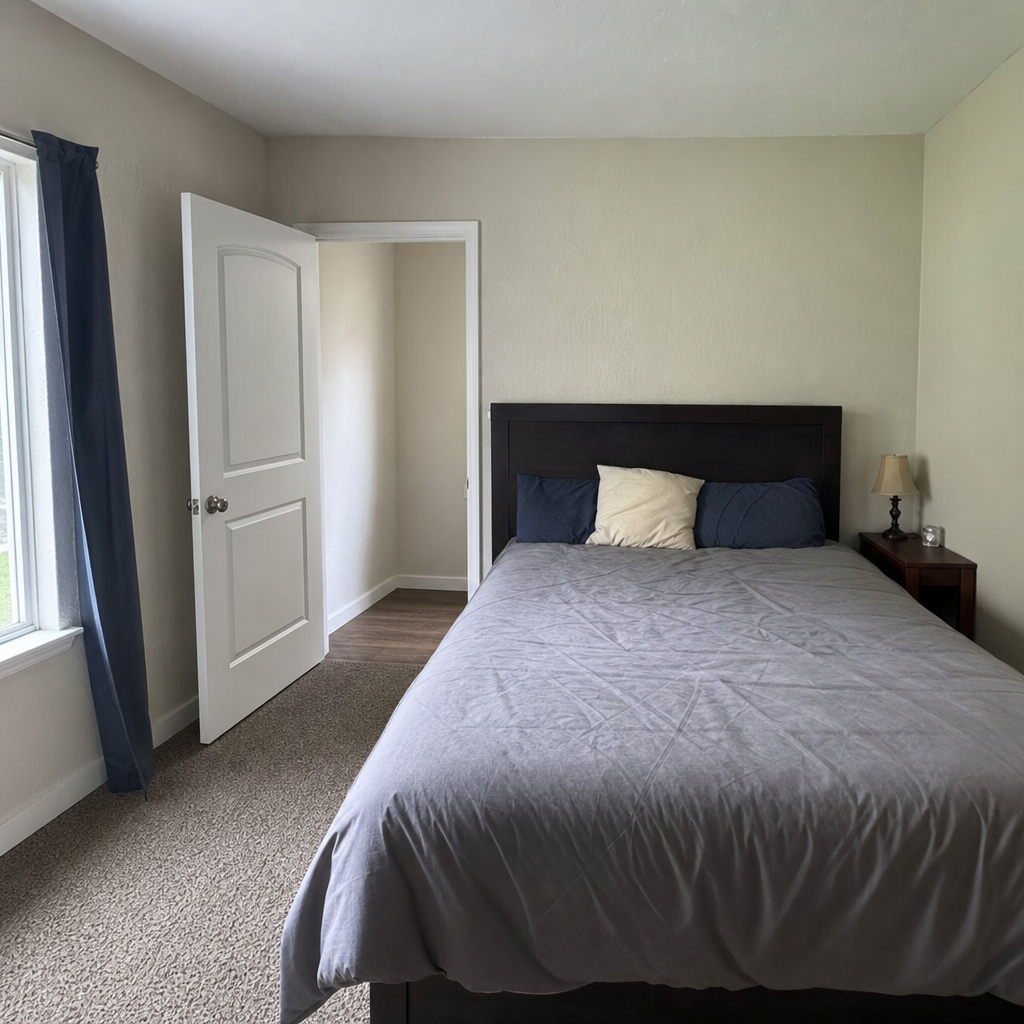
Check the door's full swing before settling on this arrangement. The door should open freely without hitting the bed frame, a bedside table, or drawers, and there should be a clear place to step inside the room.
Give the far side of the bed the larger bedside surface if only one will fit. A slim shelf or wall light on the door side keeps that area useful without narrowing the entry route.
Worth knowing: This arrangement can make one side of the bed feel tight if the door opens close to the headboard wall.
4.Use the Window Wall When the Sill Is High Enough
Set the headboard below a high window when doing so frees a better wall for a wardrobe or dresser. A bed under the window can make a compact room feel more balanced, particularly when the other walls are interrupted by doors or closets.
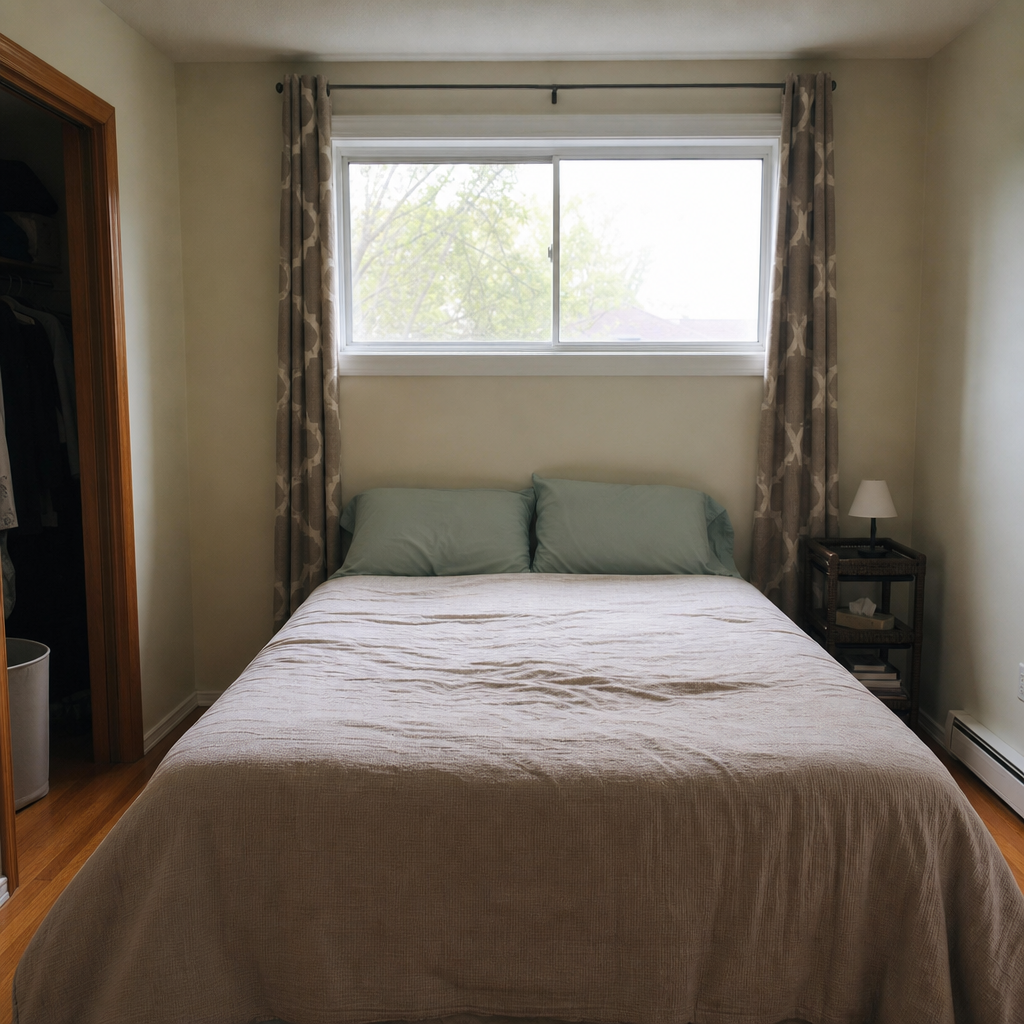
Choose simple curtains or blinds that remain easy to open and close behind the bed. Keep pillows and bedding below the window as much as possible, and do not cover a radiator, vent, or return air grille.
This placement needs extra care in cold or drafty climates. Check for condensation, poor window insulation, and a window that must serve as an emergency exit before making the bed difficult to move.
Worth knowing: A low window, active radiator, or required egress window can rule out this layout.
5.Turn the Bed Perpendicular to a Long Narrow Room
In a long, narrow bedroom, turn the queen bed across the far end rather than running it lengthwise along a wall. When the room has enough width at that end, this can preserve a direct walkway from the door toward the window.
Keep storage shallow and wall-mounted along the remaining long wall. The point is to protect the route through the room, not to squeeze a deep dresser into the narrow passage beside the bed.
This arrangement can also make the sleeping area feel distinct from the entry area. Keep the foot and sides clear enough for making the bed, and make sure no closet door opens into the main path.
Worth knowing: It only works where the far end of the room is wide enough to hold the bed without blocking the route beside it.
Related: 12 Small Living Room Layout Ideas That Leave Room to Walk
6.Create a Clear Entry Lane Along One Side of the Bed
Align the queen bed along the wall opposite the door so a straightforward lane runs from the entry along one side. This can be more useful than trying to force equal access around every edge of the bed.
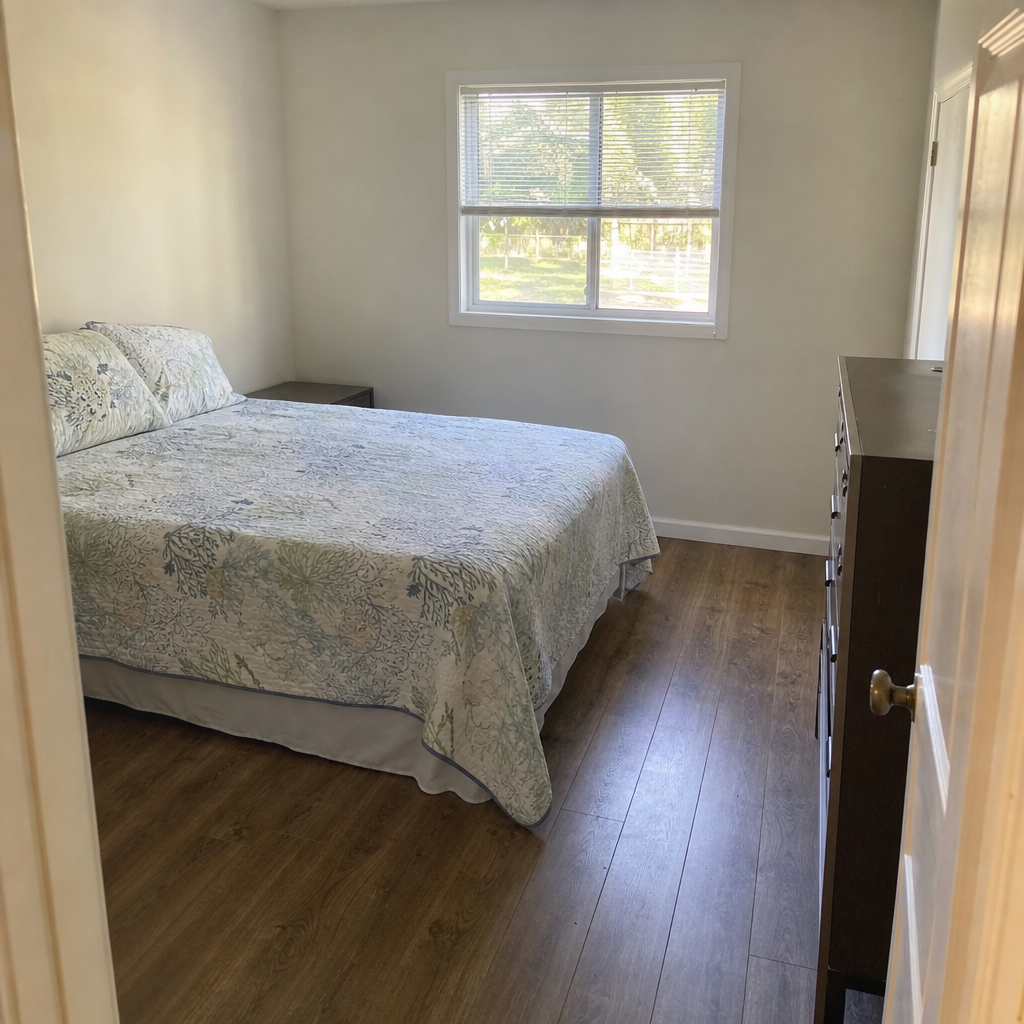
Reserve the open end of the room for a low dresser, laundry basket, or a small storage piece that does not interfere with the doorway. Furniture near the entrance should never stop the door from opening fully or make it hard to carry bedding into the room.
Use the wall above the dresser for a mirror, hooks, or art instead of adding another floor piece. Keeping one lane consistently open makes a tight room easier to use day to day.
Worth knowing: This gives priority to one side of the bed and may not provide comfortable access for two sleepers.
7.Place the Bed Diagonally Only in an Awkward Corner
Angle the queen bed only when a chimney breast, sloped ceiling, off-center window, or unusual corner makes straight placement wasteful. The diagonal can turn a difficult shape into a more natural sleeping zone and may improve the route around a fixed obstacle.
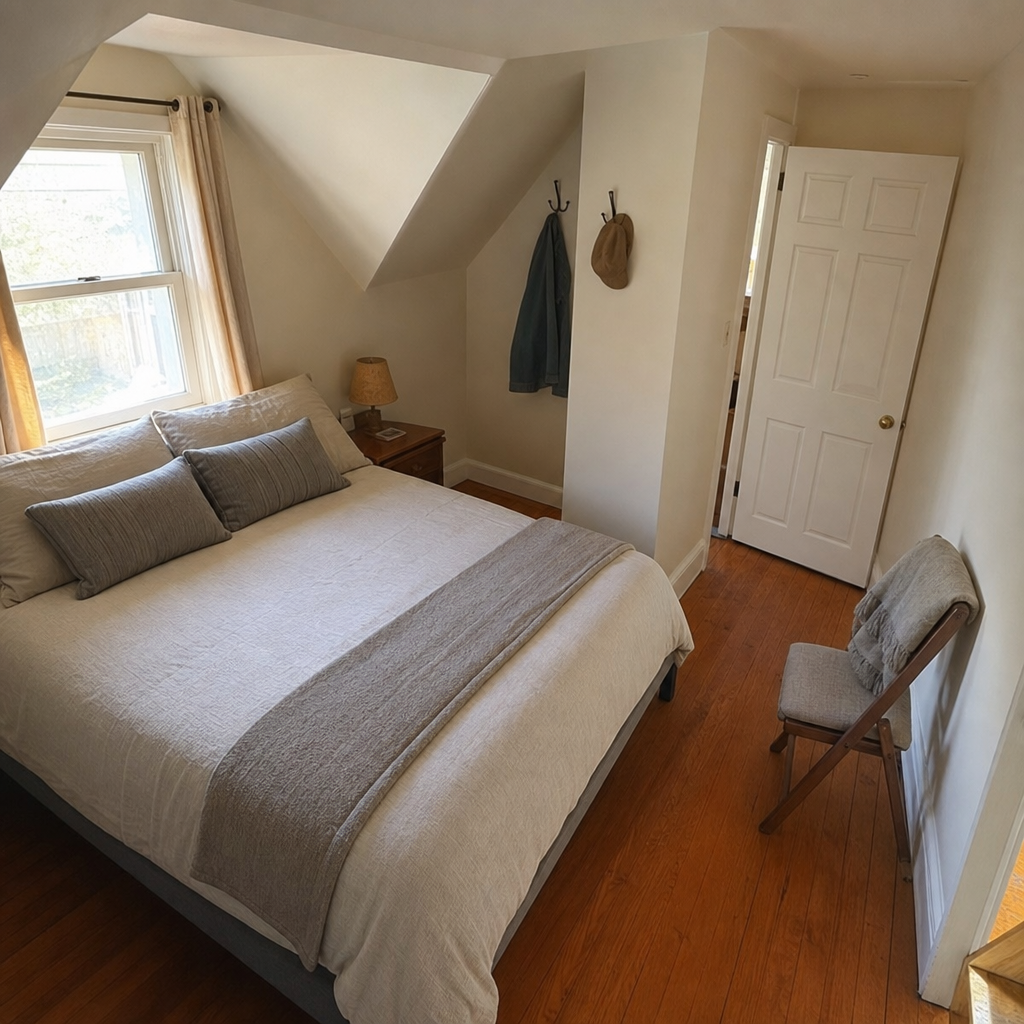
Keep the rest of the furniture restrained because an angled bed takes more visual and actual floor area than a bed against a wall. Wall hooks, a narrow shelf, and under-bed storage are often more workable than several freestanding pieces.
Mark out the bed shape on the floor before moving it. The layout should still leave a clear route to the door and any closet, rather than simply making the bed look more decorative.
Worth knowing: Diagonal placement uses substantial floor area and can make an already small room harder to furnish.
8.Let a Shallow Wardrobe Replace One Bedside Table
Use a shallow wardrobe or a wall-mounted clothing rail to handle storage on one wall, then keep the bed sides as open as possible. This can support two-sided access without relying on a bulky pair of matching bedside tables.
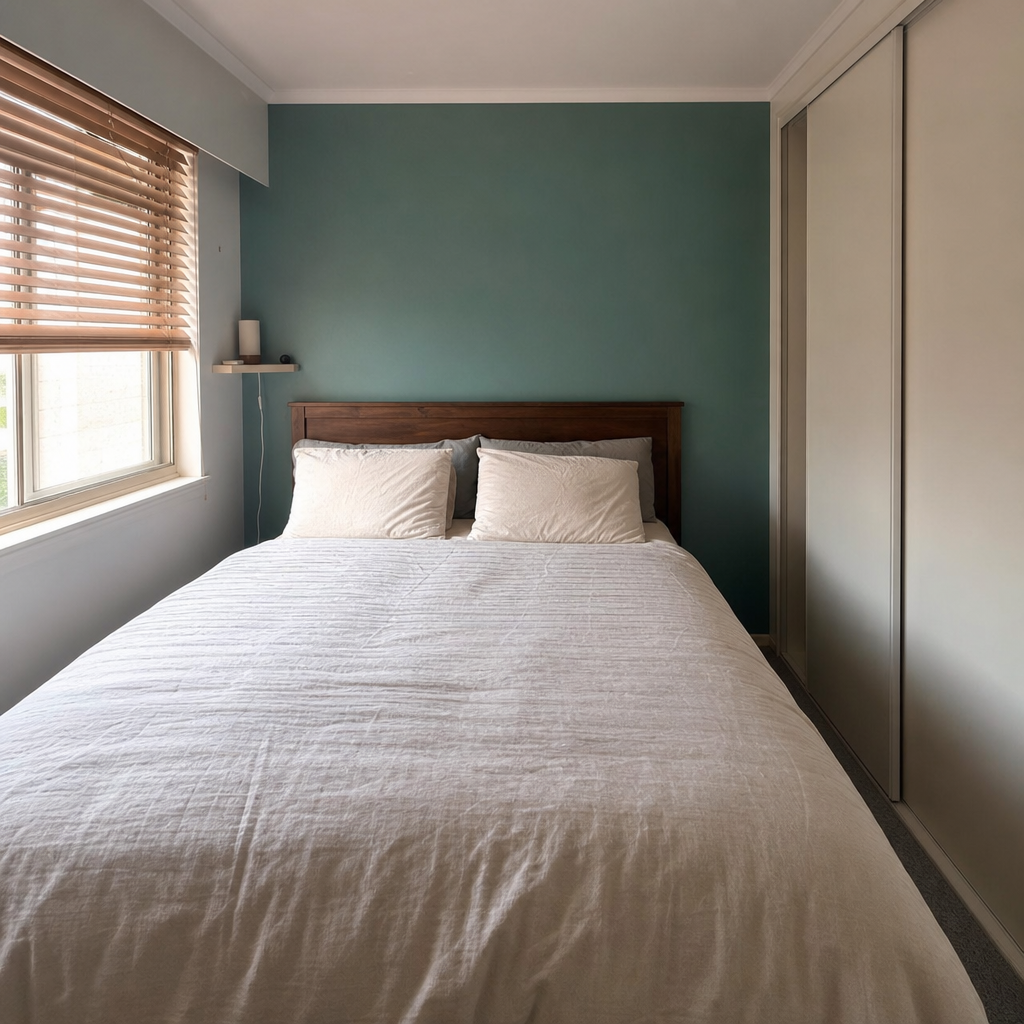
On the tighter side, use a tiny wall shelf for a phone, glasses, or a book. On the other, a small bedside table can provide a drawer if it does not cut into the walking path.
Sliding wardrobe doors are especially useful where a hinged door would open into the bed or aisle. If using a clothing rail, keep it orderly so the room does not feel crowded by visible garments.
Worth knowing: Shallow storage may not hold bulky clothing or replace a full-depth wardrobe.
9.Keep the Foot of the Bed Open Instead of Adding a Bench
Leave the floor at the foot of the queen bed clear rather than adding a bench, trunk, or extra seating. That open space makes it easier to change sheets, get dressed, and reach a closet or dresser on the opposite wall.
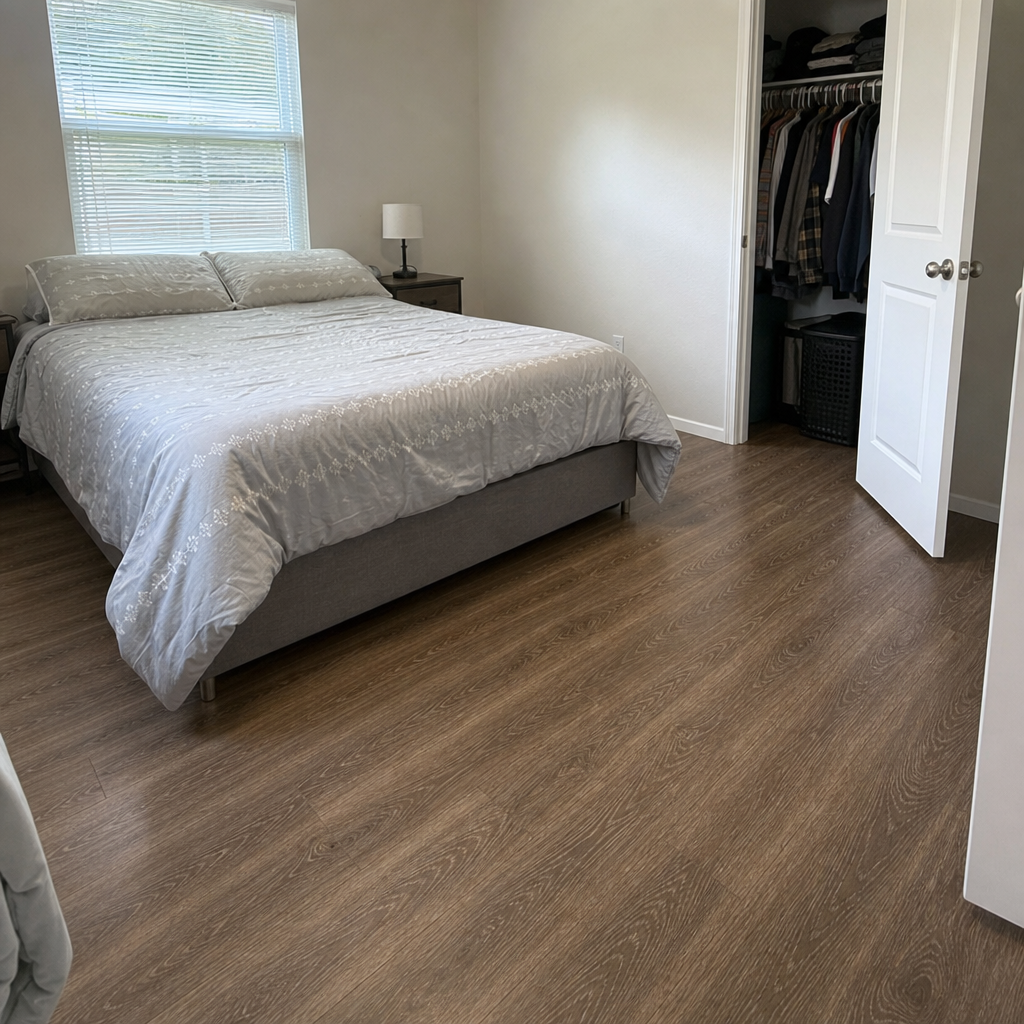
A bench can look finished in a larger room, but it often becomes a place for clothing while reducing useful circulation in a small one. Put spare blankets in under-bed storage or a closet instead of relying on furniture at the foot of the bed.
Pay close attention to closet doors and drawer fronts in this zone. They need room to open without forcing someone to move a bench each time they need clothes.
Worth knowing: This layout sacrifices a convenient spot for sitting or laying out clothes.
10.Use Wall-Mounted Lighting to Free the Bedside Floor
Replace floor lamps and large bedside lamps with wall-mounted reading lights, sconces, or compact plug-in fixtures. This lets the queen bed sit closer to a wall while keeping light available for reading and getting in or out of bed.
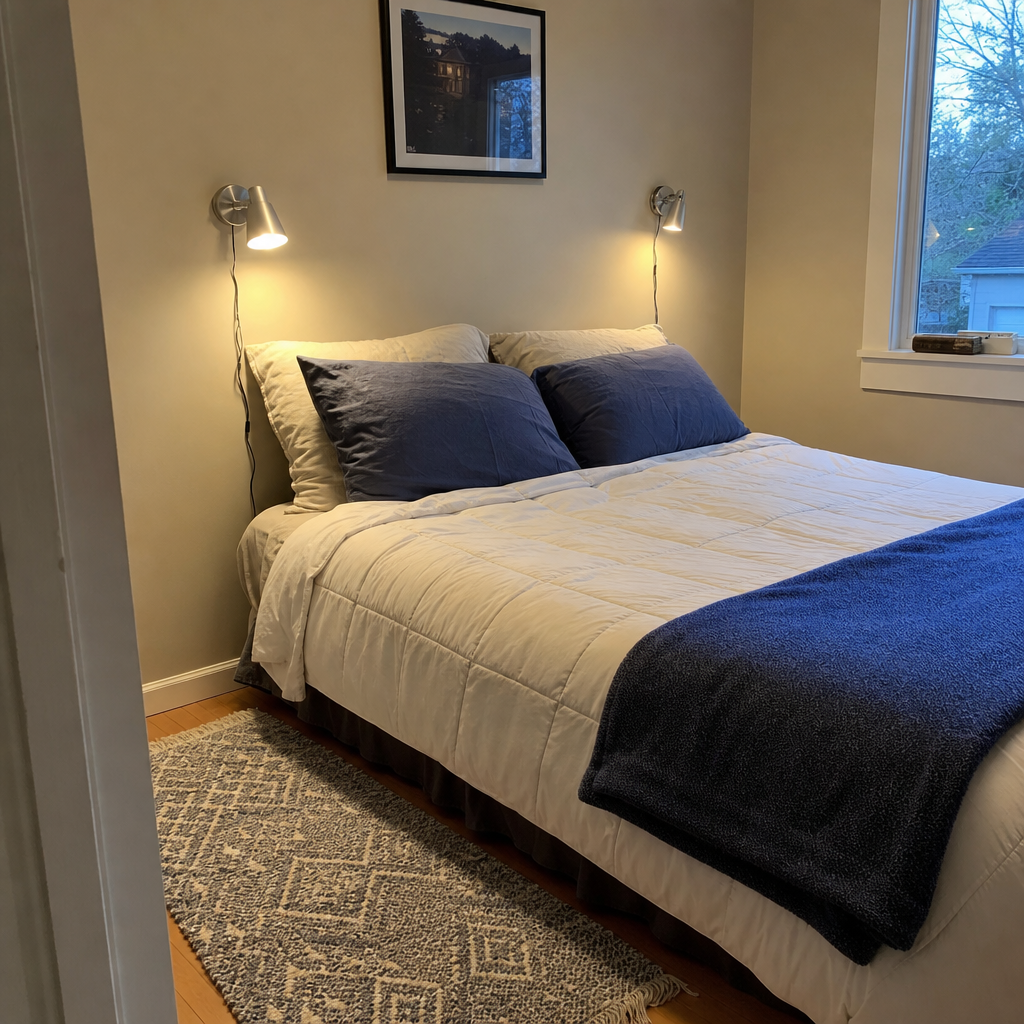
Run cords neatly along the wall and keep outlets accessible. Plug-in fixtures can be a simpler option than hardwiring, while a small wall shelf can take the place of a table for essentials.
Renters should check lease rules before drilling into walls or altering electrical fixtures. Removable cord covers and renter-appropriate mounting methods can help, but the light must still be installed securely.
Worth knowing: Wall-mounted lighting requires safe installation and may be limited by outlet locations or rental restrictions.
About the author
Dana Ruiz, Senior editor
Dana writes about small-space living, storage and low-cost decorating.
Keep reading
12 Small Kitchen Ideas That Free Up Prep Space Without Remodeling
September 15, 2026
12 Studio Apartment Divider Ideas Without Building a Wall
September 15, 2026
12 Small Living Room Layout Ideas That Leave Room to Walk
September 14, 2026
12 Small Patio Seating Ideas on a Budget
September 16, 2026