10 Shade Garden Ideas for a Small Yard on a Budget
A shaded corner improves fastest when its soil moisture, amount of filtered light, and drainage are understood rather than treated as one generic problem. These ideas use layered planting, simple surfaces, and gradual changes that suit an ordinary small yard without assuming every shade plant works in every region.
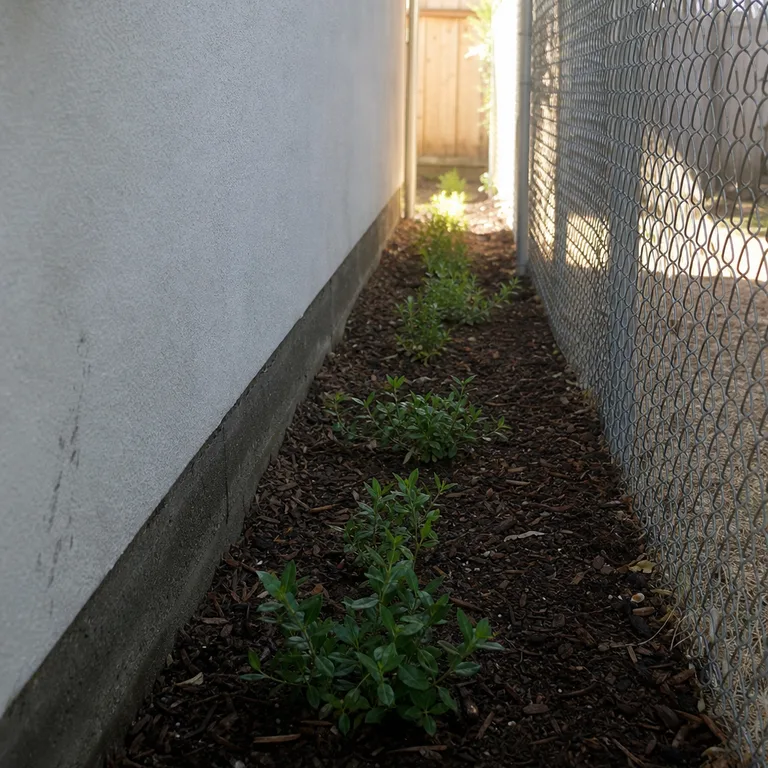
1.Sort the patch into dry shade, moist shade, or deep shade
Spend a few weeks noticing the patch after rain and at different times of day. Soil beneath mature trees may be shaded yet dry because roots take up moisture, while a corner near a downspout may stay damp for far too long.
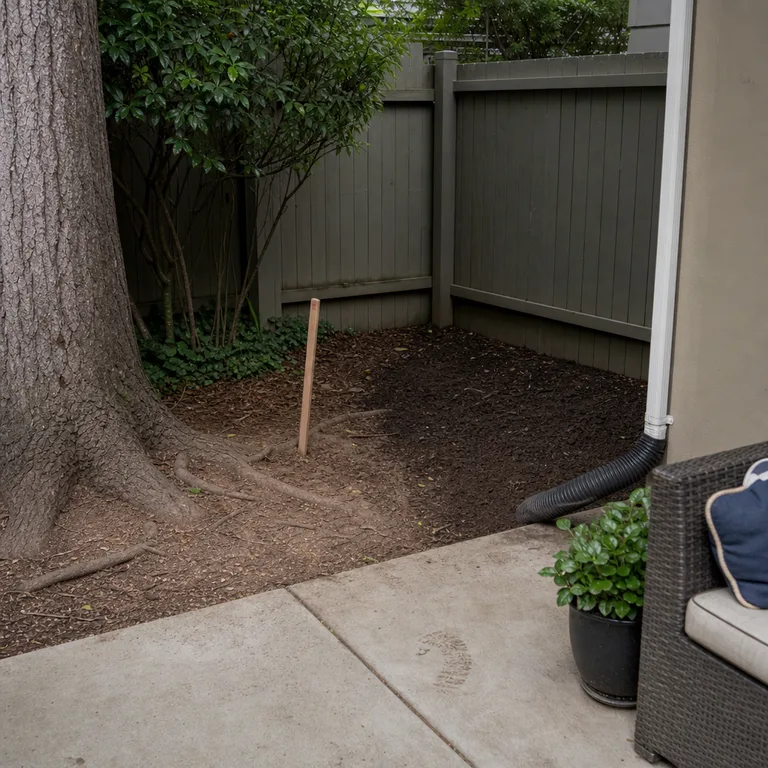
Choose plants only after identifying both moisture and light. Check local extension guidance for regional suitability and confirm that any groundcover is not invasive where you live; a plant that spreads usefully in one area can become a problem in another.
Worth knowing: A site can change through the year as tree leaves fill out, rainfall shifts, or drainage patterns change, so the first season is still partly a learning period.
Related: 15 Budget Landscaping Ideas That Make a Small Yard Feel Finished
2.Use a mulch-only pause while the site is assessed
A bare shaded bed does not need to be planted immediately. A neat layer of suitable organic mulch makes the area look cared for, softens the view of compacted soil, and can reduce weed growth while the site is observed.
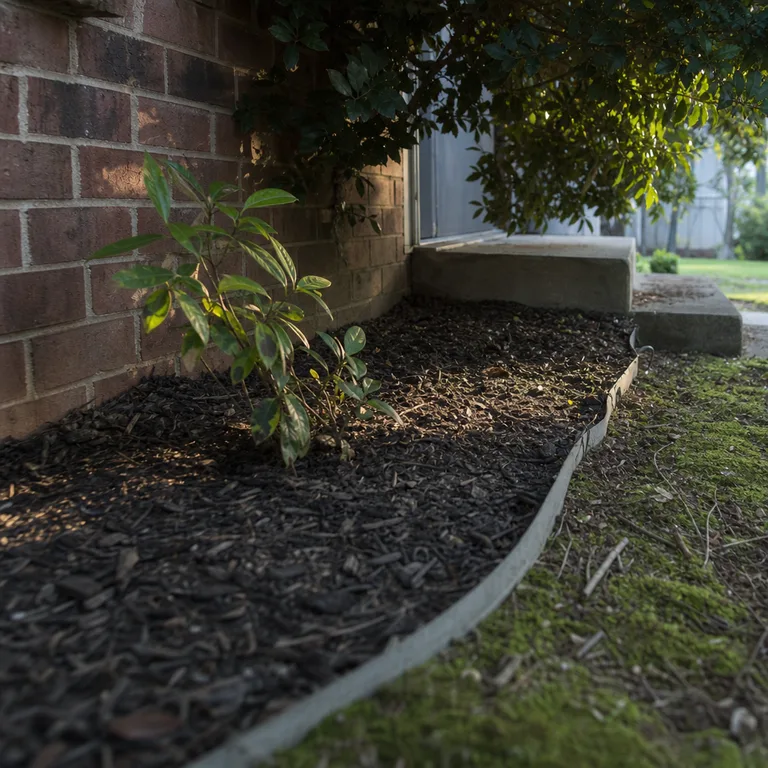
Use mulch as a temporary finish rather than packing it against trunks, stems, siding, or the foundation. Refresh thin spots gradually with locally appropriate material, and keep the bed shape simple so it is easy to revise when planting begins.
Worth knowing: Mulch improves the appearance of a difficult patch, but it will not fix standing water, severe compaction, or a drainage issue that directs water toward the house.
3.Build dry-shade planting around tree roots
Tree-rooted ground is best treated gently. Instead of digging a deep, continuous bed, place small plants in the open pockets between major roots and spread mulch around them to create a planted look without cutting through the root system.
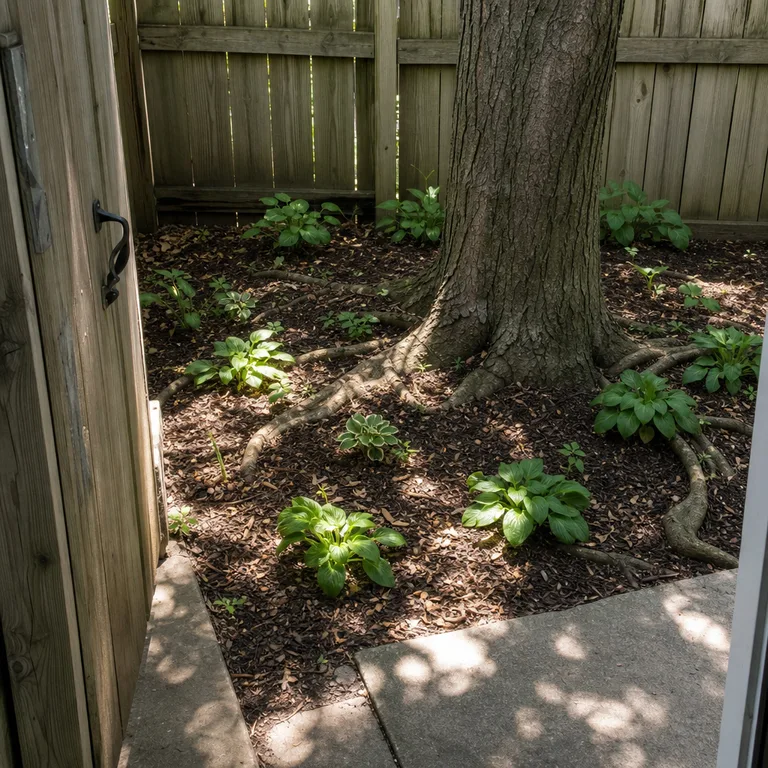
Use locally recommended dry-shade plants that can tolerate competition once established, then plant in small groups rather than trying to fill every inch at once. A loose arrangement of repeated foliage forms will look more intentional than a crowded mix of struggling plants.
Worth knowing: Even well-matched plants may need extra watering during their first growing season, especially under large trees or during dry spells.
4.Plant moisture-loving layers where runoff collects
A shaded area that stays evenly moist can support a fuller, leafier border when the water is not pooling. Arrange lower plants at the front, medium clumps behind them, and taller foliage nearer the fence or wall so the small bed has depth without blocking access.
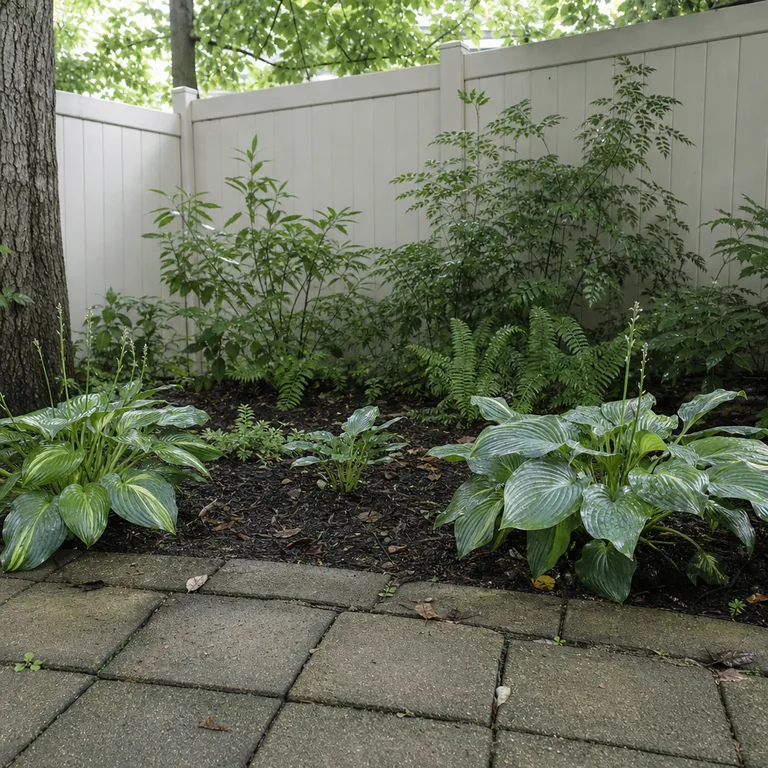
Use varied leaf shapes to make the bed interesting when flowers are limited. If runoff creates muddy soil, puddles, or water near the foundation, address the drainage path first rather than expecting plants to solve the problem.
Worth knowing: Plants suited to moist soil can still decline in waterlogged ground, so persistent puddling requires a drainage solution rather than more planting.
5.Use one repeated groundcover to unify a narrow edge
A narrow strip beside a garage, fence, or walkway often looks better with one repeated groundcover than with many unrelated plants. Repetition makes an awkward edge read as a deliberate garden border, even while the plants are still growing in.
Space plants according to their expected spread instead of forcing instant coverage. Keep mulch visible between young plants, weed the gaps, and choose a noninvasive option matched to the strip's actual moisture level and shade depth.
Worth knowing: Groundcover is not maintenance-free; it needs weeding while it fills in and occasional monitoring to keep it from crossing into paths, lawns, or neighboring beds.
6.Add a simple stepping-stone route through a shaded bed
A short route of stable stepping stones can make a tucked-away shaded patch feel useful instead of neglected. It gives access for weeding and watering while protecting soil from repeated foot traffic, which is especially helpful in damp or compacted areas.
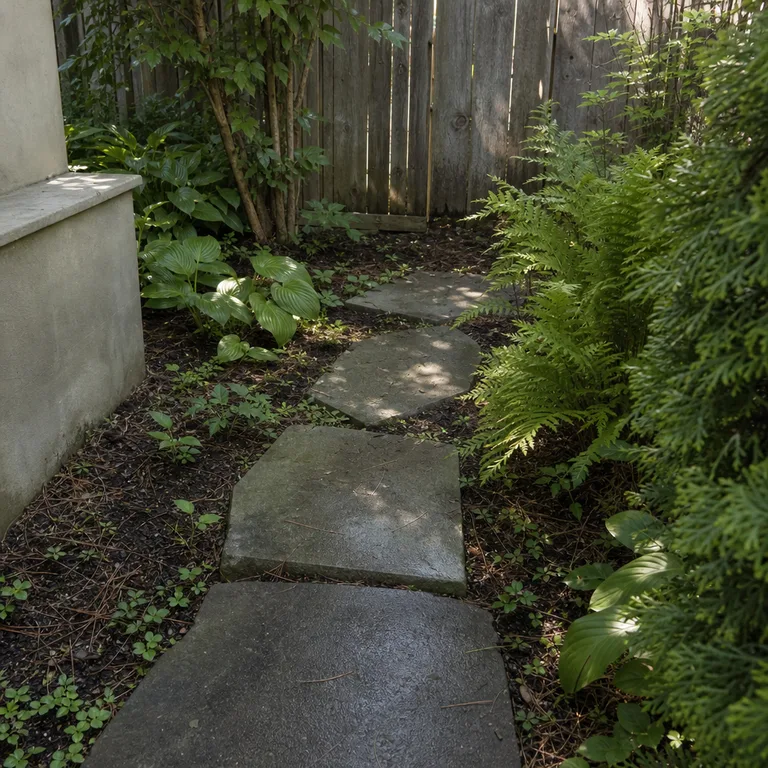
Set stones on a level base and leave enough room to walk naturally between them. Place the path so water sheds away from the house, and use planting only along the edges rather than crowding the walking surface.
Worth knowing: Stone paths can shift or become slick with moss and wet leaves in shade, so they need occasional leveling and seasonal cleaning.
7.Brighten deep shade with foliage contrast instead of flowers
Deep shade usually looks stronger when it relies on foliage rather than a large display of blooms. Combine plants with broad leaves, fine fronds, arching forms, and different green tones to create contrast that still reads clearly in low light.
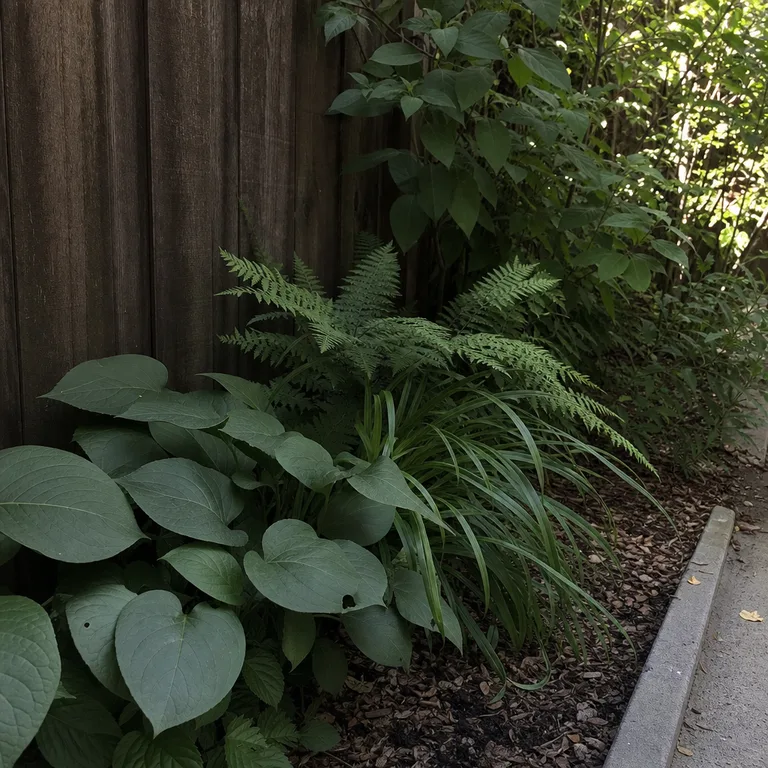
Keep the palette restrained so the texture does the work. A dark fence or wall can make lighter foliage stand out, while a simple mulch background helps individual leaf shapes remain visible from the patio or window.
Worth knowing: Foliage contrast is subtler than a flower-heavy bed, and its effect depends on keeping damaged leaves, fallen debris, and weeds under control.
8.Keep a clear gravel sitting spot beside the shade bed
A small gravel pad beside a leafy border can turn a difficult corner into a place to sit, rather than asking the garden bed to fill every part of the yard. Two simple movable chairs are often enough to create a useful pause point with a view of the planting.
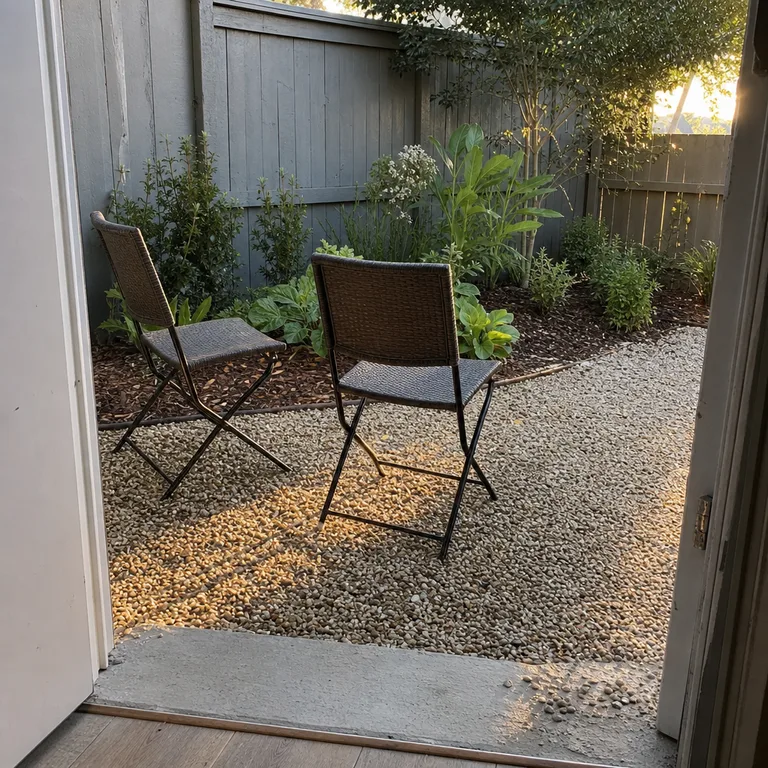
Use edging to keep gravel from mixing into the bed, and prepare a base that suits the yard's drainage. A permeable surface can be helpful in a damp yard, but it should not direct runoff toward the house or a neighbor's property.
Worth knowing: Gravel needs periodic raking, can collect leaves under trees, and may not be allowed in some rentals or shared outdoor spaces without approval.
Related: 12 Small Patio Seating Ideas on a Budget
9.Contain a shade garden in pots where soil is poor
Containers make sense where the ground is packed hard, roots fill the soil, or a permanent bed would be difficult to install. Group a few pots with compatible light and moisture needs to give a bare corner a planted layer without disturbing the site below.
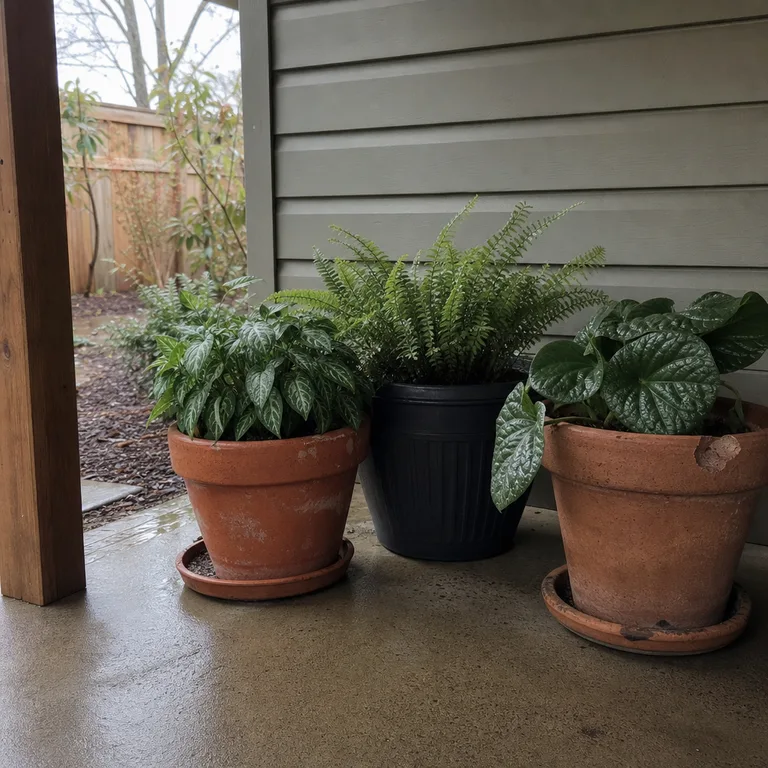
Use sturdy containers with drainage holes on a level surface, and match their size to the plants' mature needs. Reused pots can lower the cost, but check that they are sound enough for weather and that excess water can escape freely.
Worth knowing: Pots can dry out or stay wet differently from in-ground beds, and they may need winter protection in climates with freezing conditions.
Related: 12 Container Garden Ideas for a Small Patio on a Budget
10.Plant the bed in phases to spread the work
Start with a few anchor plants in the places that best match their needs, then leave mulched open space around them. This gives the bed structure without requiring a complete planting all at once, and it makes it easier to see which conditions are helping or hurting new plants.
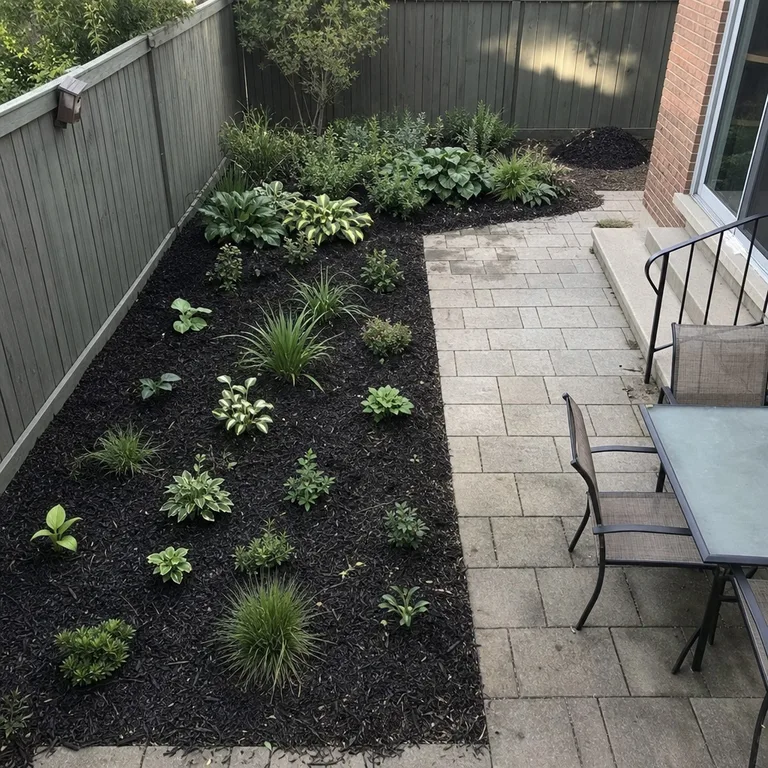
Add a repeated groundcover or a few seasonal accents after the first plants have settled in. Keep some flexibility in the plan so weak plants can be moved or replaced instead of forcing the same choice across the entire patch.
Worth knowing: A phased bed can look sparse at first, and it requires patience while plants establish and the design gradually fills in.
About the author
Dana Ruiz, Senior editor
Dana writes about small-space living, storage and low-cost decorating.
Keep reading
10 Small Patio Dining Ideas Without a Big Furniture Set
September 19, 2026
12 Small Living Room Seating Ideas Beyond a Second Sofa
September 21, 2026
10 Small Laundry Nook Ideas for Homes Without a Laundry Room
September 21, 2026
10 Guest Room and Office Ideas for One Small Room
September 20, 2026