8 Budget Ways to Organize a Small Chest Freezer
A small chest freezer works best as a set of shallow, retrievable layers rather than a single stack of frozen packages. Keep it at 0°F for best quality, follow the appliance instructions for airflow and loading, and use a simple map and rotation routine so older food stays visible.
As an Amazon Associate I earn from qualifying purchases.
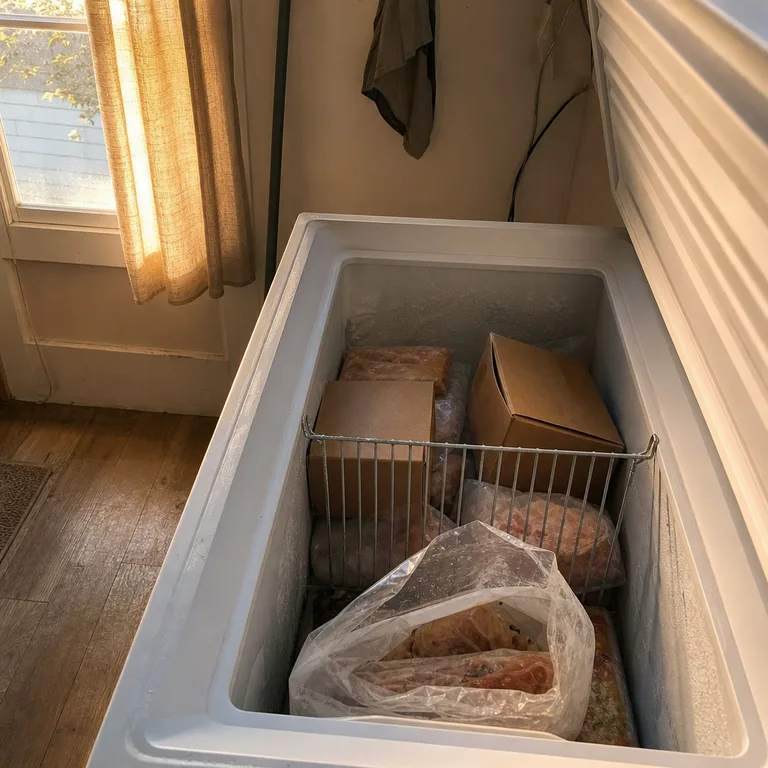
1.Assign Baskets to Food Zones
Divide the freezer into broad zones such as everyday meals, vegetables, breakfast foods, and meat. Put each category in an open basket with handles so a whole group can be lifted out instead of shifted aside package by package.
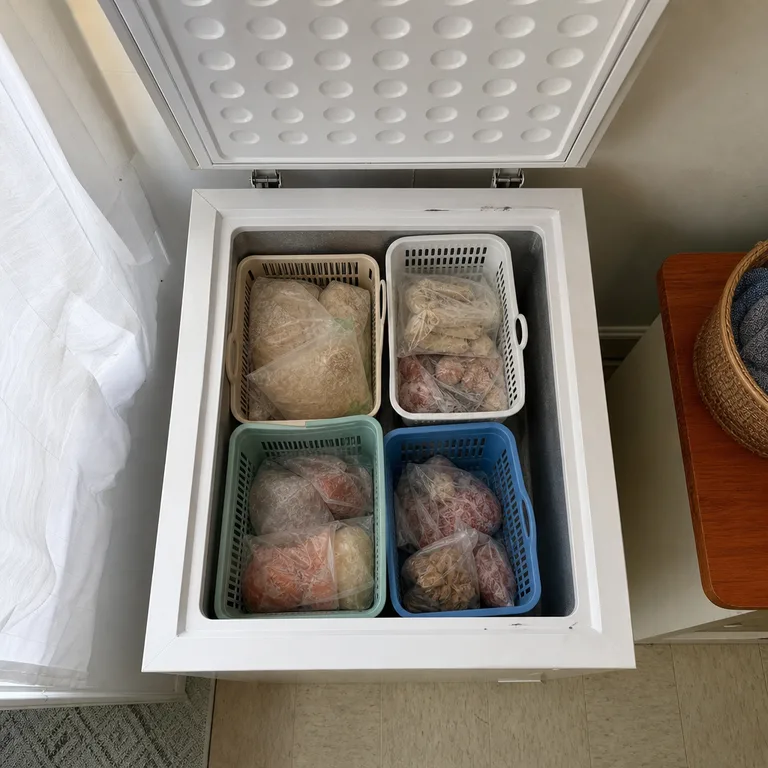
Reuse sturdy baskets or open bins that fit below the freezer rim and leave room for the lid to close. Keep the categories simple enough that everyone in the household can put food back in the right place, and avoid packing bins so tightly that air cannot circulate as the appliance instructions require.
Worth knowing: This system needs occasional resetting after a large grocery trip or a period of heavy freezer use.
2.Build Shallow Layers With Lift-Out Crates
Treat the depth of the freezer as two or more removable layers, not one tall pile. Place sturdy shallow crates or baskets at the bottom, then add a lift-out layer above them only where reaching the lower food is difficult.
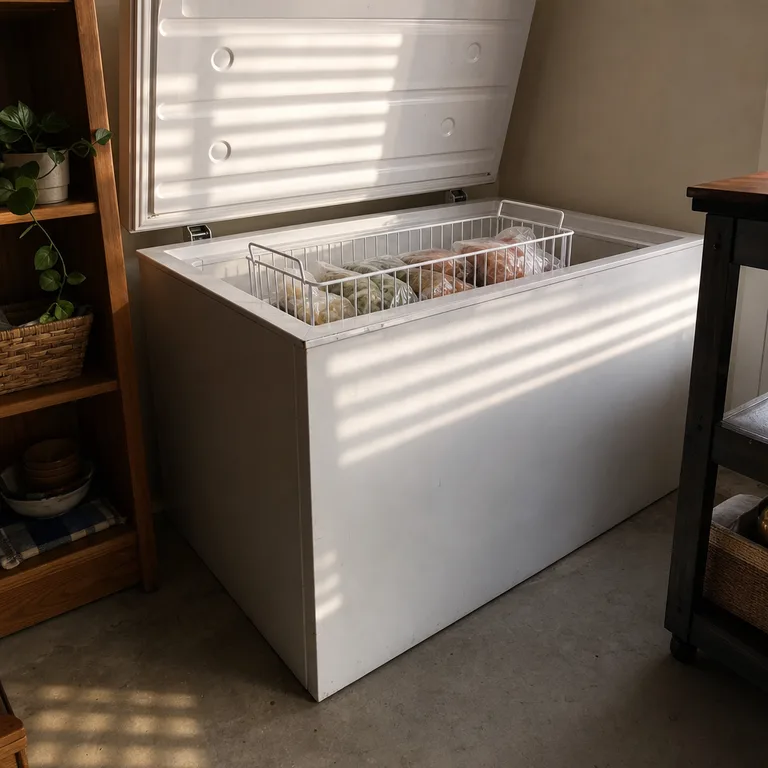
Wire baskets, handled plastic bins, and shallow crates can work when they are sized to lift straight up without catching on the rim. Store heavier and less-frequently used items below, but do not overfill the freezer or block any areas the manufacturer identifies for airflow.
Worth knowing: A full upper layer still has to be lifted out to reach food stored underneath it.
3.Stand Flat Packages Upright Like Files
Place flat packages of fruit, vegetables, leftovers, or individually portioned food upright in one narrow section. Simple dividers turn the section into a file system, making it possible to flip through packages rather than dig through a frozen stack.
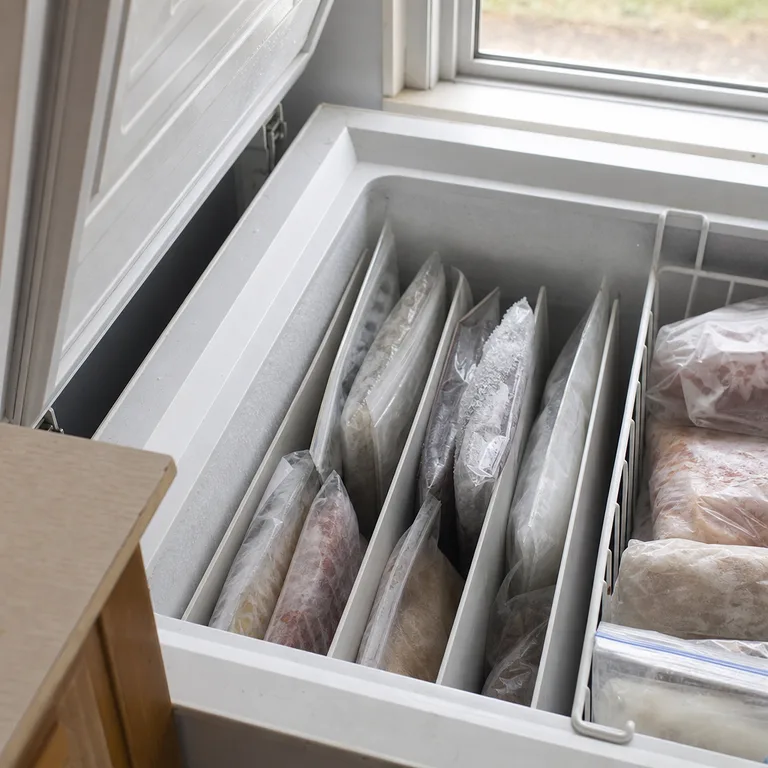
Use freezer-safe bags that are pressed flat before freezing, then group similar shapes together between low dividers or inside a narrow bin. Mark packages with the contents and date before they freeze, since unreadable mystery bags are hard to rotate and use well.
Worth knowing: This approach is best for thin, flat packages and will not hold bulky cartons or irregularly shaped items upright.
4.Keep a Front Basket for the Next Meals
Reserve the basket nearest the opening for ingredients planned for the coming days. It can hold a few meal components, leftovers to use soon, or a prepared meal that needs to be easy to find on a busy evening.
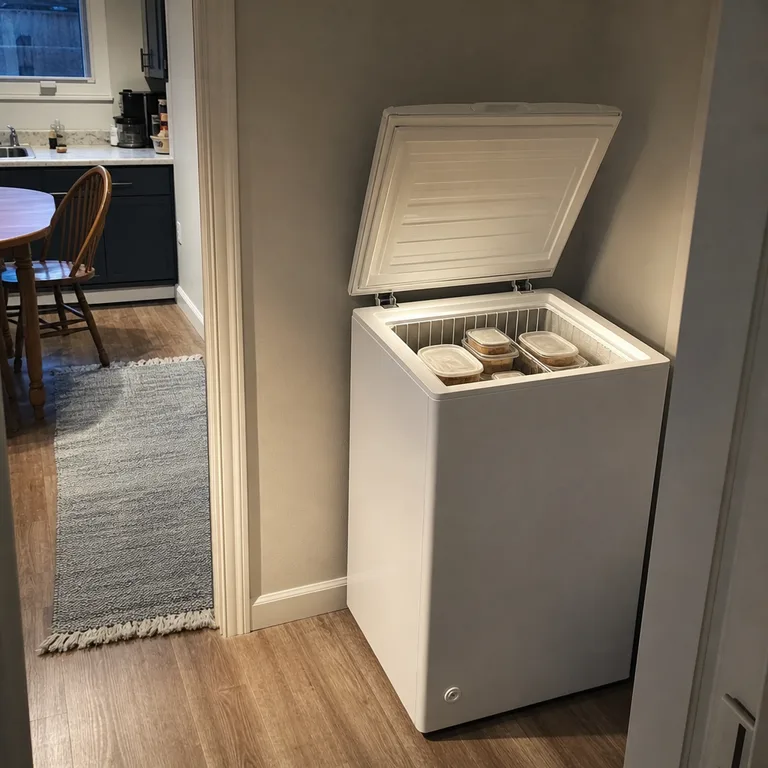
Refresh this basket when plans change, returning unused food to its regular category instead of letting it become a second long-term storage zone. Reused handled baskets or freezer-safe containers make this approach inexpensive and easy to adjust.
Worth knowing: The front basket only works when it is reviewed regularly rather than becoming a catchall for every convenient item.
5.Create a Back Stock Section for Bulk Food
Set aside one clearly bounded area at the back or bottom for unopened bulk packages and long-term staples. Keep the package currently being used in an easier-to-reach basket, so opening the freezer does not mean sorting through extra stock first.
A wire divider, narrow bin, or even a dedicated basket can make the boundary obvious without adding a complicated system. Place heavier bulk packages where they will be stable, and make sure the section does not interfere with the freezer lid, seal, or required interior clearance.
Worth knowing: Back stock can still be forgotten if it is not included on the location map and checked during rotation.
6.Use a First-In, First-Out Rotation Lane
Choose one narrow lane for foods that need to be used first, with older packages at the front and newer ones placed behind them. This gives frozen food a clear path forward instead of allowing recent purchases to bury what was already there.
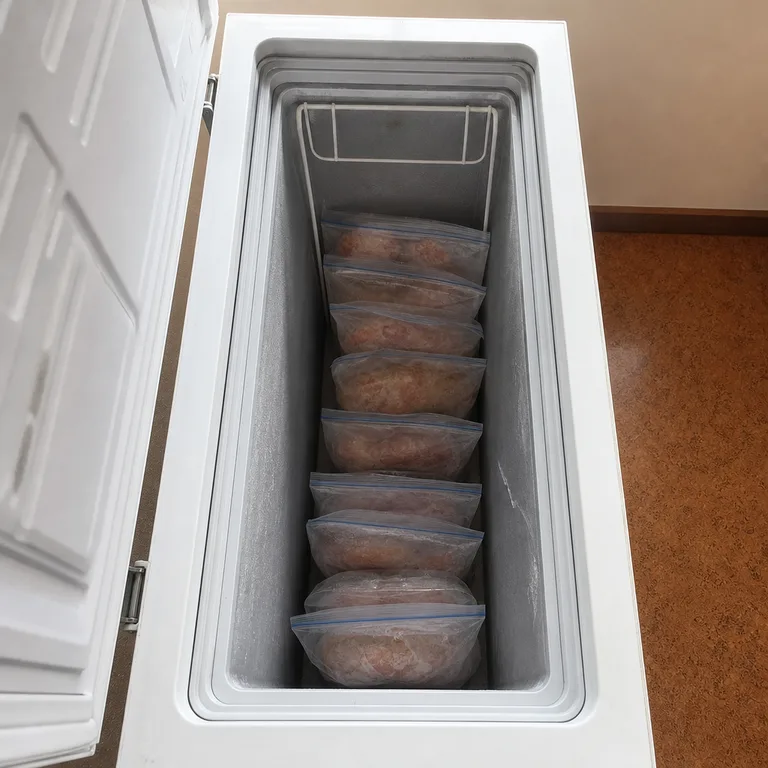
Date food when it goes into the freezer, especially home-portioned items and leftovers, then move the oldest suitable package forward as new food arrives. A low tray or two slim bins can define the lane while keeping the rest of the freezer categories separate.
Worth knowing: First-in, first-out rotation depends on clear dates and a household habit of returning newer items to the back.
7.Hang a Simple Location Map on the Lid
Keep a short category map on the inside of the lid if the appliance instructions allow it, or place it on a nearby wall or cabinet. List broad locations such as front meals, left vegetables, back stock, and small-item bin so food can be found without opening every basket.
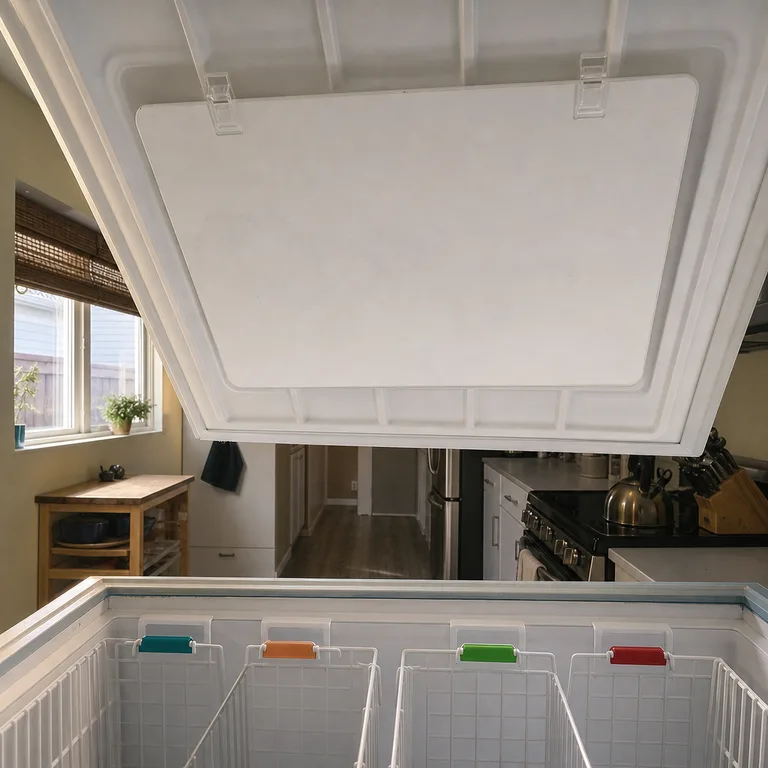
A wipe-clean board, clipboard, or paper list in a protective sleeve is enough for this job. Update the map when baskets move, and avoid attaching anything that could affect the lid seal, cover vents, or conflict with the manufacturer's guidance.
Worth knowing: A location map loses value quickly when the freezer layout changes without being updated.
8.Corral Small Loose Items in One Grab Bin
Give small freezer items one compact, easy-to-lift bin near the top. Ice packs, herb cubes, smoothie portions, small leftovers, and similar items are less likely to slide into gaps between larger packages when they have one assigned home.
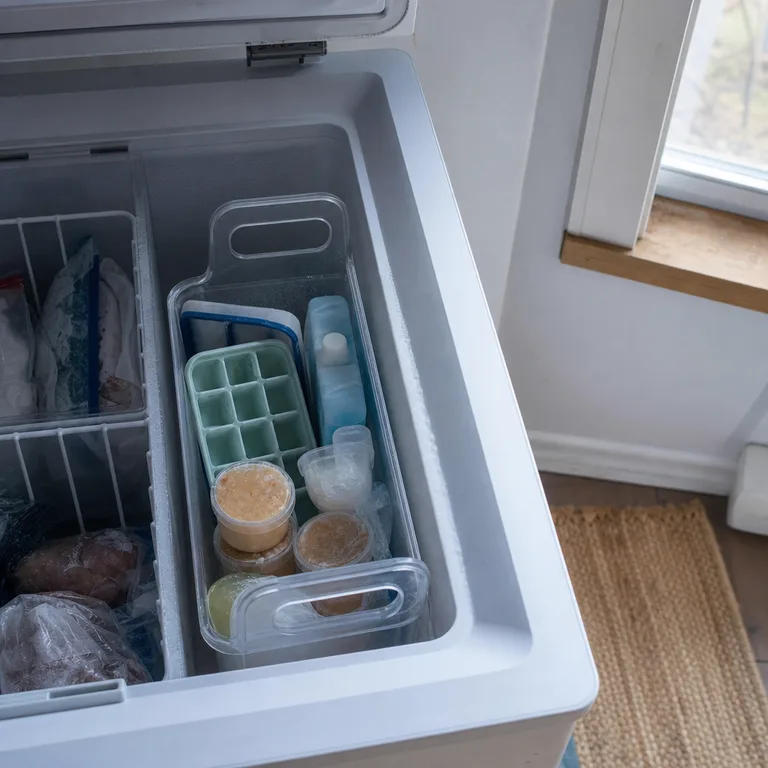
A clear handled bin makes it easy to see what is inside, but any sturdy small basket can work. Keep only genuinely loose, small items in it; separating too many tiny categories creates more upkeep than a small chest freezer needs.
Worth knowing: The grab bin can become overcrowded if it is used for every odd-sized item rather than only small loose pieces.
About the author
Dana Ruiz, Senior editor
Dana writes about small-space living, storage and low-cost decorating.
Keep reading
9 Budget Sewing Fabric Storage Ideas for Small Bedrooms
November 4, 2026
10 Easy Suitcase Storage Ideas to Clear Bedroom Clutter
November 4, 2026
9 Easy Ways to Refresh an Overgrown Garden Bed
November 5, 2026
7 Easy Shoe-Changing Seats for a Narrow Entryway
November 5, 2026