8 Foil and Food Wrap Storage Ideas for Kitchens With Shallow Drawers
Shallow drawers can hold foil, parchment, and plastic wrap boxes when each box has a protected lane that prevents crushed corners and buried cutters. These eight layouts use drawers, cabinet interiors, open shelves, and portable storage while keeping labeled packaging visible and cutting edges out of children’s reach.
As an Amazon Associate I earn from qualifying purchases.
1.Divide a Shallow Drawer Into Box-Length Lanes
Turn a shallow drawer into separate lengthwise lanes with adjustable dividers. Measure the longest wrap box first, then set each lane wide enough that the cardboard does not bow or catch when the drawer closes.
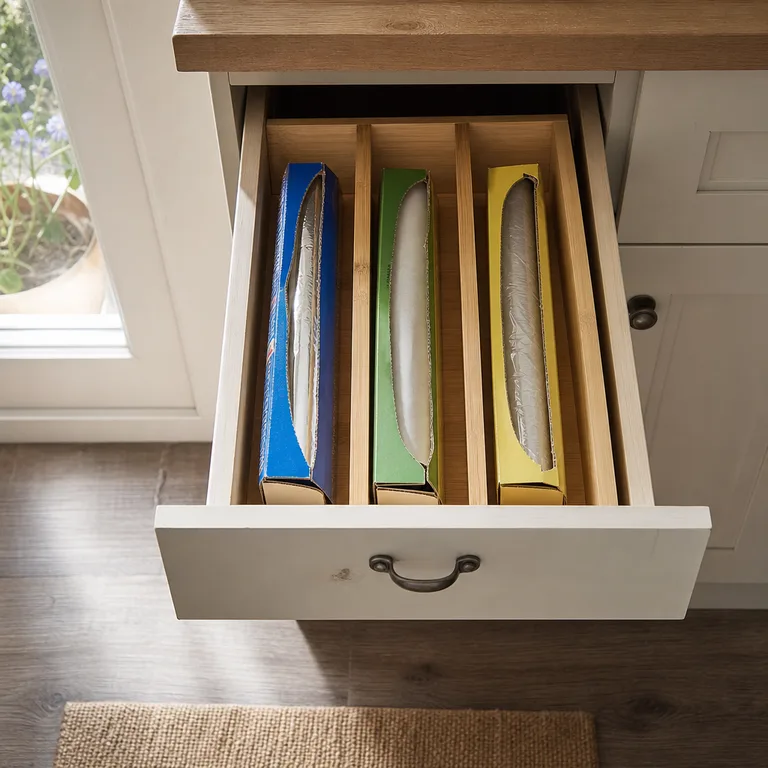
Place the cutter ends toward the drawer front so each box can be opened without lifting out the others. A non-slip liner under the boxes helps them stay put, and using the original labeled boxes makes it easy to tell foil from parchment at a glance.
Worth knowing: This only works when the drawer is long enough for the longest box and deep enough for its lid flap to open without rubbing the drawer above.
2.Stand Narrow Wrap Boxes Upright in a Deep Drawer
A deep drawer can hold narrow wrap boxes on their long edges, much like files in a drawer. Set the boxes inside a low bin or behind a short divider so they do not tip as the drawer opens and closes.
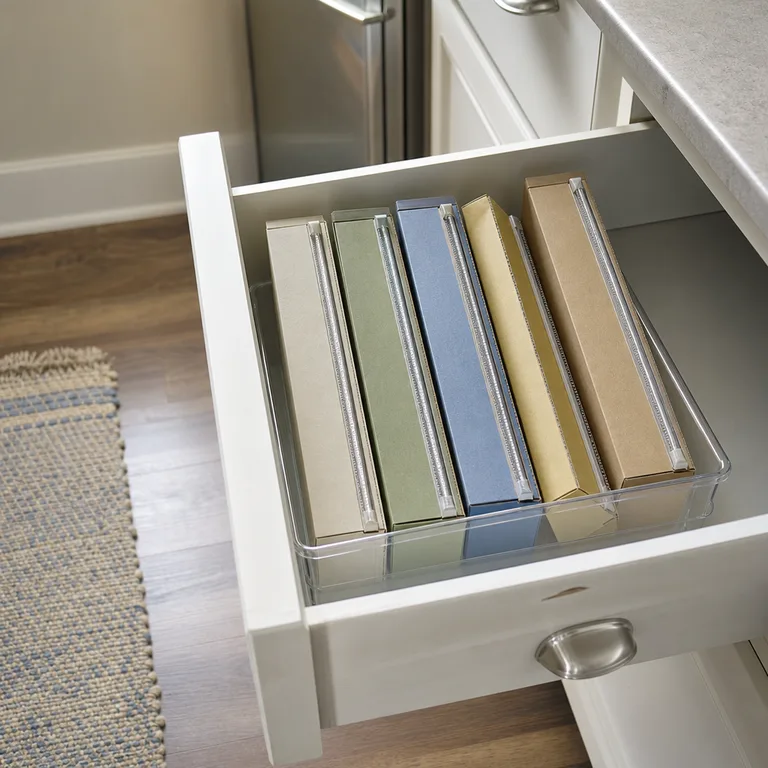
Face the cutter flaps upward and toward the drawer opening for easy access. This arrangement works especially well for a few slim boxes, but leave some room around the tops so fingers can grip them without tearing the cardboard.
Worth knowing: Tall or wide boxes may be unstable upright, and a deep drawer still needs enough overhead clearance for the cutter flaps.
3.Create a Dedicated Lane on a Cabinet Shelf
Reserve the front strip of a base-cabinet shelf for food wraps rather than letting the boxes disappear behind pots and bowls. A shallow bin, wire shelf fence, or low-sided tray keeps them aligned in one easy-to-reach lane.
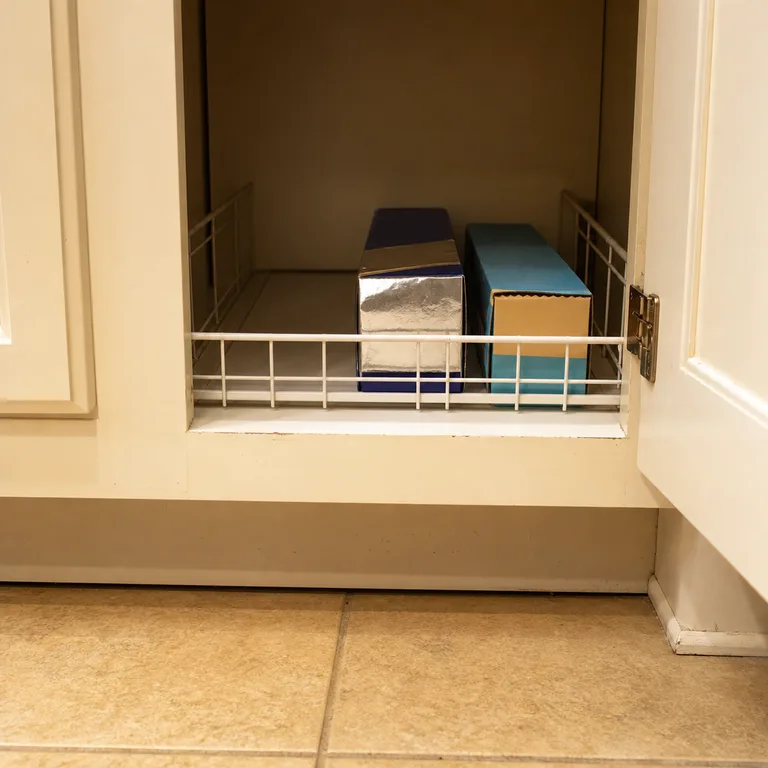
Keep the cutting ends facing the cabinet opening, with the most-used wrap closest to the door. This uses an existing shelf and costs less effort than adding a new organizer system, while preserving the packaging labels.
Worth knowing: A cabinet lane can become inconvenient if it blocks access to heavier cookware stored behind it.
4.Mount a Rated Basket Inside a Cabinet Door
A door-mounted basket can move lightweight wrap boxes off the shelf and onto the inside of a cabinet door. Choose hardware rated for the intended load, and check that the basket will clear shelves, hinges, and nearby handles when the door closes.
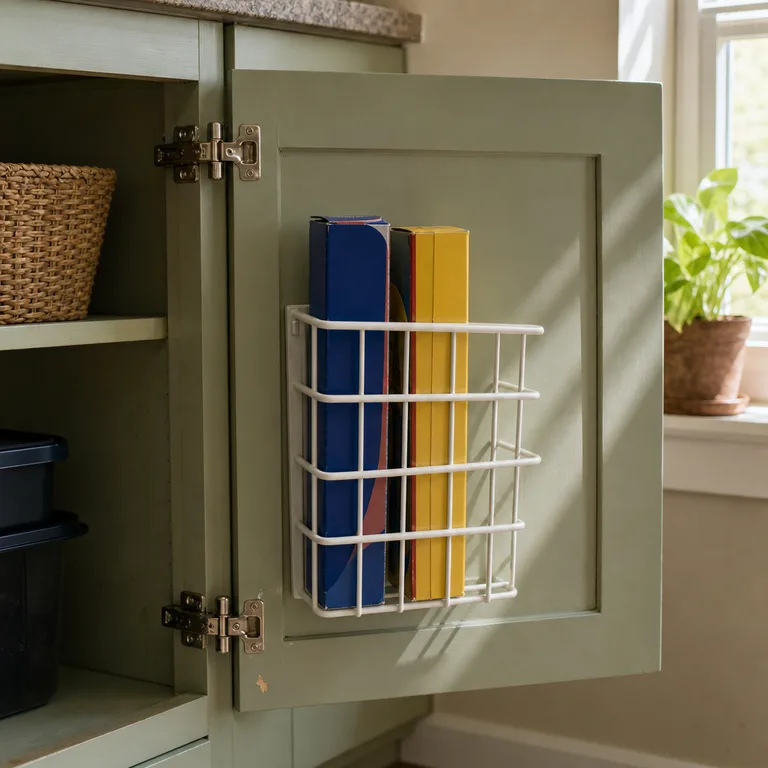
Install the basket so the boxes sit snugly rather than rattling against the door. This is most useful in a cabinet that opens fully and has a clear interior, with cutter flaps positioned where they stay protected from accidental bumps.
Worth knowing: Not every cabinet door can take mounted hardware, especially thin doors, doors with damaged material, or rental cabinetry where drilling is not allowed.
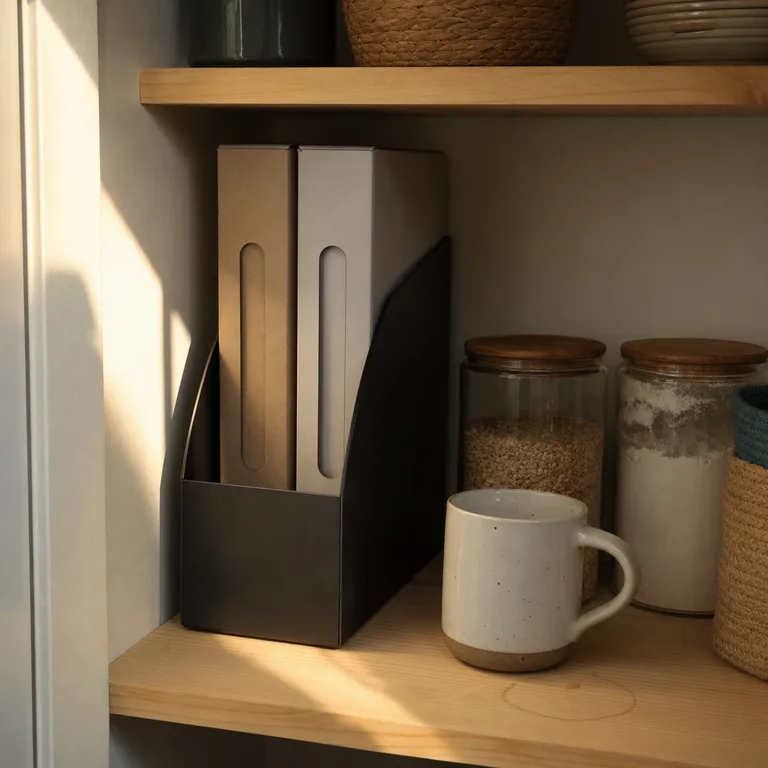
5.Use a Magazine Holder on an Open Pantry Shelf
A sturdy magazine-style holder gives a few wrap boxes an upright home on an open pantry shelf. The holder stops the boxes from sliding into a loose pile and leaves their ends visible for quick identification.
Choose a holder with sides tall enough to support the boxes but low enough to reach the cutter flap. Metal or wipeable plastic is usually easier to keep clean near food storage than an absorbent holder, particularly in a humid kitchen.
Worth knowing: Open shelving keeps boxes visible, so worn packaging and mismatched sizes can look cluttered if the shelf is in a main living area.
6.Carry Baking Wraps in a Handled Caddy
A handled caddy can gather parchment, foil, baking liners, and related tools when fixed storage is limited. Keep it in a cabinet or on a high shelf, then bring it to the counter only for baking or prep work.
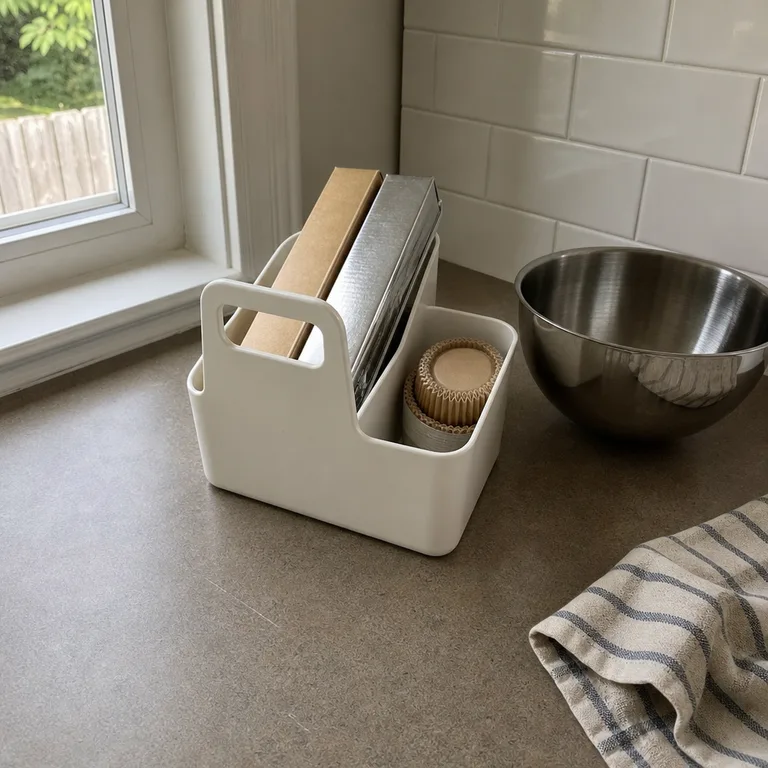
This approach makes sense for a kitchen where wraps are used in more than one spot or where shallow drawers are already full. Pick a caddy with a stable base and tall enough sides to keep boxes upright while it is carried.
Worth knowing: A caddy takes up shelf space and needs to be returned after use, so it is less convenient for wraps used several times a day.
7.Use a Freestanding Dispenser With a Guarded Cutter
For a roll used constantly, a freestanding dispenser can replace a soft cardboard box with a more stable cutting setup. Use one with a covered or guarded cutter, a non-slip base, and a design that holds the roll securely as material is pulled out.
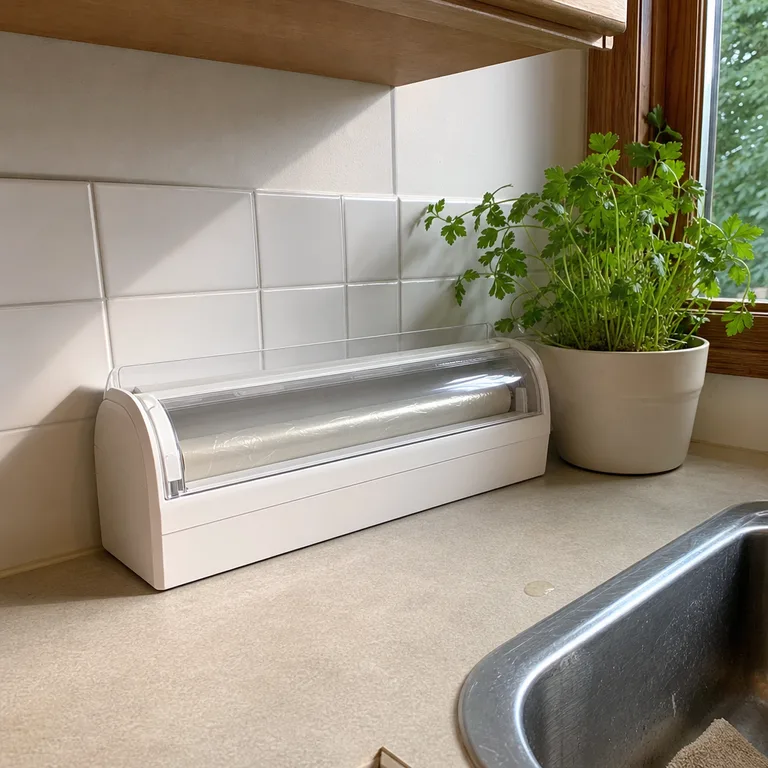
Store the dispenser in a child-inaccessible cabinet or other protected spot when it is not actively in use. Keep the original box label nearby if the dispenser does not clearly identify what is on the roll, especially when several wraps look similar.
Worth knowing: A freestanding dispenser uses more counter or cabinet space than a box and may not fit every roll size.
8.Store Flat Boxes in a Slim Shelf Basket
When drawers are too shallow, stack wrap boxes flat inside a long, low basket on a cabinet shelf. Put heavier boxes at the bottom and align cutter ends toward the front so the stack stays orderly and each box can be pulled forward.
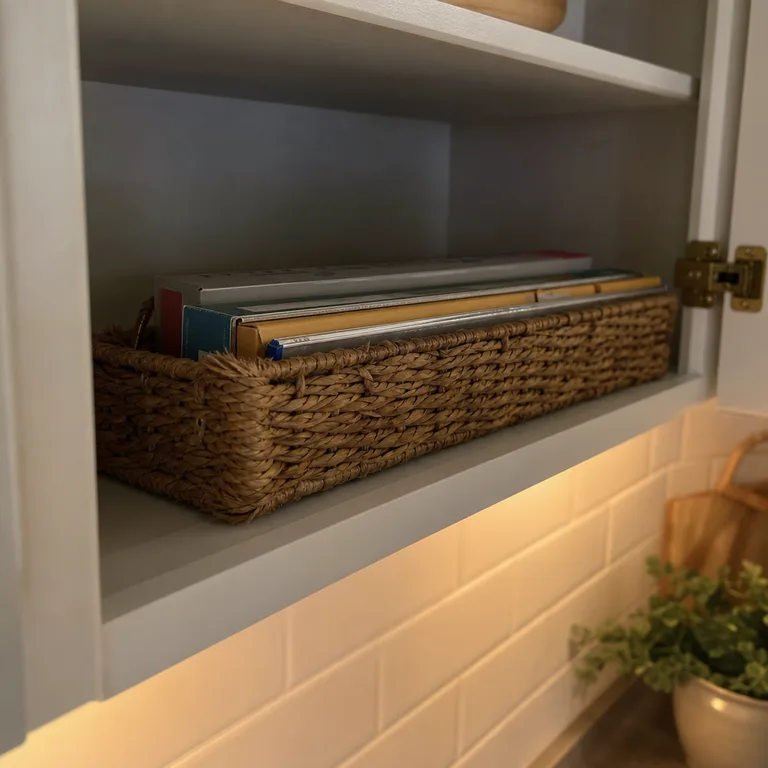
A slim basket contains the stack without requiring permanent installation. It also makes a useful choice for an upper cabinet, where loose boxes are more likely to shift or slide when items are removed.
Worth knowing: Boxes near the bottom must be lifted or moved to reach them, so this works best for wraps that are not all used equally often.
About the author
Dana Ruiz, Senior editor
Dana writes about small-space living, storage and low-cost decorating.
Keep reading
7 Broom and Mop Storage Ideas for Homes Without a Utility Closet
October 18, 2026
10 Small Appliance Storage Ideas for Kitchens Without an Appliance Garage
October 18, 2026
9 Water Bottle Storage Ideas That Keep Bottles and Lids Together
October 18, 2026
8 Hair Tool Storage Ideas for a Small Bathroom After Tools Cool
October 17, 2026