8 Christmas Village Layouts That Fit on One Shelf
A single living-room shelf can hold a Christmas village when the buildings are arranged as a deliberate scene rather than lined up in one row. These eight layouts use stable low risers and familiar household materials while leaving access for cords and the ventilation that illuminated pieces need.
As an Amazon Associate I earn from qualifying purchases.
1.Build a Main Street That Runs Along the Shelf
Turn the full shelf length into one continuous street. Set the tallest storefronts and façades near the wall, then place smaller houses, trees, and a narrow paper or fabric road nearer the front edge.
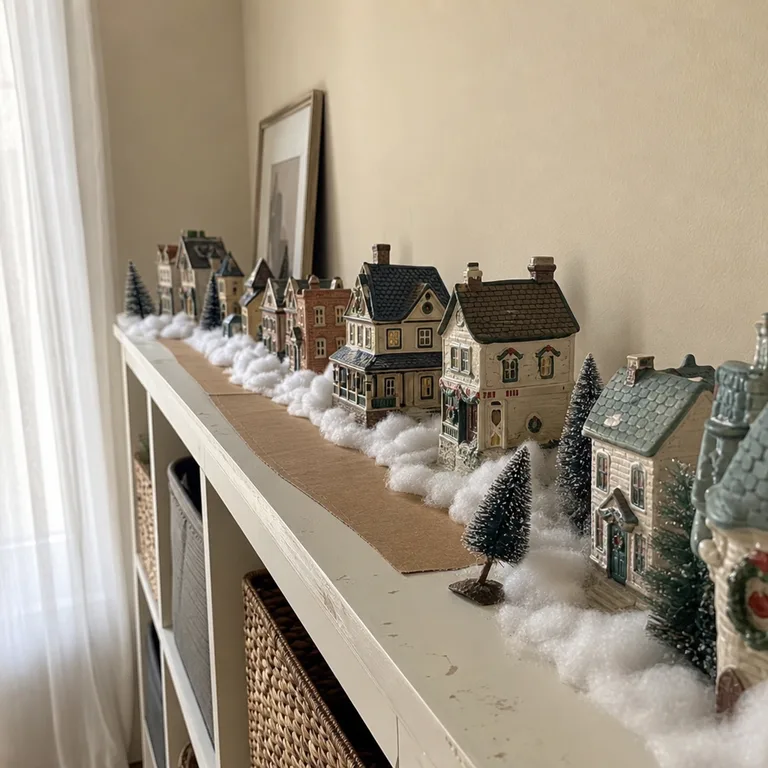
This layout makes a small collection look connected instead of scattered. Vary the spacing slightly so the buildings do not form a rigid line, and use a few trees to cover awkward gaps between pieces.
A strip of kraft paper, dark fabric, or a saved piece of packaging can suggest a road without adding bulk. Keep the road shallow enough that it does not cover switch access, cords, or the base vents of illuminated buildings.
Worth knowing: A long, narrow shelf can make the scene feel flat if every building is the same height, so use a few low, stable risers at the back where space allows.
2.Create a Town Square Around an Open Center
Arrange shops, a church, a town hall, or other civic-looking pieces around a bare central patch of snow. The open space can hold one small tree, a bench, or a simple figurine-scale feature without becoming crowded.
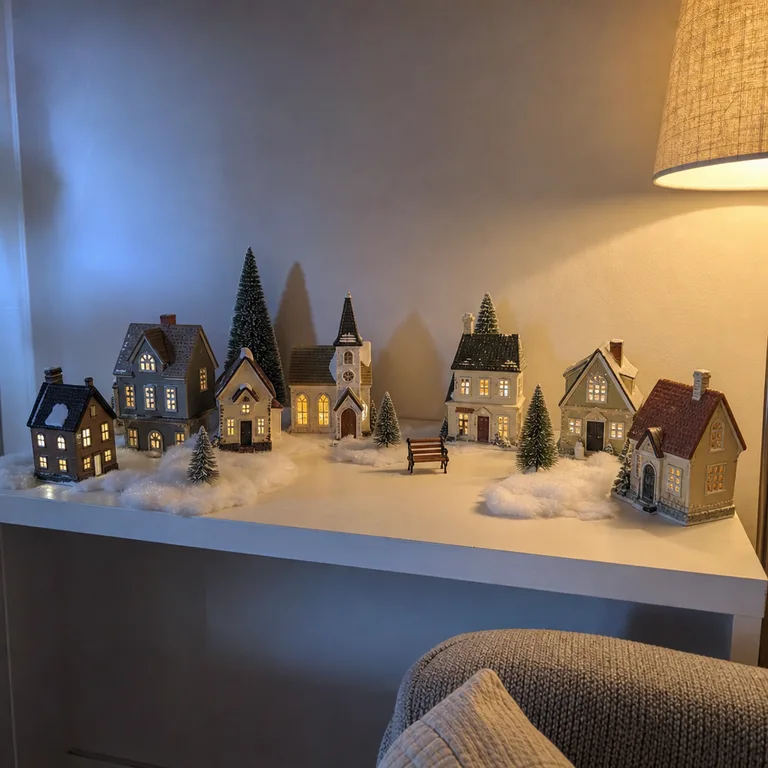
The empty center gives the eye somewhere to rest and makes even a mixed collection feel planned. Keep the buildings facing inward at slightly different angles so they appear to frame the square rather than form a wall.
Use batting, cotton, or a folded white scrap as the square, then tuck trees behind the buildings to define its edges. This approach works especially well on a deeper shelf, where there is room for a visible center and a back row.
Worth knowing: The square needs clear floor space, so it is less suitable when the collection is mostly large buildings.
3.Stack a Gentle Hillside With Low Risers
Create a gradual slope by putting the smallest buildings at the front and raising the rear pieces on shallow, secure risers. Cover the risers with snow material so the village reads as a hillside rather than a display stand.
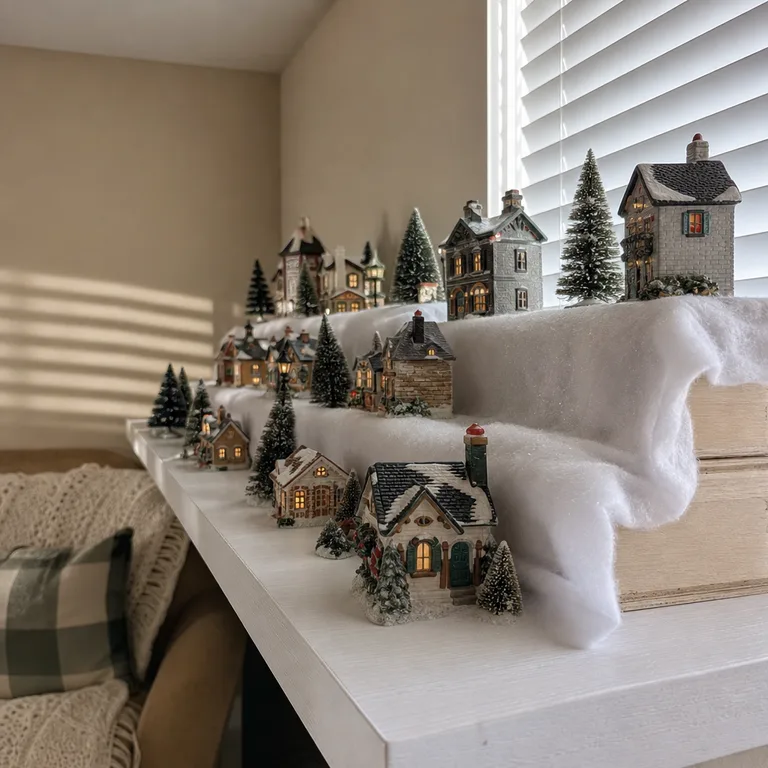
Height lets more façades stay visible on a single shelf. It also gives a small group of houses a stronger sense of depth without requiring a wider display area.
Reuse sturdy wood offcuts, low storage lids, or purpose-made risers that sit flat and do not rock. Place heavier pieces low, keep tall buildings away from the shelf edge, and leave space around lighted houses so warmth is not trapped beneath snow covering.
Worth knowing: This layout takes more careful setup because unstable or overly tall risers can make ceramic buildings unsafe.
4.Make a Station Scene With Tracks at the Front
Place a station toward one end of the shelf and run a simple train track across the front. Put homes, trees, and a platform behind it so the track remains visible without blocking the village buildings.
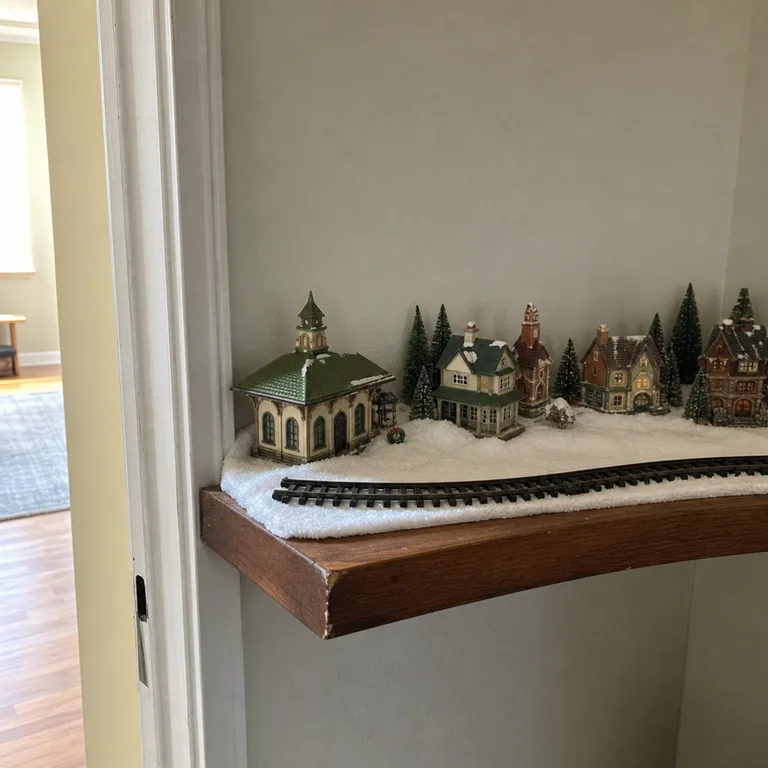
The curved or angled line of track gives the display a clear direction. It can make a modest collection feel like part of a larger town beyond the shelf.
Use track sections only if they fit comfortably inside the shelf edge; a painted paper strip can suggest rails where real track is too bulky. Keep the front area uncluttered, since small accessories beside the track can quickly make a shallow shelf look crowded.
Worth knowing: Working train pieces may need more room and power access than a one-shelf display can provide, so a static track is often the simpler choice.
5.Use a Bridge to Divide Two Small Neighborhoods
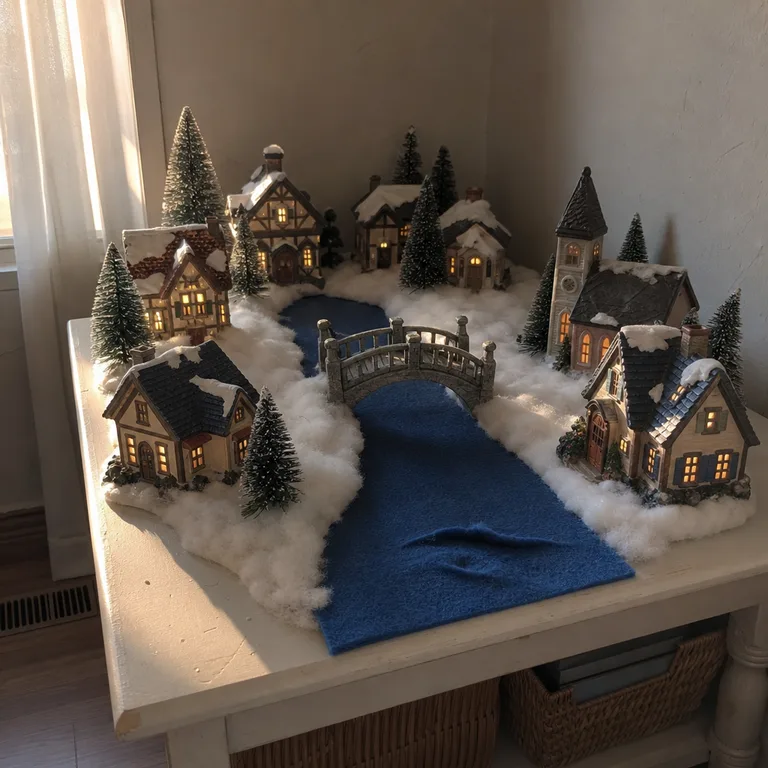
Lay a narrow stream, ravine, or snowy path diagonally across the shelf, then set a small bridge over it. Group a few buildings on each side to create two distinct neighborhoods that still belong together.
The dividing line adds movement to a display that might otherwise look like one row of houses. A bridge also creates a natural focal point without needing a large centerpiece.
Blue felt, folded paper, or a darker strip of fabric can become a stream, while plain white material can suggest a ravine or path. Keep the bridge low and firmly supported, especially if the shelf is bumped when decorations are being dusted or rearranged.
Worth knowing: A diagonal divide uses valuable shelf surface, so this composition is best with a smaller number of buildings.
6.Tuck the Village Into a Woodland Clearing
Use varied-height trees to form most of the scene, leaving a clearing for only a few cottages. Set the houses slightly apart instead of filling every open spot, so the trees look like a deliberate woodland border.
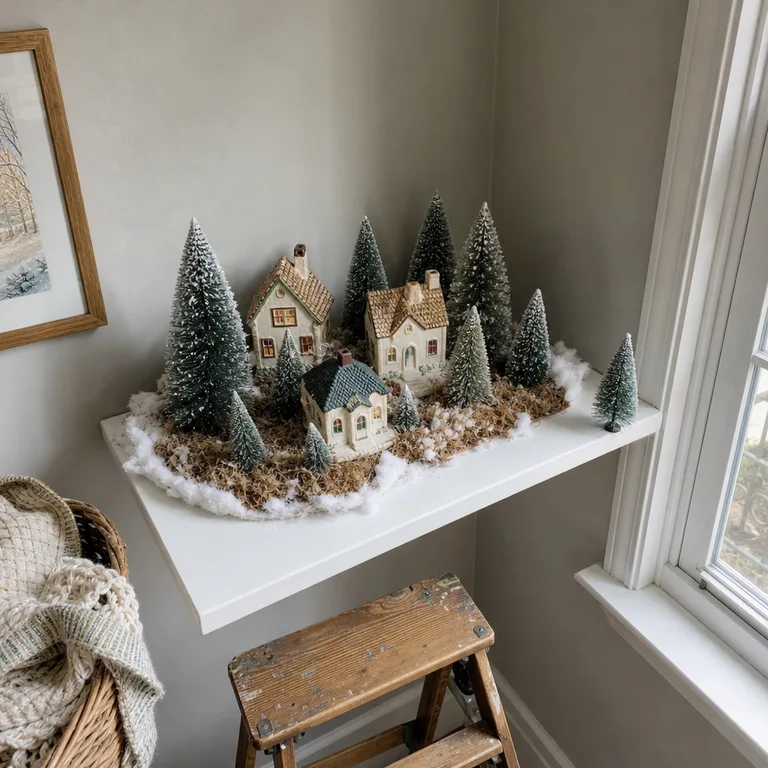
This is a useful layout for a sparse collection or for buildings that do not match closely. The repeated trees create visual unity and make the village feel quieter and more spacious.
Gather bottlebrush trees already used elsewhere in seasonal decorating, then place the tallest ones toward the back and ends of the shelf. Avoid packing trees tightly around illuminated houses, and keep flocking or loose snow away from hot bulbs and vents.
Worth knowing: Too many trees can hide the buildings, particularly on a shelf viewed from below or across the room.
7.Cluster Stalls for a Winter Market
Group small stalls, a bakery, a shop, and tiny accessories closely around a narrow snowy aisle. Keep the market concentrated in the center, with a few trees or a larger building at each end to give the scene a clear boundary.
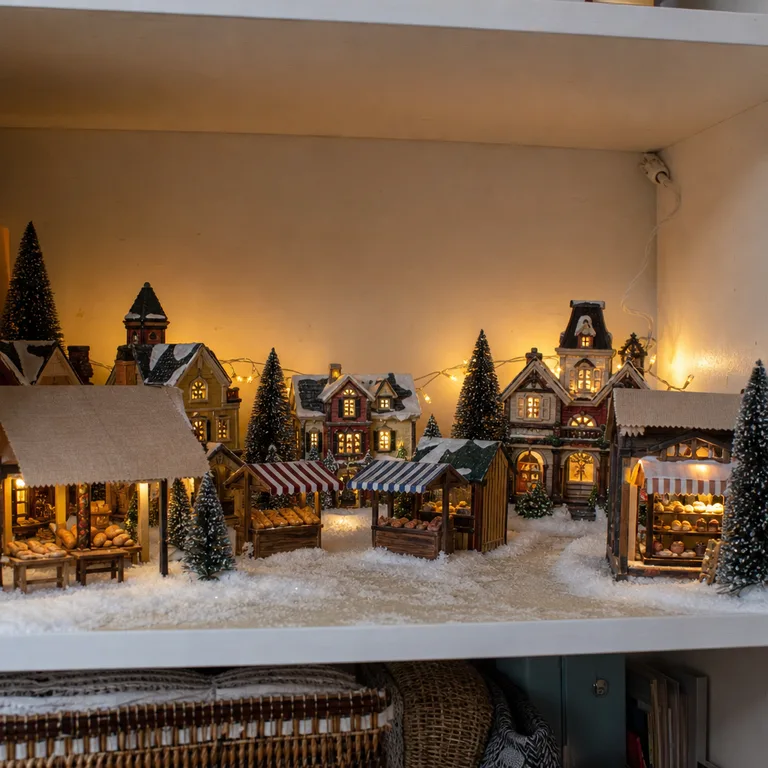
A dense market arrangement makes small accessories feel useful rather than random. It also gives older village pieces a new role when there are not enough houses for a full neighborhood.
Make simple stall awnings from folded kraft paper or fabric scraps, and use existing miniature items sparingly so the aisle remains visible. If adding lights, route cords behind the display with clips or ties rather than hiding them under snow material or running them across the shelf front.
Worth knowing: Market scenes can look messy quickly, so they need fewer accessories than expected and regular dusting around the small details.
8.Stagger Buildings in Deep Rows for a Fuller Scene
Offset buildings in two or three rows instead of placing each house directly behind another. Start with a low cottage near the front, shift a taller piece behind it, and fill visible openings with trees, fences, or a small accessory.
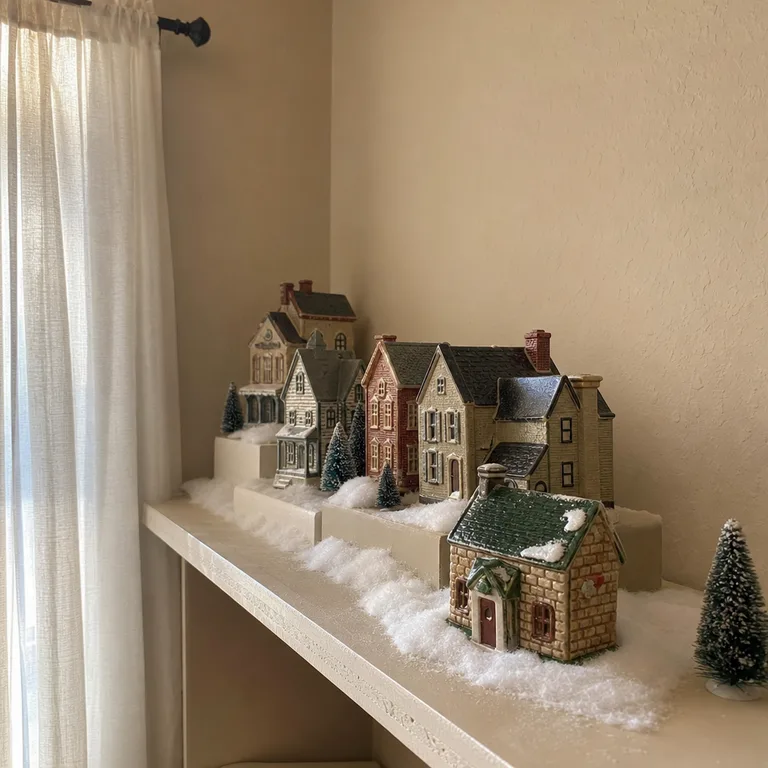
This arrangement gives a short shelf more apparent depth while keeping several façades in view. It works well for collections with different building sizes because the staggered placement avoids a formal skyline.
Measure the shelf depth and test the rows without snow first, ensuring every piece has a stable base and remains visible from the usual viewing position. Use shallow risers only for rear buildings that need extra height, and leave a reachable path for any switches or cords behind them.
Worth knowing: This layout is harder to appreciate on an extremely narrow shelf because the rear row may be mostly hidden from view.
About the author
Dana Ruiz, Senior editor
Dana writes about small-space living, storage and low-cost decorating.
Keep reading
10 Living Room Rug Looks That Make Pet Hair Less Noticeable
November 2, 2026
8 Stair Riser Looks That Update Plain Steps Without Rebuilding Them
November 2, 2026
10 Budget Ways to Refresh a Brick Fireplace Without Painting the Brick
November 2, 2026
8 Table Linen Storage Ideas for Homes Without a Dining Hutch
November 2, 2026