8 Christmas Tree Ribbon Ideas Using Ribbon You Already Own
Saved ribbon can change a Christmas tree’s shape and rhythm without requiring matched lengths, new ornaments, or a single color scheme. These eight arrangements use ribbon in visibly different ways, from full-height cascades to a topper that becomes the main feature, while keeping lights accessible and the tree stable.
As an Amazon Associate I earn from qualifying purchases.
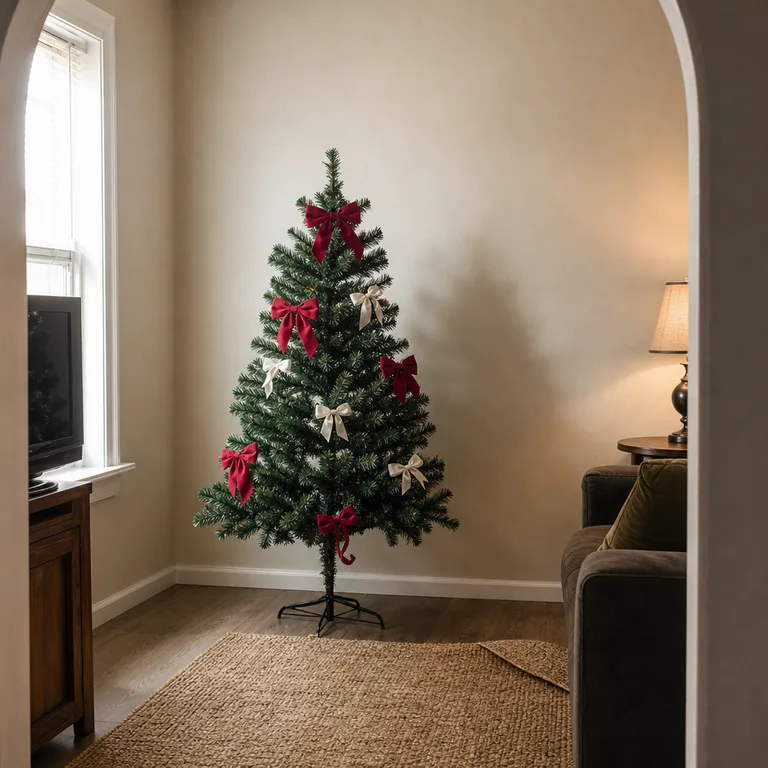
1.Run Vertical Ribbon Cascades From the Top Third
Choose several ribbon lengths in related or deliberately mixed textures, then secure their upper ends in the top third of the tree. Let each piece fall toward the lower branches in a soft column, pushing a few sections inward so the ribbon appears to travel through the tree rather than sit on its surface.
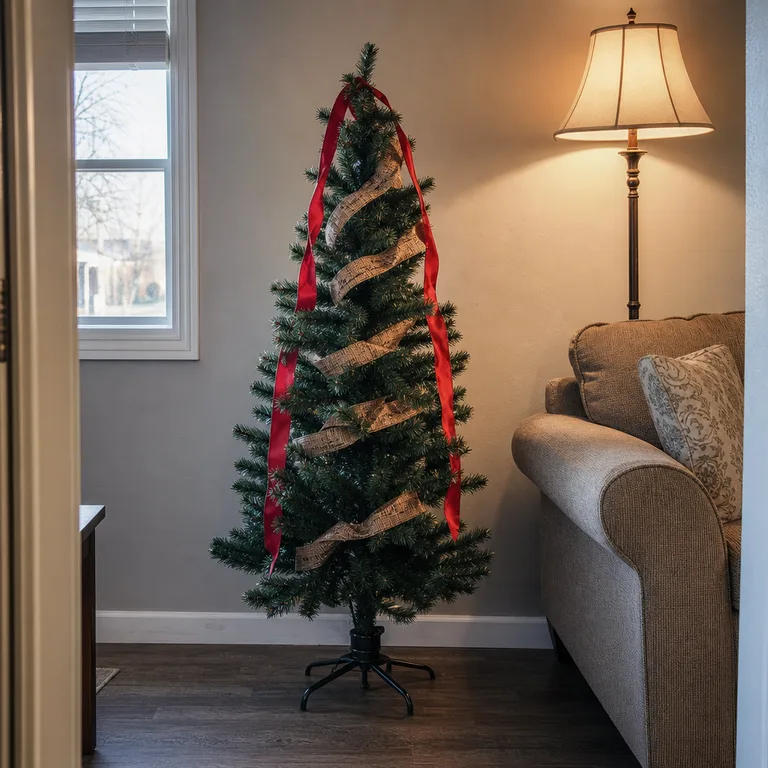
This arrangement gives a small tree more height and makes uneven saved lengths look intentional. Use the longest pieces near the center front, and reserve shorter lengths for the sides or back; floral wire or branch tips can hold the ribbon without adding bulky hardware.
Keep the stand, plug, and light connections clear, and follow the tree manufacturer’s instructions for arranging anything near lights. A few open gaps between cascades help the branches and lights remain visible.
Worth knowing: Vertical cascades can look sparse on a very wide tree unless there is enough ribbon to repeat them around the full front and sides.
Related: 12 Ways to Style Mismatched Christmas Ornaments on the Tree You Own
2.Wrap One Diagonal Band Around the Tree
Take one longer ribbon length and bring it around the tree in a relaxed downward spiral. Start near the upper branches, travel diagonally across the front, and let the spacing widen slightly toward the base instead of wrapping every row of branches.

A single diagonal band creates a clear path for the eye and works especially well with plaid, wired ribbon, or any wide ribbon that would be lost in small tucks. Secure it only at a few branch points so it keeps a soft curve and does not flatten the tree’s outline.
If the ribbon is creased from storage, shape it with gentle bends as it is placed rather than pulling it tight. Leave room between each pass for light strands to show through.
Worth knowing: This method needs one fairly long piece of ribbon, so it is less practical when the saved supply is mostly short remnants.
3.Make Short Ribbon Tucks Inside the Branches
Fold short ribbon pieces into loose loops, waves, or shallow V shapes, then nest them inside branch pockets. Place each tuck far enough into the tree that the branch tips partly frame it, with the ribbon showing as a small flash of color or texture.

This is a useful treatment for offcuts, narrow lengths, and ribbons that do not match. Rather than trying to make every piece reach around the tree, repeat the same tucked shape at different points through the middle and outer branches.
Use twist ties, floral wire, or the tree’s own branch tips to hold slippery ribbon in place. On a real tree, avoid packing ribbon tightly against damp foliage, which can make the branches harder to air out.
Worth knowing: Short tucks read best up close and may not have enough visual impact on a large tree viewed from across the room.
4.Drape a Loose Ribbon Garland in Wide Scoops
Lay a long ribbon across the branch tips in broad, shallow scoops, attaching it at the high points and allowing the middle to dip gently. Work from the top downward, changing the width of the scoops slightly so the garland does not look overly measured.
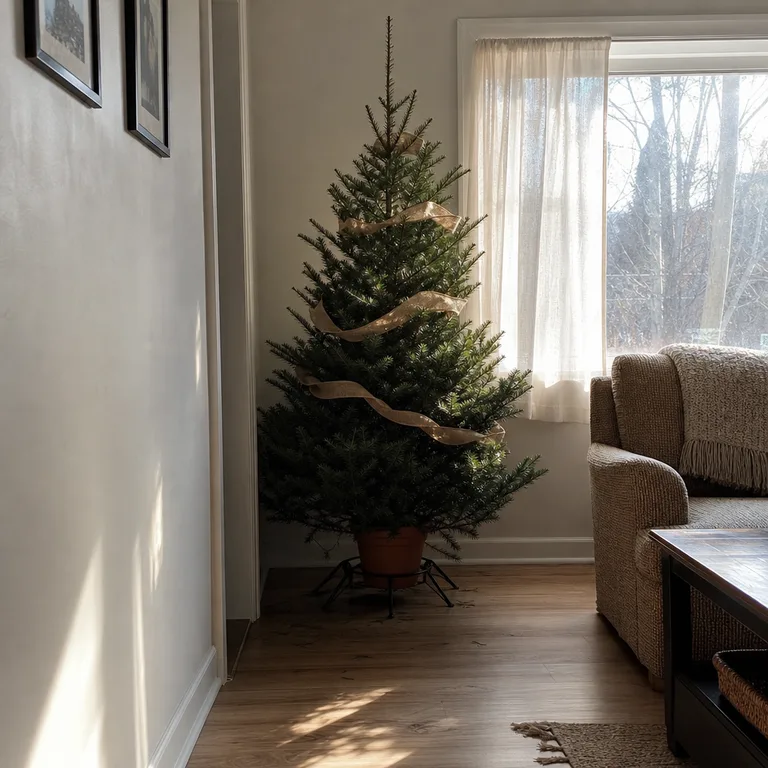
The result is softer than a tight spiral and gives ribbon a traditional garland role without needing a separate garland. Linen, cotton, burlap, and other matte ribbons suit this approach because their texture remains visible across the open curves.
Keep the loops loose enough that branches can retain their shape. A real tree needs particular care: do not press the ribbon into fresh needles or block access to the water reservoir and stand.
Worth knowing: Loose scoops can shift when the tree is brushed past, especially if the ribbon is smooth or the branches are very sparse.
5.Tie Simple Bows at Branch Ends
Turn separate ribbon lengths into individual bows and tie them directly onto outer branch tips. Place fuller bows on lower or middle branches, then use smaller bows near the top so the tree keeps a tapered outline.
Branch-end bows make mixed ribbon feel collected rather than mismatched because each piece becomes its own small decoration. Velvet, satin, grosgrain, and printed ribbon can all work together when the bow shape is repeated across the tree.
Use simple tied bows instead of elaborate multi-loop versions if the ribbon supply is limited. Wire-edged ribbon can be lightly shaped after tying, while soft ribbon may need a small piece of floral wire at the center to stay open.
Worth knowing: Many bows can make a small tree look busy, so this arrangement needs restraint when the ribbon is wide or heavily patterned.
6.Hang Narrow Ribbon Streamers From the Crown
Gather narrow saved ribbons at the crown, fasten them beneath the top branches, and let the ends fall freely through the upper half of the tree. Vary the lengths and directions so they look like separate streamers rather than a single dense curtain.
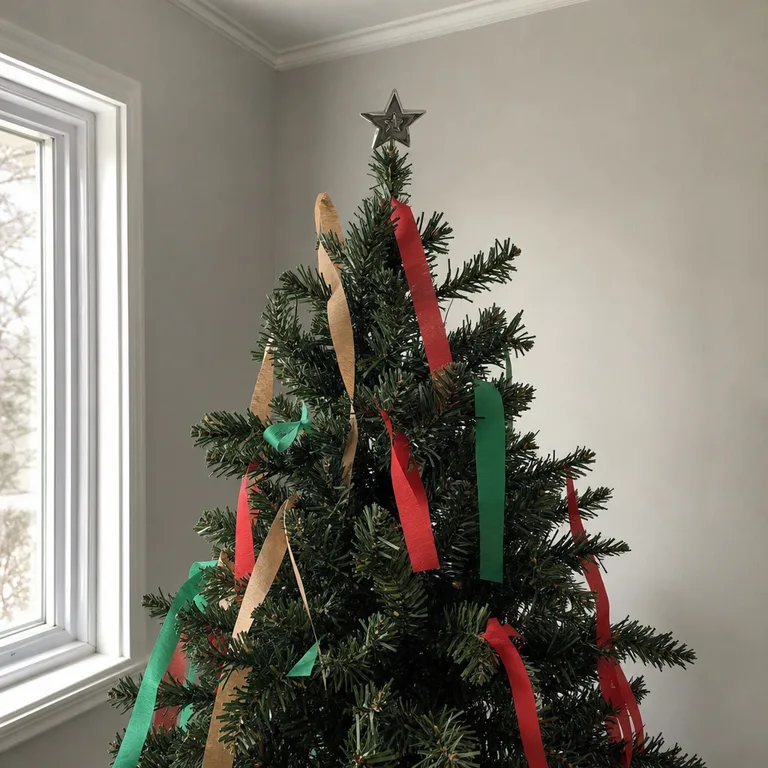
This approach gives narrow ribbon a purpose when it is too slight to wrap around branches. It also draws attention upward without needing a large topper, which can be helpful on a compact tree with a flexible top section.
Secure the streamer bundle with a discreet tie and check that it does not interfere with light wires or make the tree top pull forward. For homes with pets or young children, keep the lowest loose ends high enough that they cannot be easily tugged.
Worth knowing: Freely hanging streamers can catch on passing hands or pets, making this less suitable for a tree in a tight walkway.
7.Place Paired Ribbon Strips in Repeating Lanes
Select two ribbons with a useful contrast, such as velvet and jute or satin and grosgrain, and place them side by side in loose vertical or diagonal lanes. Keep a small gap between the strips so each material remains visible instead of blending into one thick band.

Paired lanes create a more deliberate look from ribbons that might seem unrelated on their own. Repeat the same pairing in two or three areas rather than covering every branch, which gives the tree structure while leaving room for lights and ornaments.
Attach each strip separately at a few points so one ribbon does not drag the other out of position. This is also an effective way to use different lengths: let the longer strip continue farther down while the shorter one ends naturally higher up.
Worth knowing: The paired effect is harder to see when both ribbons are very similar in color, width, and finish.
8.Build a Ribbon-Led Tree Topper With Long Tails
Use the best remaining ribbon lengths to make a loose bow, knot, or gathered cluster at the crown. Let two or three tails trail down the front of the tree, with shorter pieces tucked into the top branches to fill out the topper.
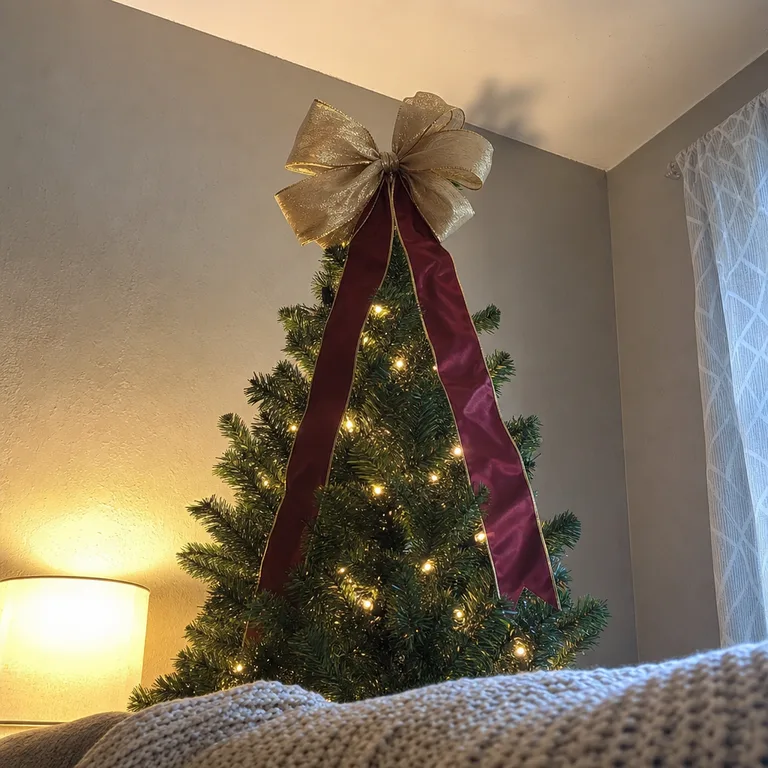
A ribbon-led topper gives the tree a focal point without relying on a heavy star, figure, or oversized ornament. It is particularly useful when ribbon is available in a few good lengths but not enough quantity for a full-tree treatment.
Fasten the topper to sturdy upper branches and keep it light so the tree tip does not lean. Wired ribbon can hold a bow shape more easily, but soft ribbon can still work when the loops are smaller and the tails are allowed to drape naturally.
Worth knowing: A flexible or weak tree top may not support even a lightweight ribbon cluster without extra support from nearby branches.
About the author
Dana Ruiz, Senior editor
Dana writes about small-space living, storage and low-cost decorating.
Keep reading

8 Budget Interior Door Makeovers for Plain Flat Doors
October 29, 2026
10 Christmas Stocking Displays for Small Homes With No Mantel
October 29, 2026

8 Christmas Gift-Wrapping Stations That Pack Away in a Small Home
October 31, 2026

9 Kids' School Paper Organization Ideas That Separate Forms From Keepsakes
October 31, 2026