10 Baking Sheet Storage Ideas for Narrow Kitchen Cabinets
Narrow lower cabinets work better when baking sheets, cooling racks, cutting boards, and muffin tins stand on edge instead of forming a heavy horizontal stack. These ten options cover freestanding, adhesive, and installed dividers, with enough clearance to remove one piece without dragging out the rest.
As an Amazon Associate I earn from qualifying purchases.
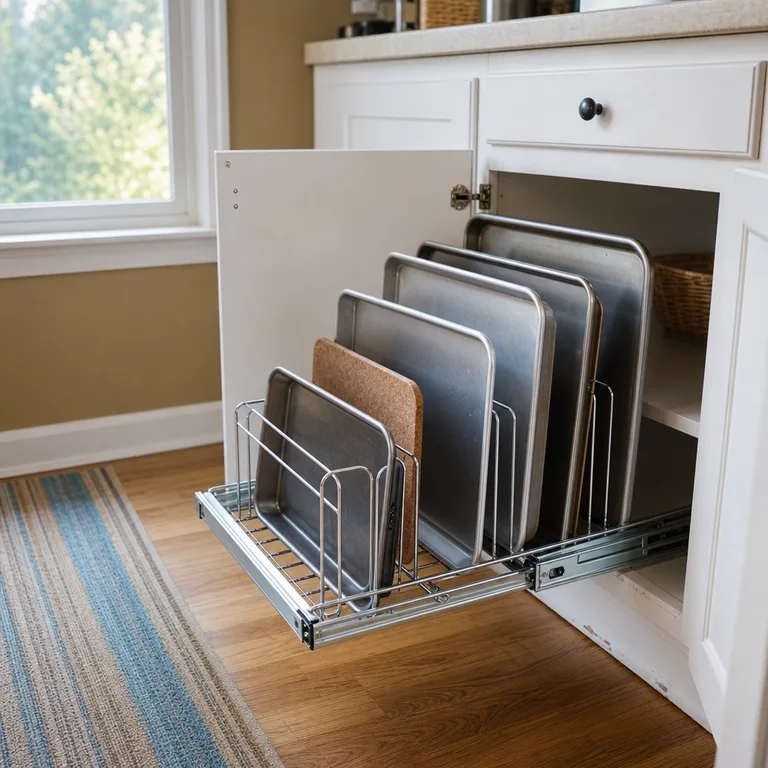
1.Use a Freestanding Wire Rack on the Cabinet Shelf
A coated wire rack gives baking sheets their own upright slots without changing the cabinet itself. It works especially well for lighter cookie sheets, cooling racks, and flat cutting boards that otherwise slide into a leaning pile.
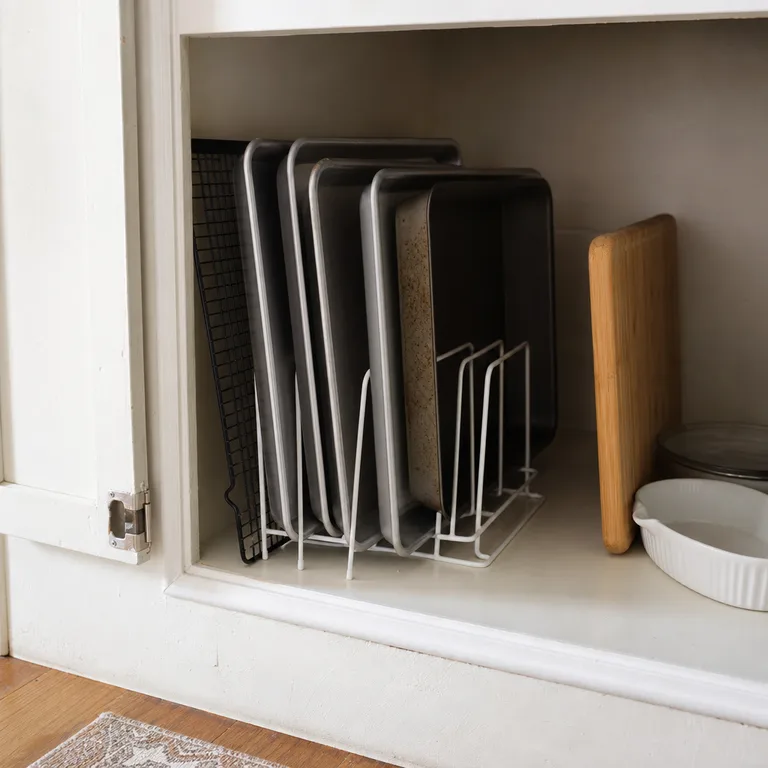
Measure the cabinet’s clear width, depth, and height, then compare those dimensions with the rack footprint and slot spacing. Choose a rack that sits flat and fills enough of the shelf width that it will not scoot sideways when a tray is pulled out; a non-slip liner can add useful grip.
Worth knowing: Freestanding racks can tip or slide when loaded with heavy roasting pans, especially on a slick shelf.
2.Fit an Adjustable Tension Divider Across the Cabinet
A spring-loaded divider can create a separate vertical bay for trays, boards, or pan lids in a cabinet that has no built-in organizer. It is a rental-friendly way to keep a small group of items from collapsing into the rest of the cabinet.
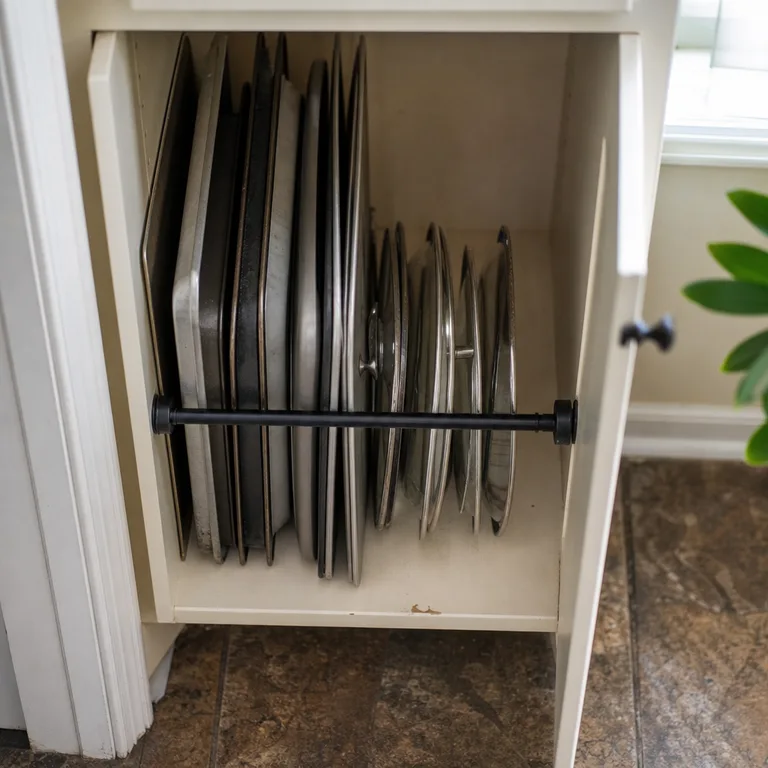
Measure the inside span between cabinet walls and check that the contact points are smooth, clean, and solid. Set the divider around the widest item in the group, leaving enough room to grasp one tray without forcing its neighbors outward.
Worth knowing: Tension dividers need periodic checks and may lose grip on textured, greasy, or damaged cabinet walls.
3.Install Fixed Vertical Dividers in a Deep Cabinet
Fixed dividers turn a deep lower cabinet into strong, made-to-fit parking spaces for roasting pans, pizza pans, muffin tins, and sheet trays. Because each item has a defined slot, heavy pieces are less likely to shift when one is removed.
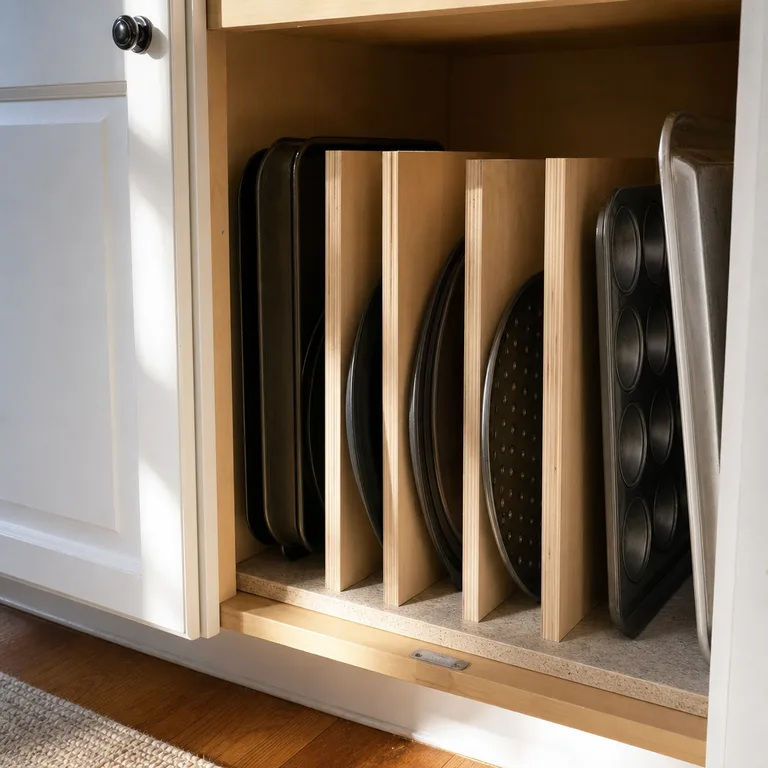
Plan the layout around the tallest and widest bakeware first, including the space needed to lift it out below the shelf above. Plywood strips or cabinet-grade dividers can be screwed into a base panel rather than directly into the cabinet shelf when a removable insert is preferred.
Worth knowing: This is a more involved installation and may not be appropriate for rented, shared, or unapproved cabinetry.
4.Turn a File Sorter Into a Small-Tray Holder
A metal file sorter can hold quarter sheets, small cooling racks, silicone mats, and thin cutting boards in an overlooked section of the cabinet. The narrow slots keep small pieces visible instead of letting them disappear under larger pans.
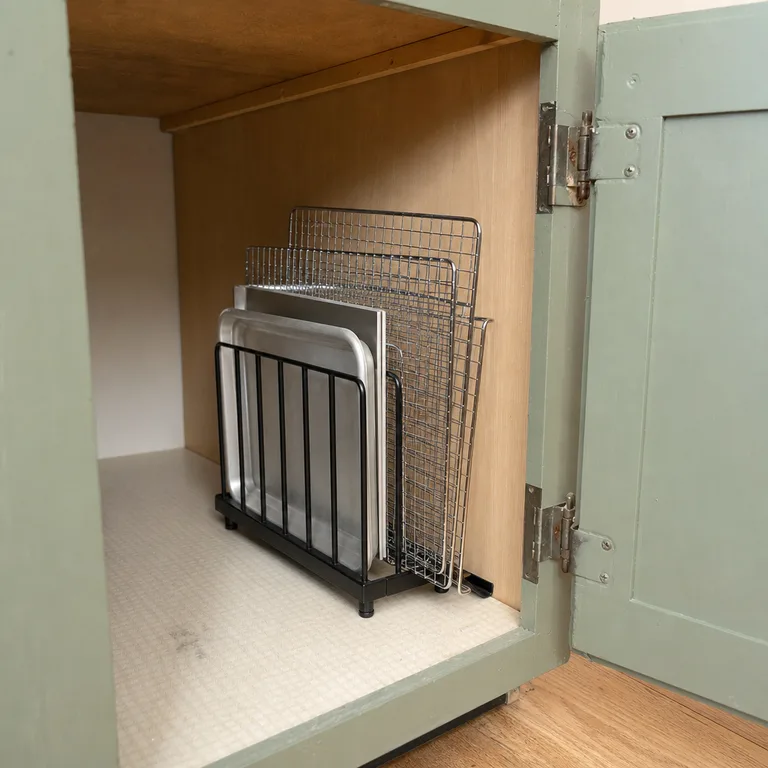
Use one with a broad, stable base and place it along a cabinet wall rather than in the middle of the shelf. Reserve it for lightweight bakeware, and use a shelf liner beneath it if the feet might scratch the cabinet surface.
Worth knowing: File sorters are not designed for oversized trays or heavy cast-iron bakeware.
5.Add a Slim Pull-Out Pan Organizer
A slim pull-out organizer brings baking sheets forward from the back of a narrow cabinet, so each tray can be selected separately. This is useful when the cabinet is deep but its opening makes it hard to reach stored pans behind other cookware.
Measure the usable interior width rather than the cabinet face opening, then check depth, door hinges, and slide-mounting space. Follow the slide hardware instructions closely, and make sure the organizer can fully extend without hitting an adjacent door or appliance.
Worth knowing: Pull-out organizers require careful installation and may not fit cabinets with limited side clearance or unsuitable mounting surfaces.
6.Use Adhesive Hooks to Secure a Leaning Board
A small adhesive hook near the front edge of the shelf can act as a stop for a cutting board, pizza pan, or flat tray stored on edge. It keeps the group from slowly sliding forward and falling when the cabinet door opens.
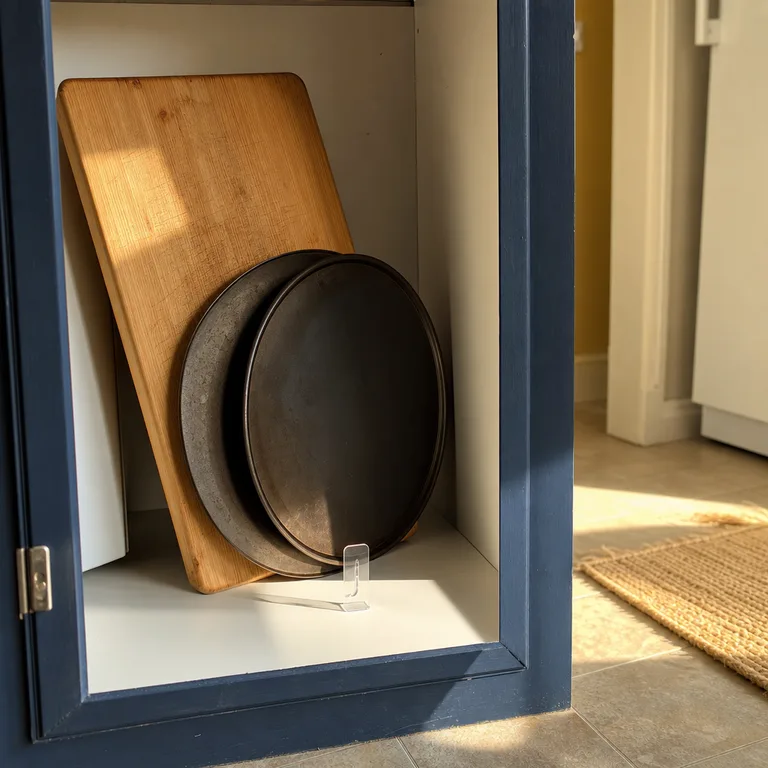
Clean and dry the mounting spot thoroughly, then position the hook where it blocks the lowest edge without making the board hard to remove. This works best as a simple restraint for a few light pieces, not as the main support for a crowded stack.
Worth knowing: Adhesive can fail in humid, greasy, or frequently scrubbed cabinets, so it should not be trusted with heavy bakeware.
7.Create a Vertical Bay Beside the Cabinet Wall
The slim space beside a stack of pots can become a dedicated bay for full-size sheet pans and boards. Separating the large flat pieces from round cookware prevents them from becoming a hard-to-reach layer at the bottom of the cabinet.
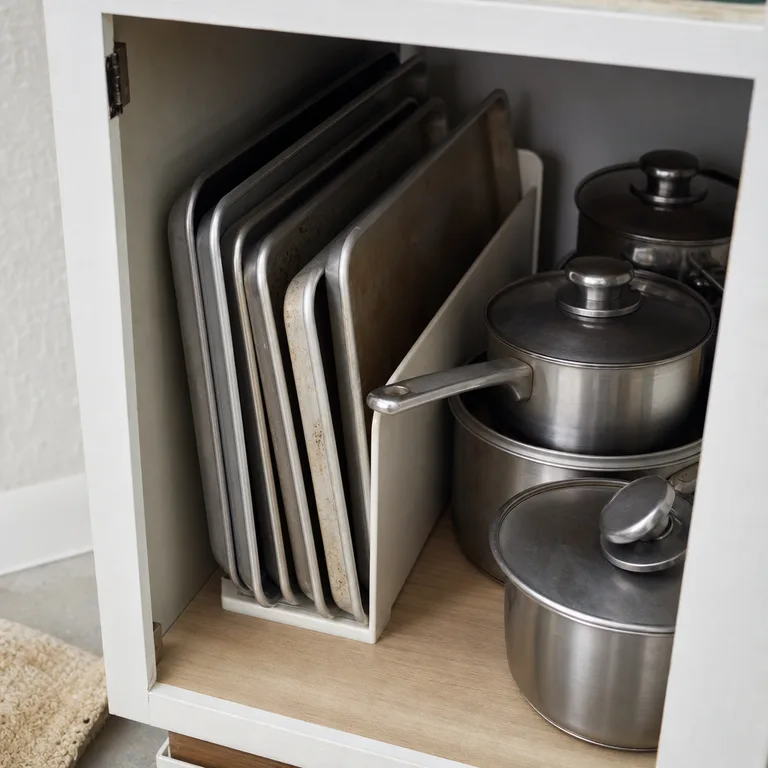
Use a narrow plastic or wood divider to keep the bakeware upright against the cabinet wall. Check the clear height from shelf to shelf before committing to this layout, since pan rims need room to come out without scraping the shelf above.
Worth knowing: This approach depends on having an unused strip of cabinet width and enough vertical clearance for the tallest tray.
8.Hold Tins in a Tension-Rod Grid
Short tension rods placed front to back can form adjustable channels for muffin tins, shallow baking dishes, and narrow trays. The rods give each item an edge to lean against, which makes a mixed collection easier to sort.
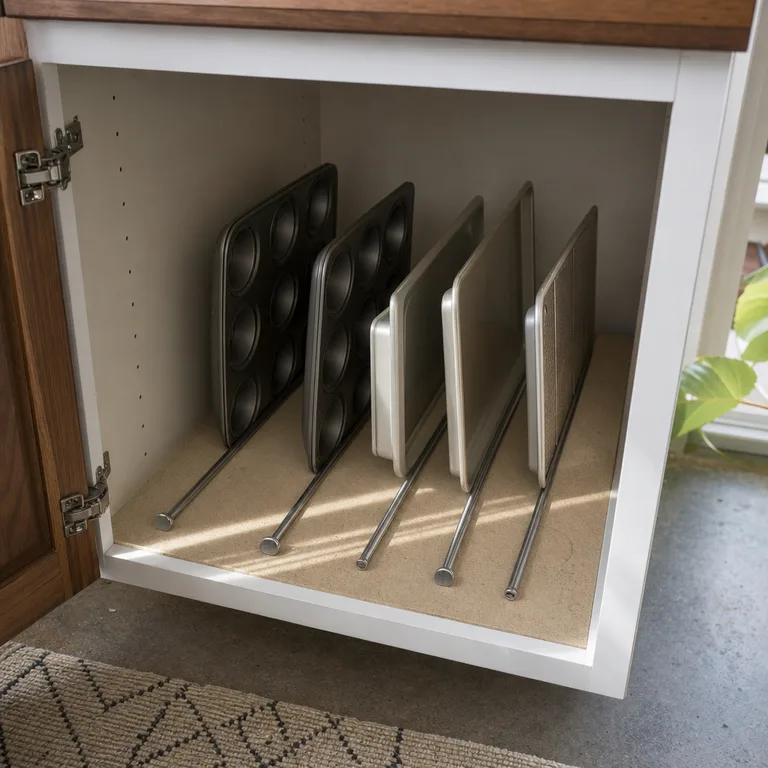
Measure the inside depth and use rods that can brace firmly between the cabinet’s front and back surfaces. Keep the heaviest tins closest to a cabinet wall or in the widest channel, and avoid packing the grid so tightly that the rods bow under pressure.
Worth knowing: Tension rods are best for light to moderate bakeware and can shift if overloaded or installed against weak surfaces.
9.Store Cooling Racks in a Magazine Holder
An open metal magazine holder keeps cooling racks, silicone mats, and pastry boards together in a narrow leftover space. It separates these thin, flexible pieces from baking sheets, so they do not bend around or snag on larger pans.
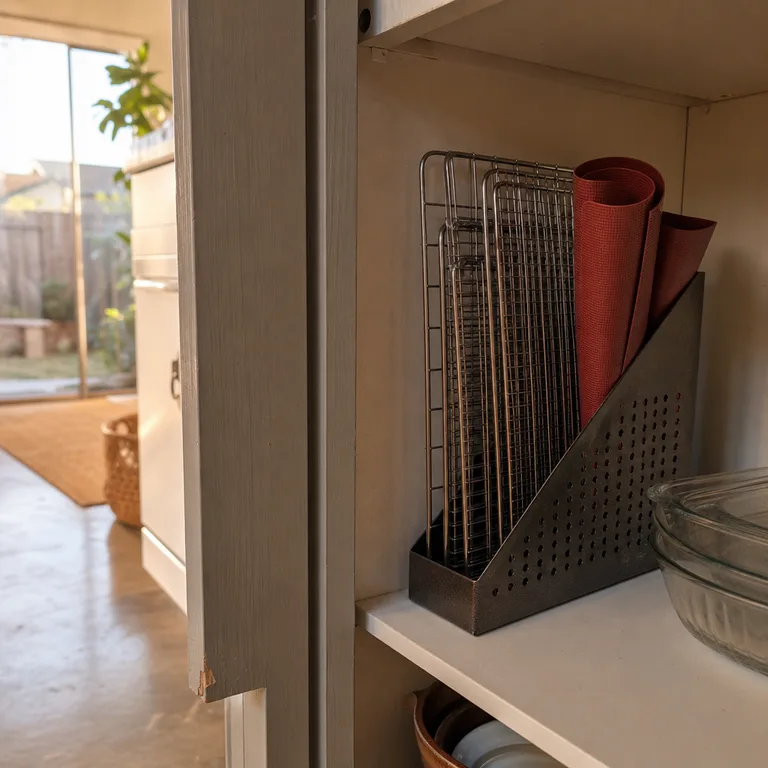
Choose a sturdy holder with open sides that make the contents easy to grab, and position it near the cabinet front if these items are used often. Stand silicone mats loosely or roll them gently so they do not hold a sharp crease.
Worth knowing: A magazine holder usually has too little weight capacity and slot width for a substantial stack of sheet pans.
10.Build a Removable Crate Insert for Loose Bakeware
A simple open crate with internal dividers creates a contained upright-storage insert for mismatched tins, loaf pans, boards, and shallow trays. The whole insert can be lifted out for cleaning or moved if the cabinet needs to serve another purpose.
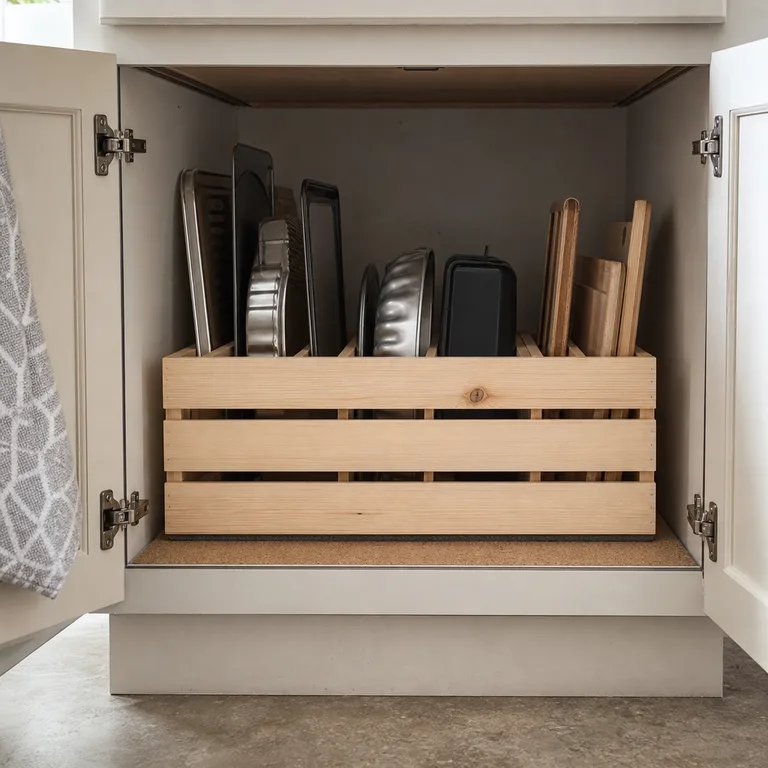
Build or adapt the crate to fit the cabinet’s interior dimensions with a little clearance at the sides and top. Add a protective liner under the crate and smooth every cut edge, since metal pan rims can catch on rough wood or wear through a cabinet shelf finish.
Worth knowing: A crate insert takes up some usable cabinet space and can become heavy to lift when it is filled with bakeware.
About the author
Dana Ruiz, Senior editor
Dana writes about small-space living, storage and low-cost decorating.
Keep reading
10 Charging Station Organization Ideas That Hide Everyday Cable Clutter
October 6, 2026
10 Blanket Storage Ideas for a Living Room Without Spare Closets
October 6, 2026
10 Food Container Storage Ideas That Keep Every Lid Easy to Find
October 4, 2026

10 Small Living Room Ideas for Keeping a Pet Bed Out of the Walkway
October 6, 2026