9 Pot and Pan Storage Ideas That Protect the Cookware You Own
Mixed cookware is easier to retrieve when weight, handle shape, and finish determine the storage arrangement instead of trying to make every piece stack the same way. These nine setups use existing cupboards, drawers, and open wall space while keeping surfaces from rubbing and heavy pieces within a safe lifting reach.
As an Amazon Associate I earn from qualifying purchases.
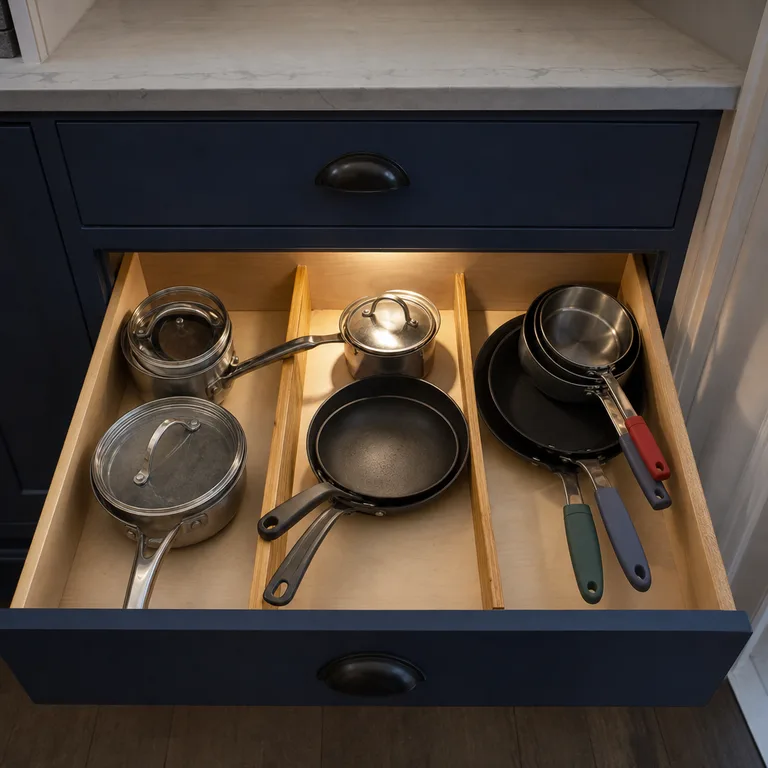
1.Build Short Stacks From Largest to Smallest
Make two or more low stacks instead of one tall pile. Put the widest, heaviest compatible pan at the bottom and work upward to smaller pieces, with handles turned toward the cupboard opening.
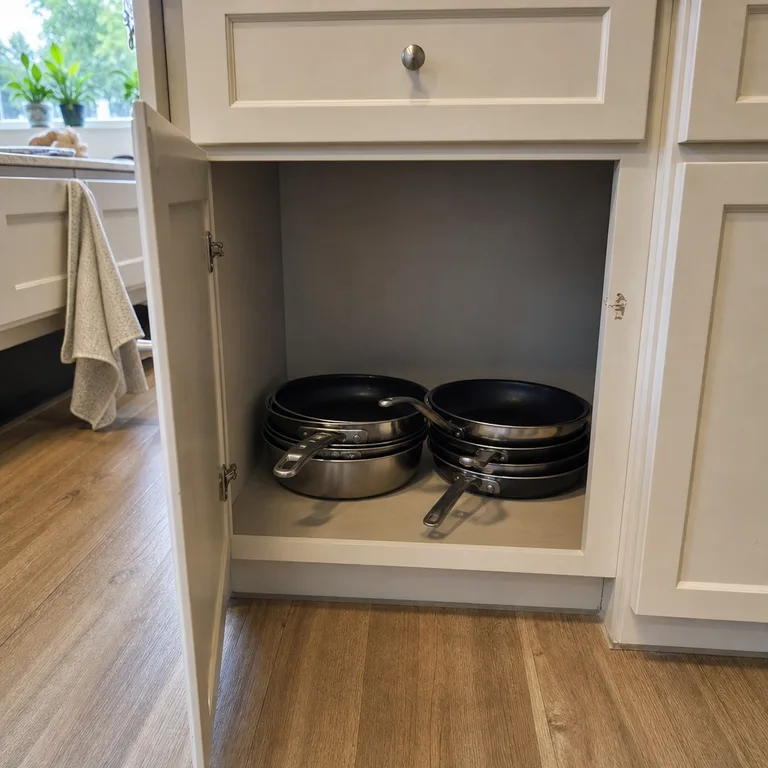
A short stack is easier to lift from without dragging the pans above it along for the ride. It also keeps long handles from catching on cabinet sides or blocking access to nearby cookware.
Use an existing shelf and divide the collection by diameter rather than trying to force every pan into one group. A strip of non-slip liner can help a smooth pan base stay put, and a soft separator is useful where finished surfaces touch.
Worth knowing: Even a short stack can be awkward if the pans have very different handle shapes, so reserve this method for pieces that sit flat and nest without rocking.
2.Place Soft Protectors Between Finished Pans
Slip felt, cork, or washable fabric protectors between pans that need to nest. This is especially helpful for nonstick interiors, enamel exteriors, and polished metal that can pick up marks when pans shift.
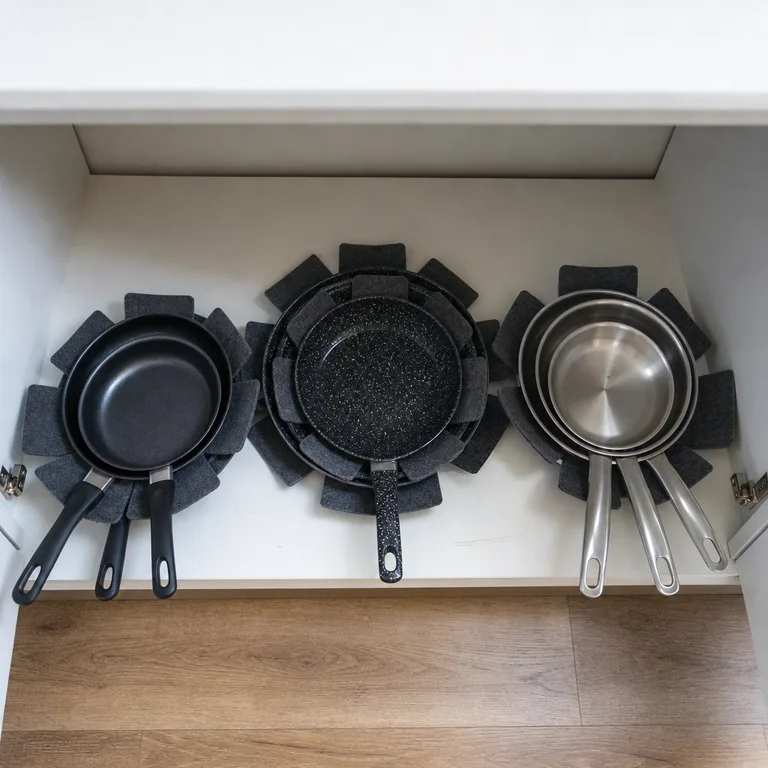
The protectors create a small buffer between rims and cooking surfaces, so the stack can be lifted and replaced with less scraping. They also make a mixed collection feel more orderly without requiring matching cookware.
Cut larger protectors down if they bunch around smaller pans, and keep a few extras near the cupboard for use after washing. Follow the cookware maker’s care directions, particularly for surfaces that should not be stored while damp.
Worth knowing: Protectors reduce rubbing but do not make an overly tall or unstable stack safe to pull from.
3.Stand Everyday Frying Pans in a Vertical Rack
Set a freestanding vertical rack on a stable cabinet shelf or in a deep drawer, then place everyday frying pans on edge in separate slots. Turn handles toward the front when the drawer depth allows it.
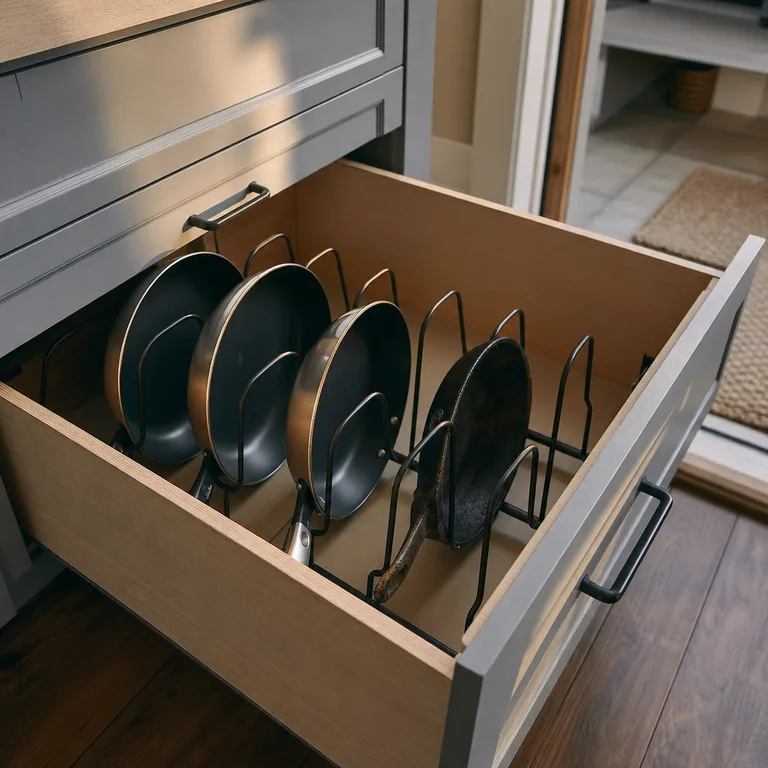
Each pan can slide out on its own, which avoids lifting a skillet from the bottom of a nested pile. The spacing also keeps cooking surfaces from pressing together.
Choose a rack with a wide base and slots that fit the actual rim widths in the collection. Put a grip mat beneath it if the rack tends to slide, and check that the shelf, drawer hardware, and rack can carry the combined load.
Worth knowing: Many vertical racks are better suited to lighter skillets than heavy cast iron, which may be difficult to lift safely from a narrow slot.
4.Give the Heaviest Dutch Oven a Low Shelf
Place a Dutch oven, stockpot, or cast-iron pan on the lowest accessible shelf near the cabinet front. Leave enough clear space to grasp it with both hands rather than reaching around other pieces.
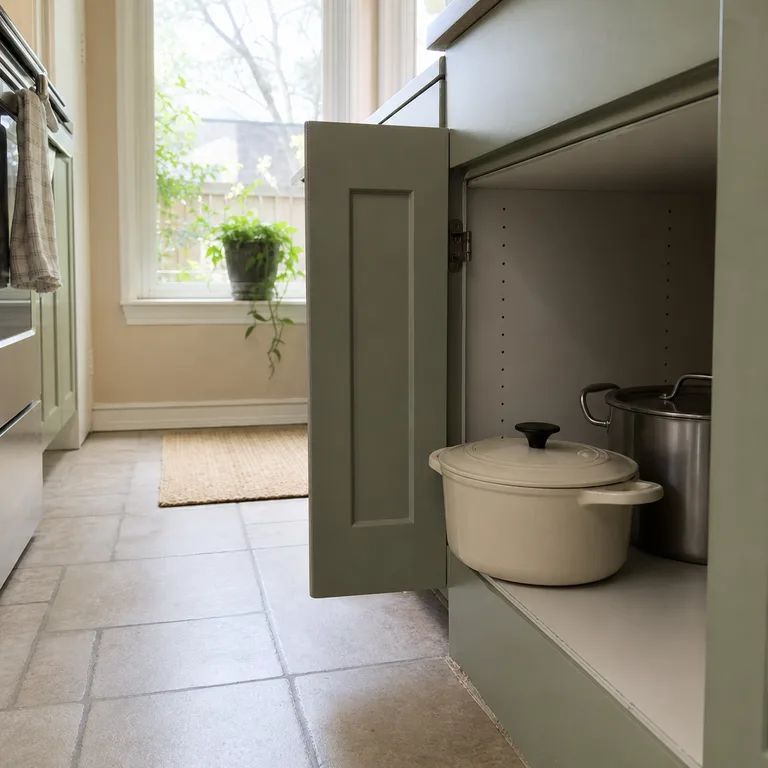
A low position removes the risk of pulling heavy cookware down from overhead. Keeping it near the front also means it does not have to be dragged across the shelf, which can scuff both the cabinet and the pot base.
Use the cabinet shelf itself for dense cookware instead of a lightweight riser or pull-forward basket. A thin mat or trivet can protect the shelf finish, but it should lie flat so the pot does not wobble.
Worth knowing: Floor-level storage can be inconvenient for anyone who has trouble bending or lifting from a low position.
5.Group Pots and Pans by Drawer Zone
Use a deep drawer to create clear zones: saucepans in one area, skillets in another, and lids or detachable handles in a third. Low dividers can keep the groups from sliding into one another when the drawer opens.
Zoning makes it obvious where each cookware type belongs and reduces the clatter that comes from loose pieces shifting together. It also lets a single pan be retrieved without moving a lid pile first.
Start with simple drawer dividers, narrow bins, or even a few pieces of non-slip liner rather than a fitted organizer. Keep the heaviest pieces closest to the drawer sides or over stronger hardware, and confirm the drawer operates smoothly when fully loaded.
Worth knowing: Shallow drawers rarely provide enough clearance for upright handles, so this works best in a genuinely deep, sturdy drawer.
6.Add a Shelf Insert for a Second Cookware Level
Place a sturdy shelf insert in a tall cupboard to create a second level for lightweight saucepans, small lids, or compact pans. Keep larger pots directly on the original cabinet shelf below.
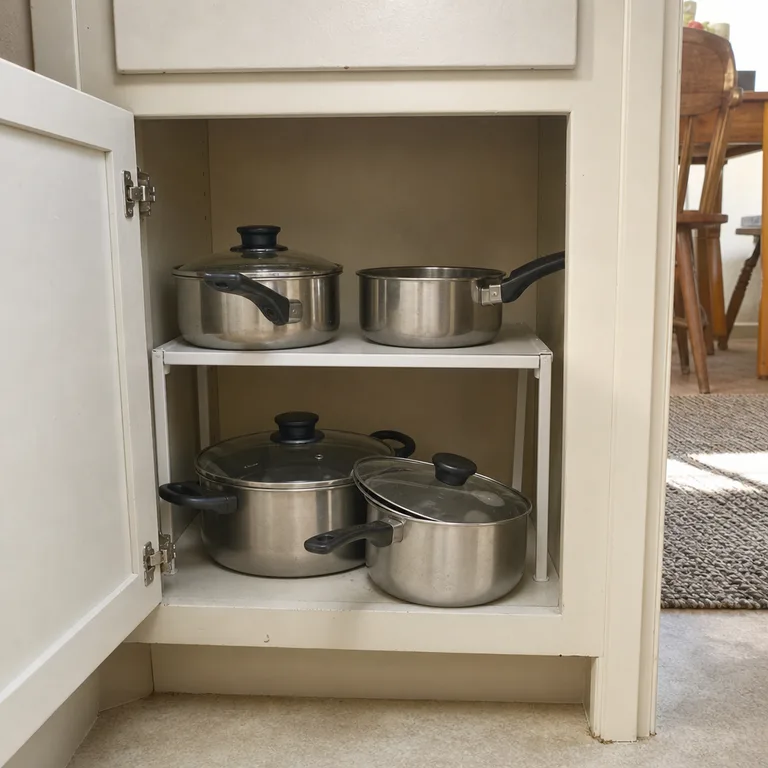
The extra level uses unused vertical space and prevents a lighter pan from being buried under a larger pot. It can also separate lids from cookware bodies without adding permanent cabinet hardware.
Choose an insert that sits squarely on the shelf with feet that will not scratch the surface. Check its stated load guidance and keep dense cast iron, full stockpots, and other heavy pieces off the raised level.
Worth knowing: A shelf insert reduces the height available below it, so it may not suit cupboards that already have limited vertical clearance.
7.Use One Handled Basket for Lightweight Pans
Gather small, lightweight pans in one open basket with a handle and place it on a deep shelf. Stand the pans on their sides if they fit securely, or lay them in a shallow protected stack.
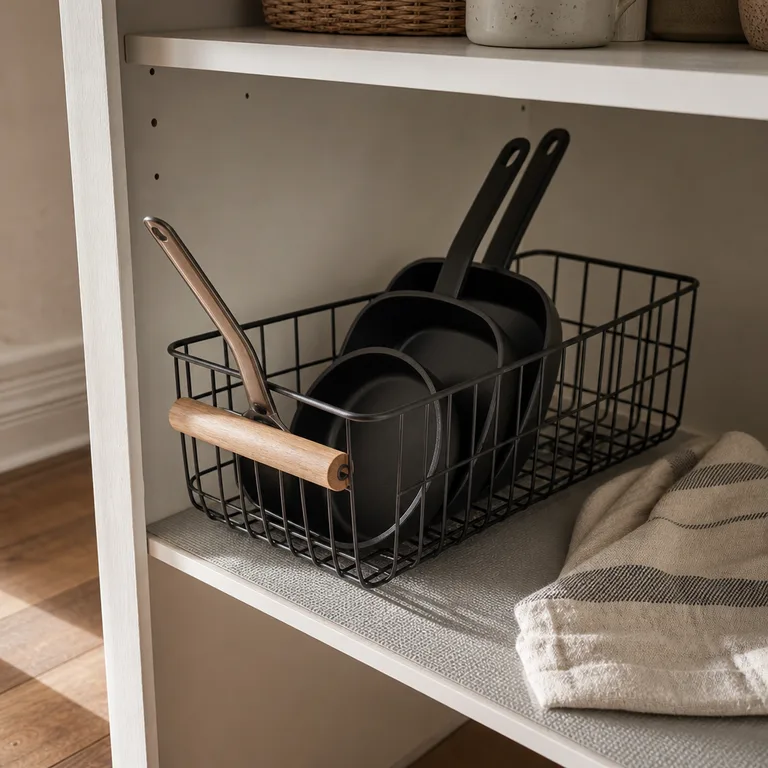
Pulling one basket forward is simpler than reaching into the back of a deep cabinet for a single small pan. The basket also gives a defined home to pieces that otherwise migrate around the cupboard.
Reuse a basket already on hand if its base is stable and its handle is comfortable to grip. Add a shelf liner underneath if metal feet could mark the cabinet surface, and avoid overfilling the basket.
Worth knowing: This arrangement is not appropriate for heavy cookware because a loaded basket can become difficult to lift and control.
8.Hang Only Verified Lightweight Pans on a Wall Rail
A short wall rail can hold a few lightweight pans where wall mounting is permitted. Use secure hooks that fully capture the pan handles, and leave space between pieces so they do not knock together.
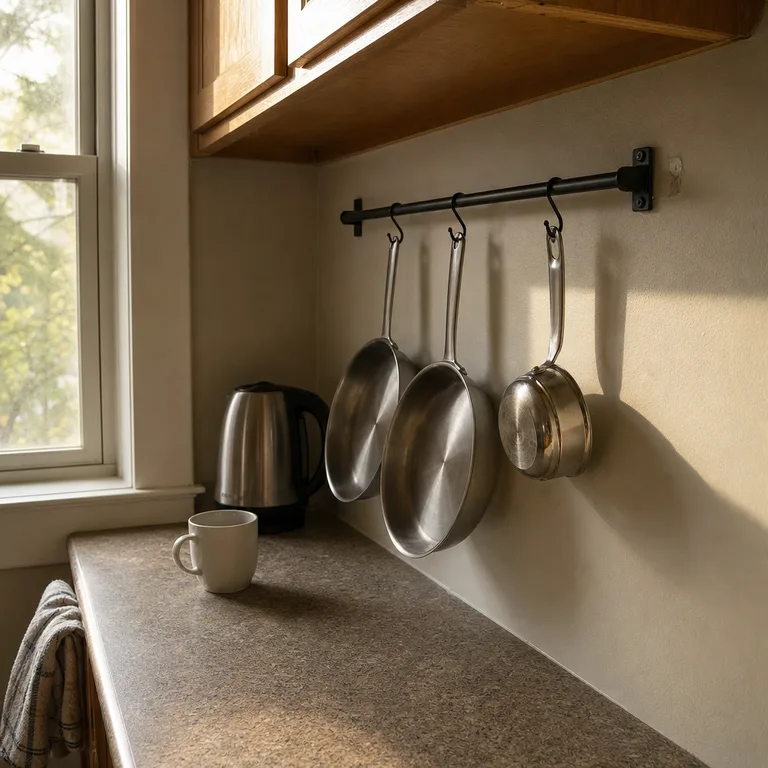
Hanging pans frees a lower cabinet for bulkier cookware and makes often-used pieces easy to grab. It can also turn a blank stretch of wall into useful storage without changing the cabinets.
Mount the rail only into suitable framing or a mounting surface that is properly rated for the intended load. Follow rental restrictions, keep the rail away from heat and grease buildup, and do not hang cast iron from hooks or hardware that have not been verified for it.
Worth knowing: Wall rails require careful installation and may not be allowed in a rental or suitable on every backsplash wall.
9.Separate Nesting Cookware From Awkward Shapes
Keep pots and pans that truly nest together in one low stack, then give awkward pieces their own positions. Woks, grill pans, long-handled sauté pans, and unusually shaped lids often need more room than a standard round skillet.
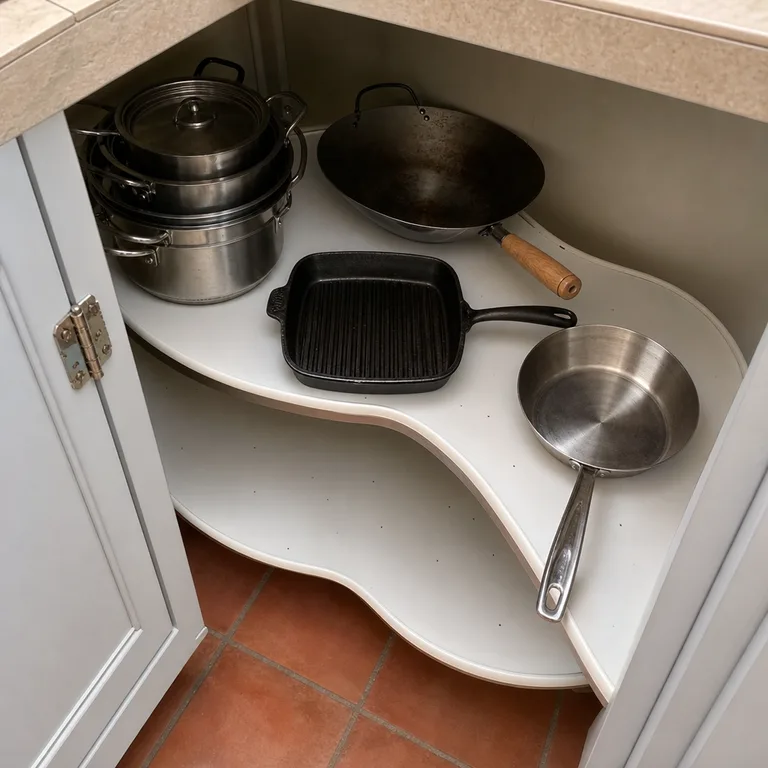
Separating these shapes stops one difficult piece from making the whole cupboard unstable. It also protects ridged grill surfaces and seasoned cookware from being used as a base for an uneven pile.
Use the corners and outer edges of a cabinet for pieces with long handles, while reserving the most accessible central area for neat nesting groups. A flat mat beneath a grill pan or wok can reduce cabinet scuffs and help it stay in place.
Worth knowing: This approach may use more shelf area than one large stack, so it is less effective in very narrow cabinets.
About the author
Dana Ruiz, Senior editor
Dana writes about small-space living, storage and low-cost decorating.
Keep reading
9 Kids' School Paper Organization Ideas That Separate Forms From Keepsakes
October 31, 2026
7 Remote Control Storage Ideas for a Shared Living Room
October 29, 2026
8 Belt Storage Ideas That Fit an Existing Bedroom Closet
October 29, 2026
8 Christmas Gift-Wrapping Stations That Pack Away in a Small Home
October 31, 2026