10 Ways to Group Mismatched Plant Pots So a Patio Looks Intentional
A mixed collection of plant pots can look deliberate when it is arranged around clear height changes, breathing room, and plant care needs rather than matched colors. These groupings keep drainage, sunlight, and watering requirements practical while giving an ordinary patio a calmer structure.
As an Amazon Associate I earn from qualifying purchases.
1.Build a Three-Level Cluster Beside the Patio Door
Set the tallest pot nearest the wall or beside the door frame, then offset a medium pot in front and place the smallest pot toward the walkway. This stepped arrangement gives separate containers one clear silhouette instead of leaving them scattered at the entrance.
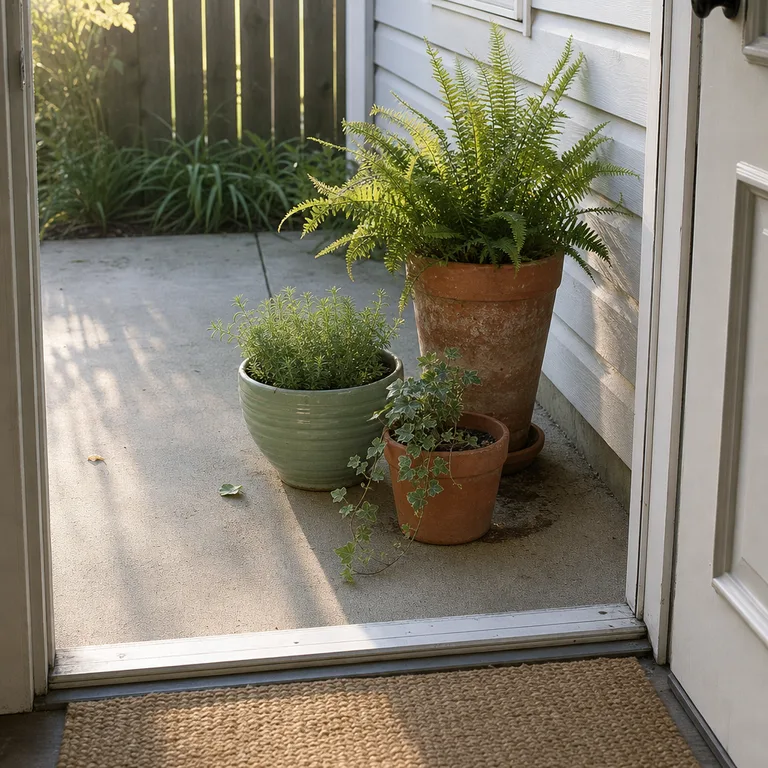
Use pots that need similar light in this spot, and keep the smallest container far enough from the door swing and foot traffic. A trailing plant works well at the front because it softens the concrete edge without hiding the taller plants behind it.
No new matching planters are needed; the contrast between terracotta, glazed ceramic, and plain nursery pots can make the group feel collected. Use saucers only where needed to protect the patio surface, and leave drainage holes open.
Worth knowing: A doorway cluster needs regular trimming and repositioning so foliage does not narrow the entry or snag people passing through.
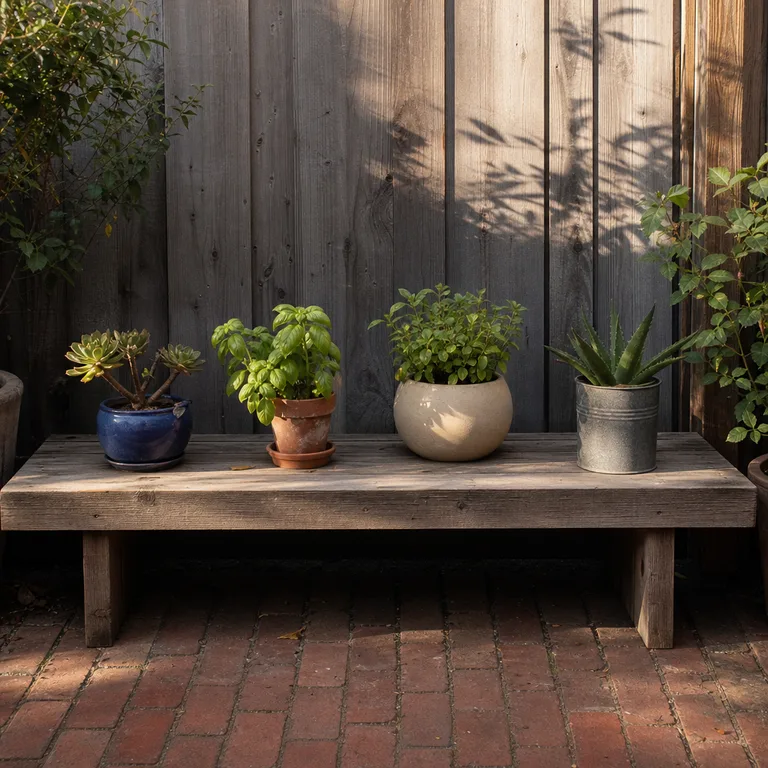
Leave visible bench space between pots so leaves can dry after watering and each plant remains easy to lift. Put the thirstiest plants together rather than arranging a succulent beside something that needs consistently damp soil.
An old bench, sturdy side table, or simple freestanding plant stand can do the job if it is stable outdoors. Place a tray under pots only if it will not trap standing water against wood or metal.
Worth knowing: Wooden furniture can deteriorate quickly when wet pots sit on it for long periods, especially in rainy climates.
Related: 12 Container Garden Ideas for a Small Patio on a Budget
3.Make One Wide Pot the Center of a Ground-Level Group
Use a broad, fuller planter as the anchor, then arrange smaller containers around it with small gaps between their rims. A wide bowl with ornamental grass, a dense leafy plant, or a mounded flowering plant gives the eye one central place to land.
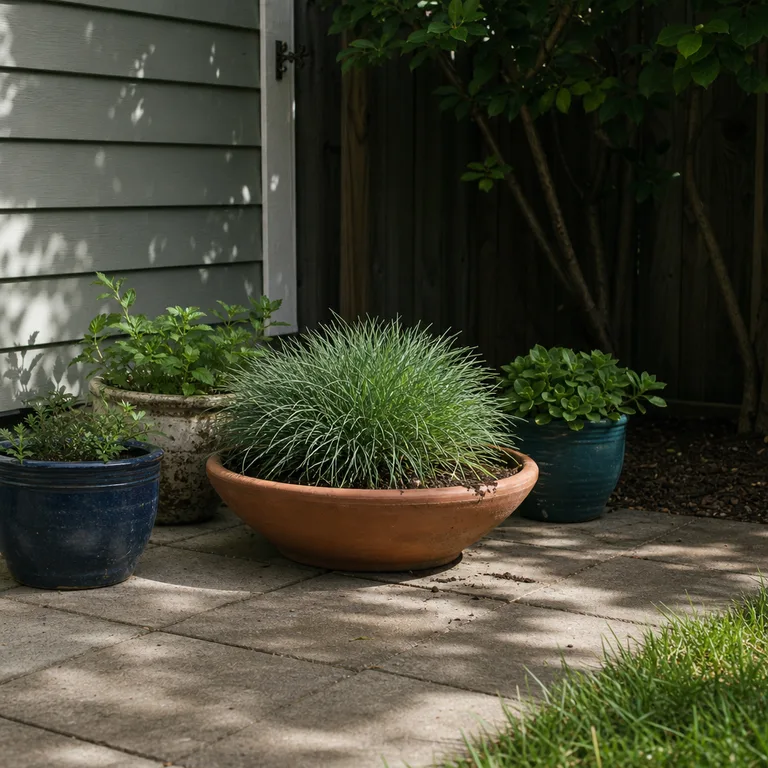
Keep neighboring pots lower than the anchor so the group retains its layered shape. Turn the broad pot occasionally if one side receives more sun, and make sure its drainage hole does not sit flat against the paving.
This approach makes use of a single substantial pot already in the collection, while smaller plain pots become supporting pieces. Vary the shapes around it, but repeat a foliage color or plant texture to keep the grouping calm.
Worth knowing: A large planted container can be difficult to move once full, so choose its location with access for watering and seasonal cleanup in mind.
4.Line Pots Along a Sunny Wall by Their Light Needs
Make a loose row along the brightest wall with plants that genuinely tolerate the available sun. Rosemary, lavender, and many flowering annuals can look natural in mismatched pots when their foliage has enough room to spread instead of touching pot to pot.
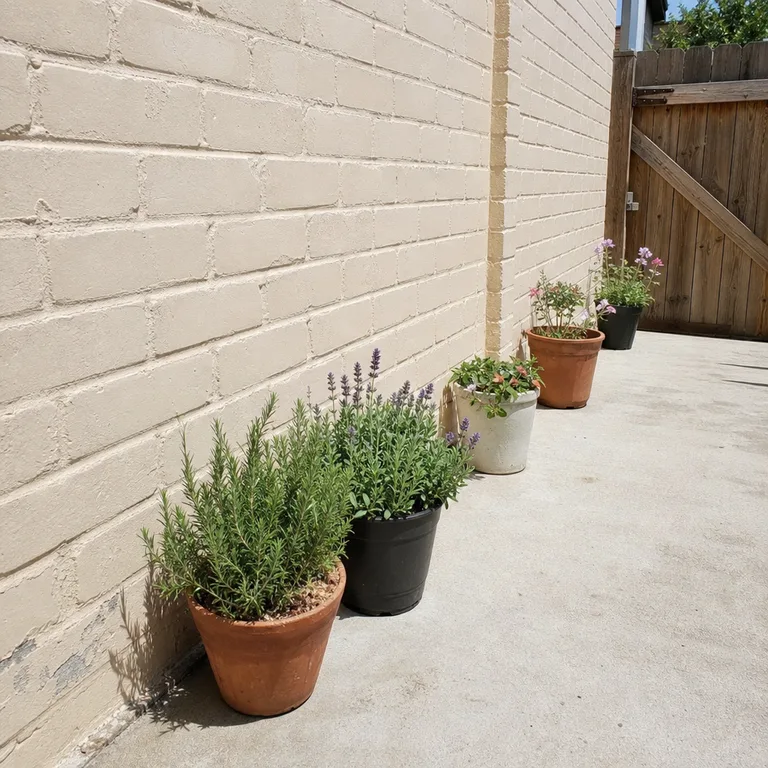
Avoid making a rigid parade of identical gaps. Stagger the containers slightly forward and back while preserving enough space to reach each plant, rotate it for even growth, and sweep leaves from behind the row.
A wall can hold warmth after sunny days, which may dry small pots faster than containers in an open area. Group plants with similar watering needs here and check lightweight pots often during hot or windy weather.
Worth knowing: A wall that appears sunny in one season may be shaded for much of the day once nearby trees leaf out or the sun shifts.
Related: 10 Budget Herb Garden Ideas for a Sunny Patio
5.Create a Shaded Corner Collection With Similar Thirsty Plants
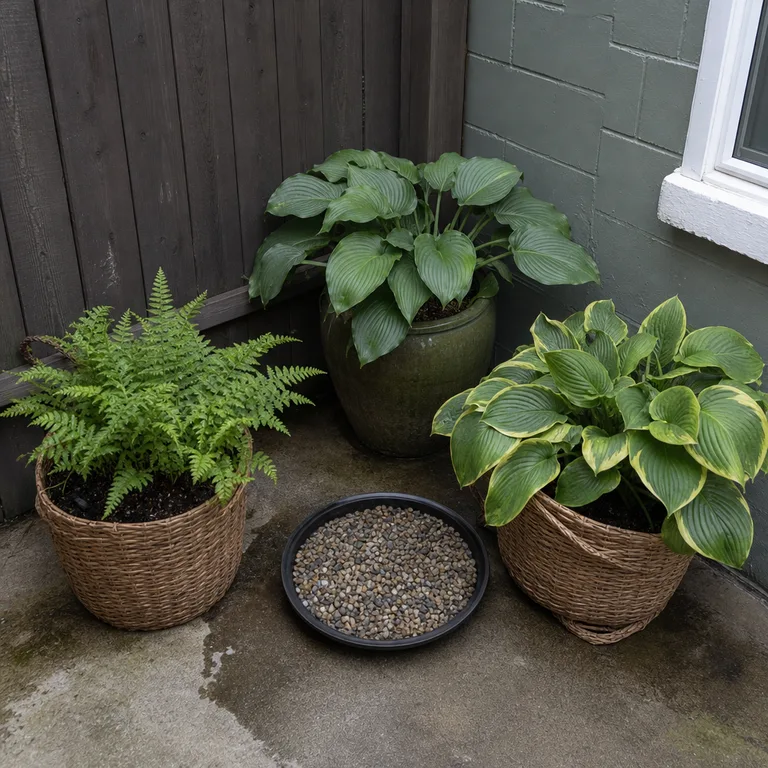
Use a sheltered, shaded corner for plants that prefer evenly moist soil, such as ferns and other leafy shade plants. Arrange three or more pots in an open triangle rather than packing them tightly into the corner, letting the leaf shapes stay visible.
Keeping these plants together makes watering simpler because they can be checked at the same time. It also prevents a shade-loving, moisture-dependent pot from being forgotten among drought-tolerant containers in full sun.
Unmatched pots can be unified here by repeating deep greens, woven sleeves, or darker neutral materials. If decorative baskets hold nursery pots, lift the inner pot out to water and empty any collected runoff.
Worth knowing: Poor air movement in a damp corner can encourage mildew or rot, so avoid keeping soil constantly saturated.
6.Repeat One Pot Color Across Different Shapes
Choose two or three containers that share a color family, such as faded blue, moss green, or warm terracotta, and place them through one cluster. The pots do not need to match in material or height; repeated color is enough to create a visual thread.
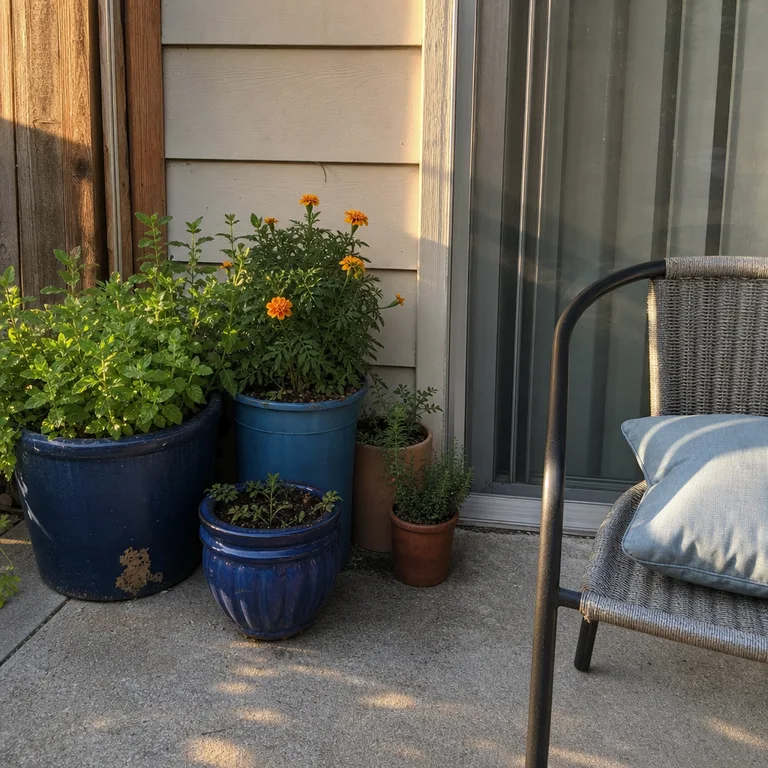
Use neutral or weathered containers between the repeated colors so the arrangement does not feel overly coordinated. A blue glazed pot, a faded plastic planter, and a painted clay pot can work together when green foliage fills the gaps.
Keep plant care as the deciding factor for placement. A pot should not be moved into deep shade or harsh sun simply to complete the color pattern.
Worth knowing: Painted pots may need touch-ups outdoors, and paint can interfere with porous terracotta if applied heavily.
7.Use a Corner Shelf to Lift the Smallest Containers
Put lightweight small pots on a stable freestanding corner shelf, with the heaviest containers remaining on the ground. Raising compact herbs and small foliage plants adds height without needing a large new planter.
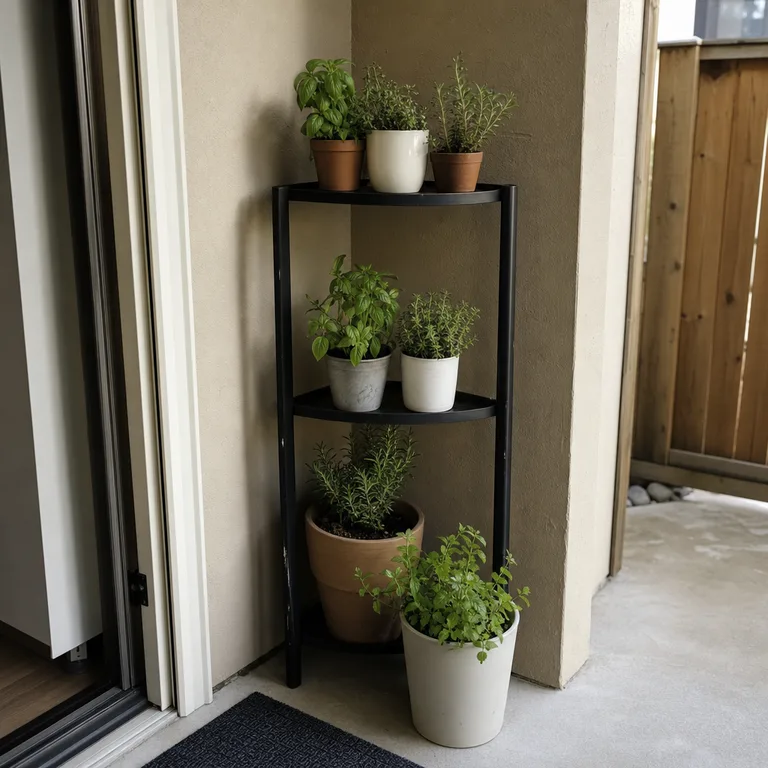
Space pots so water can drain freely and leaves do not become crowded against the wall. Use the upper shelves for plants that can handle the brighter or drier conditions often found above the patio floor.
A freestanding shelf is usually the simpler choice for renters because it does not require holes in a wall or fence. Check that the shelf feet sit level, particularly on sloped concrete or uneven pavers.
Worth knowing: Shelves can become top-heavy in wind, so they are not suitable for large pots or exposed patios without a stable protected position.
Related: 12 Budget Balcony Ideas for a Comfortable Outdoor Corner
8.Frame the Seating Area With Two Unequal Pot Groups
Place a taller, narrower pot cluster at one end of a bench or pair of chairs and a lower, wider grouping at the other. This frames the seating area without creating a formal matching border or closing off a small patio.
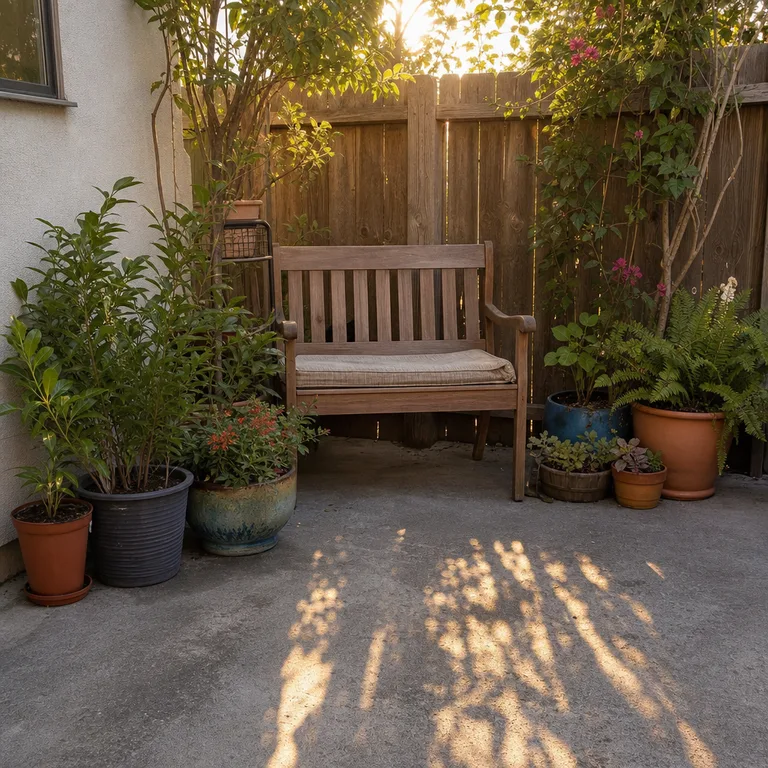
Keep the taller group behind or beside the seat rather than directly in front of it. The lower group can hold spreading plants or several small containers, leaving a clear path for people to sit down and stand up.
Use what is already on hand by assigning the tallest pots to one side and the broadest pots to the other. The two groups will feel related when they share a plant color, a repeated pot material, or similar foliage density.
Worth knowing: This layout needs enough patio depth to preserve a comfortable walkway around the seating area.
9.Set Drought-Tolerant Pots on a Dry Gravel Edge
Create a separate dry-zone grouping for succulents and other drought-tolerant plants along a gravel edge or the driest side of the patio. Space the pots with visible gaps so each distinctive shape reads clearly and runoff can move away from the containers.
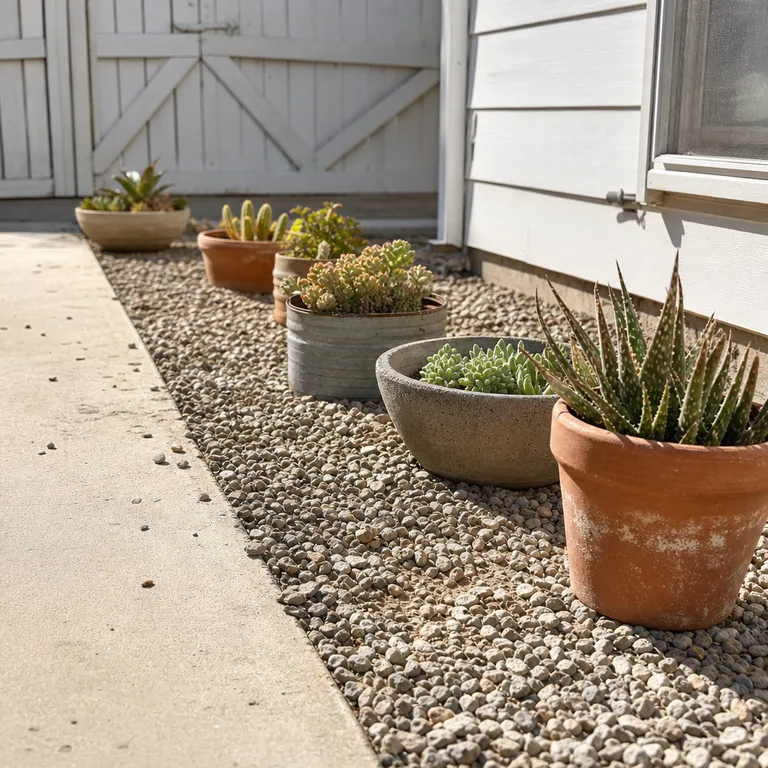
Use containers with drainage holes and a freely draining potting mix. Keeping this group apart prevents routine watering for leafy, thirsty plants from soaking pots that prefer to dry between waterings.
A narrow gravel strip can make mixed clay, cement, metal, and shallow bowls look intentionally placed rather than abandoned at the patio edge. Keep gravel out of the walkway and away from areas where it could wash into drains.
Worth knowing: Gravel may shift underfoot and can be difficult to manage where leaves, pet debris, or heavy runoff collect.
10.Leave a Clear Watering Lane Behind the Display
Arrange pots so there is a reachable gap along the fence or wall behind the main display. This hidden lane makes it possible to water back containers, check for blocked drainage, and rotate plants without pulling apart the whole grouping.
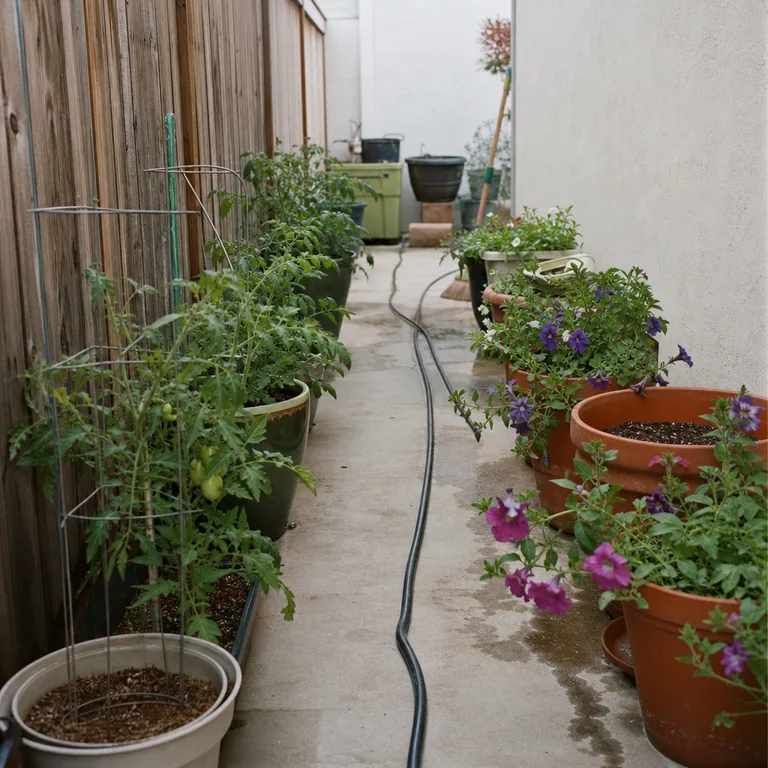
Keep the largest containers near the back only if there is enough room to reach them safely. A hose, watering can, or narrow watering wand needs a clear route that does not drag across foliage or knock over small pots.
The visible front can still look full when pots are staggered, not packed tightly. Use the maintenance gap as a practical boundary and sweep it regularly so fallen leaves and wet debris do not collect behind containers.
Worth knowing: A very narrow patio may not have room for a rear lane, in which case keep the whole display shallow enough to reach from the front.
About the author
Dana Ruiz, Senior editor
Dana writes about small-space living, storage and low-cost decorating.
Keep reading
10 Garden Hose Storage Ideas for a Small Yard
October 10, 2026
10 Budget Garden Trellis Ideas for a Small Growing Space
October 9, 2026
10 Bed Linen Storage Ideas That Keep Sheet Sets Together
October 10, 2026
10 Reusable Grocery Bag Storage Ideas for Small Kitchens
October 9, 2026